Lightroom Editing: Before and After: Lorsch Abbey
RAW Photo. Lightroom Edit is shown below at the end of the article.
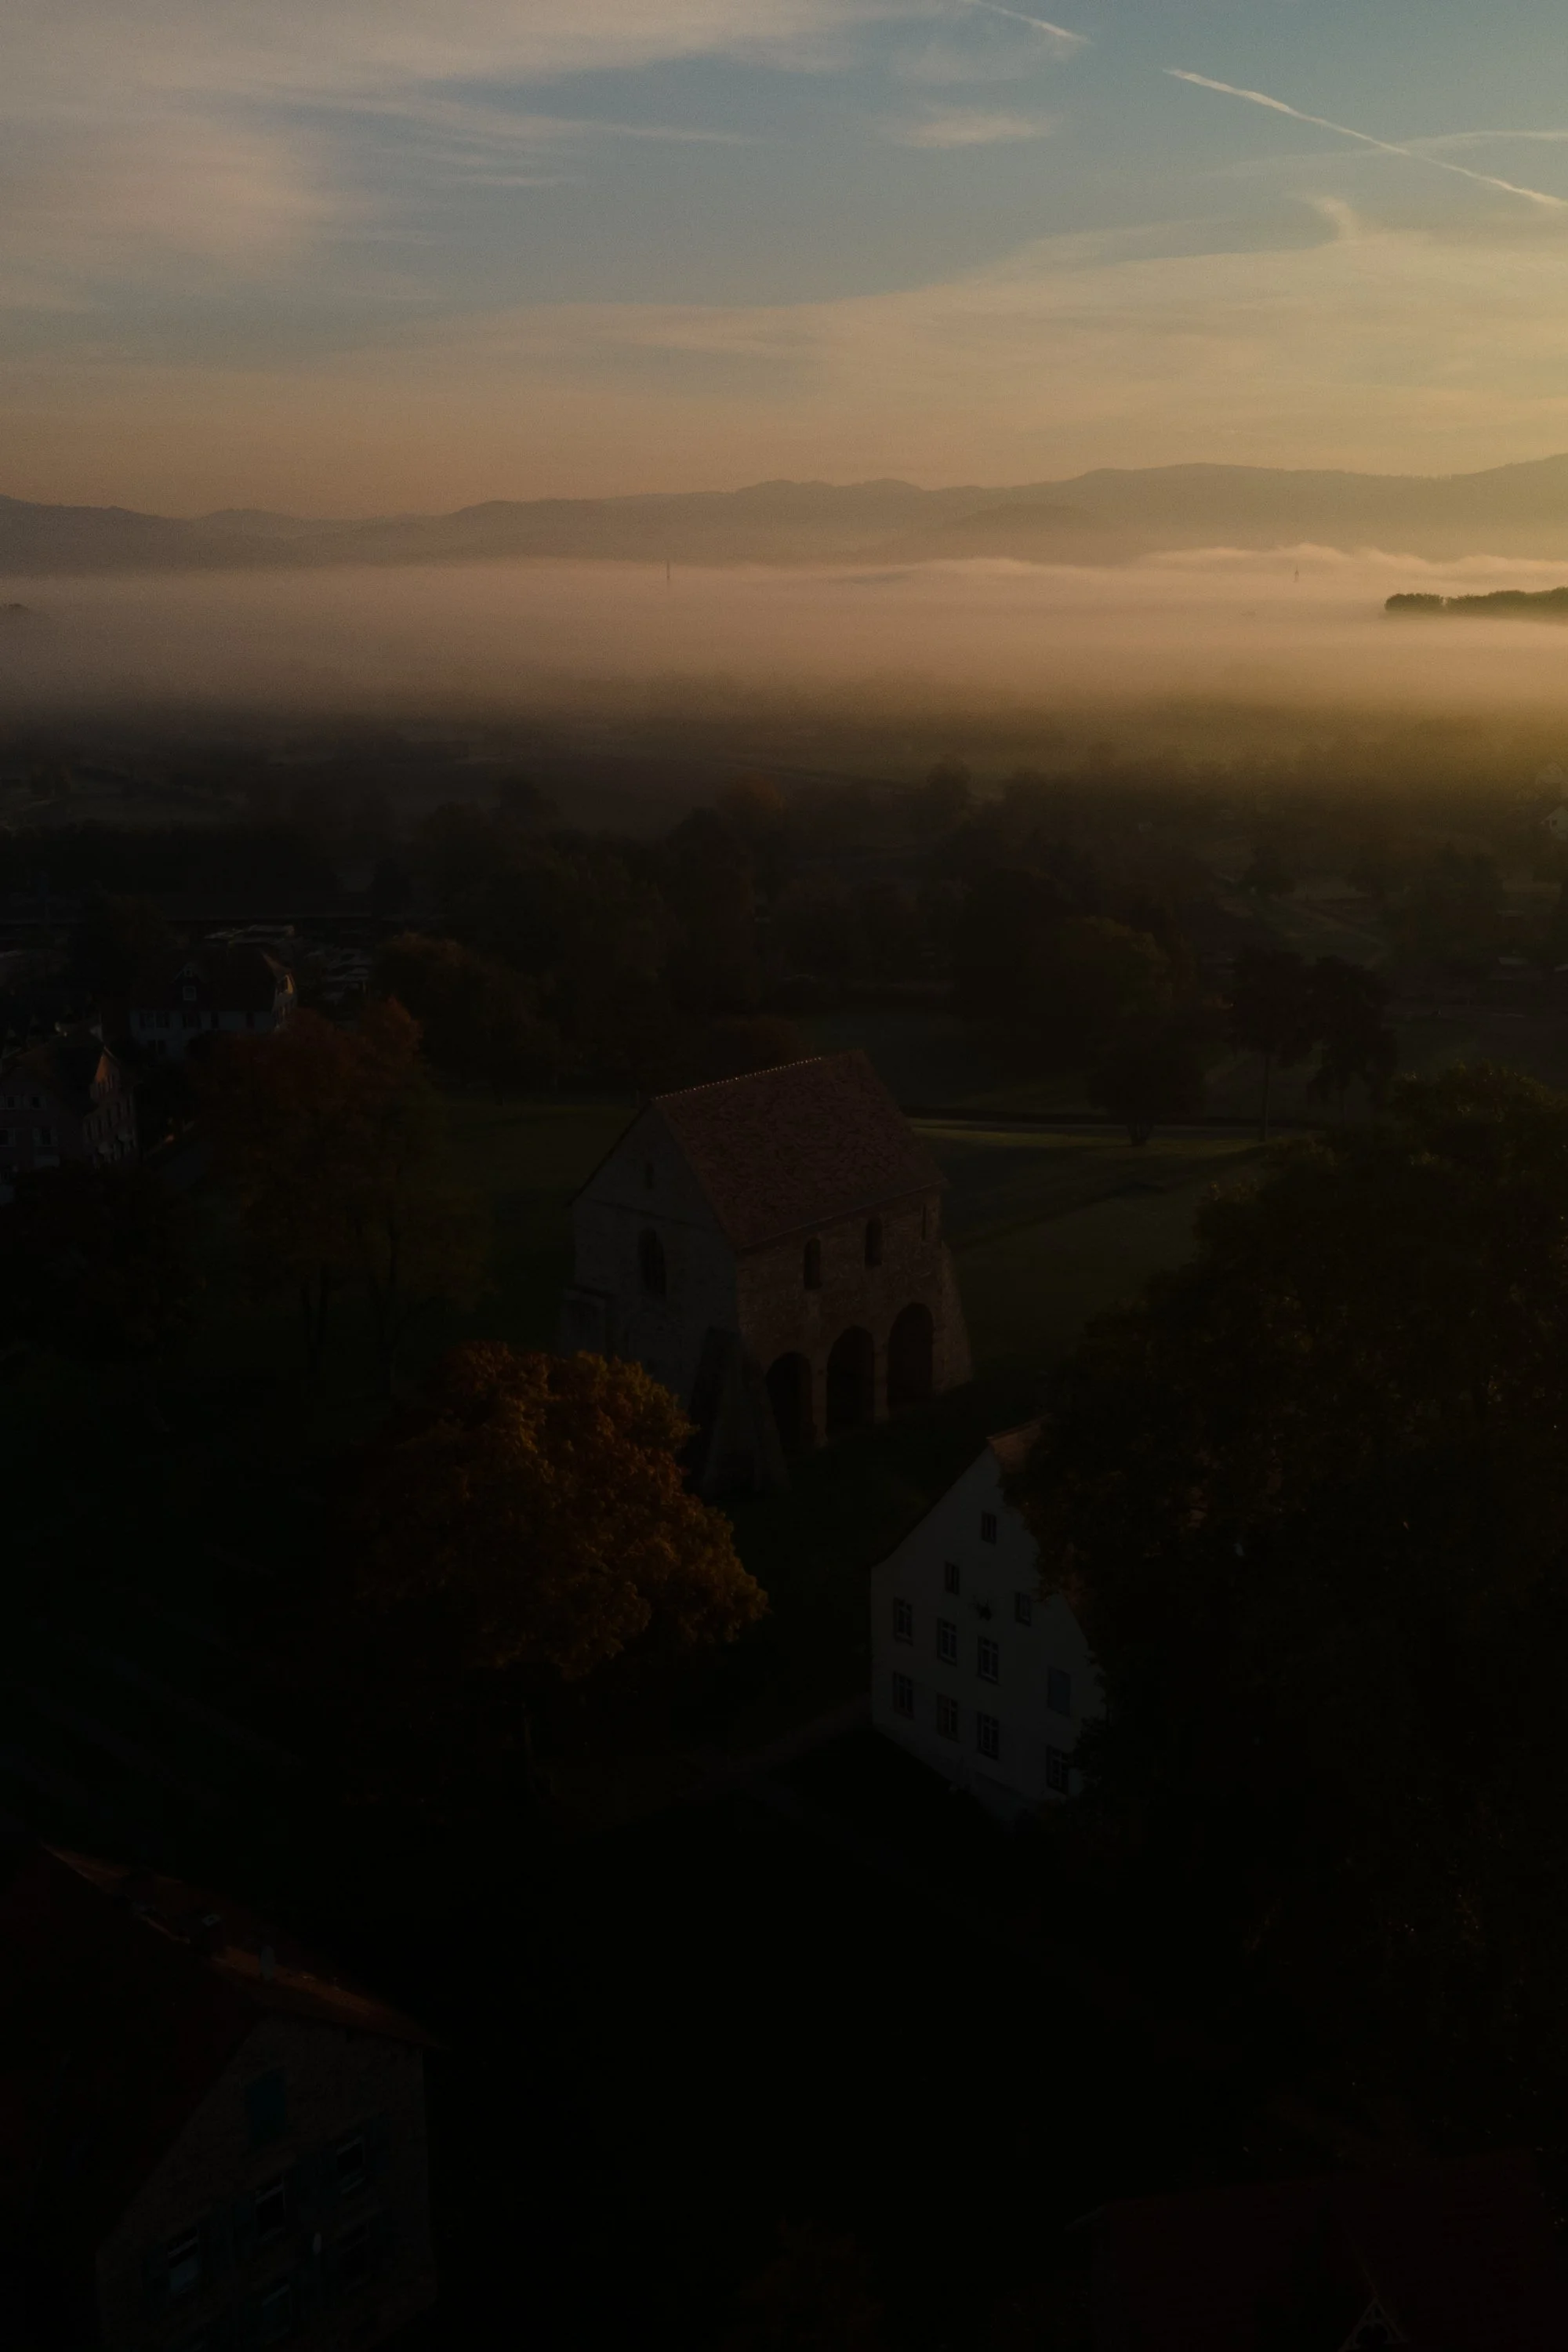
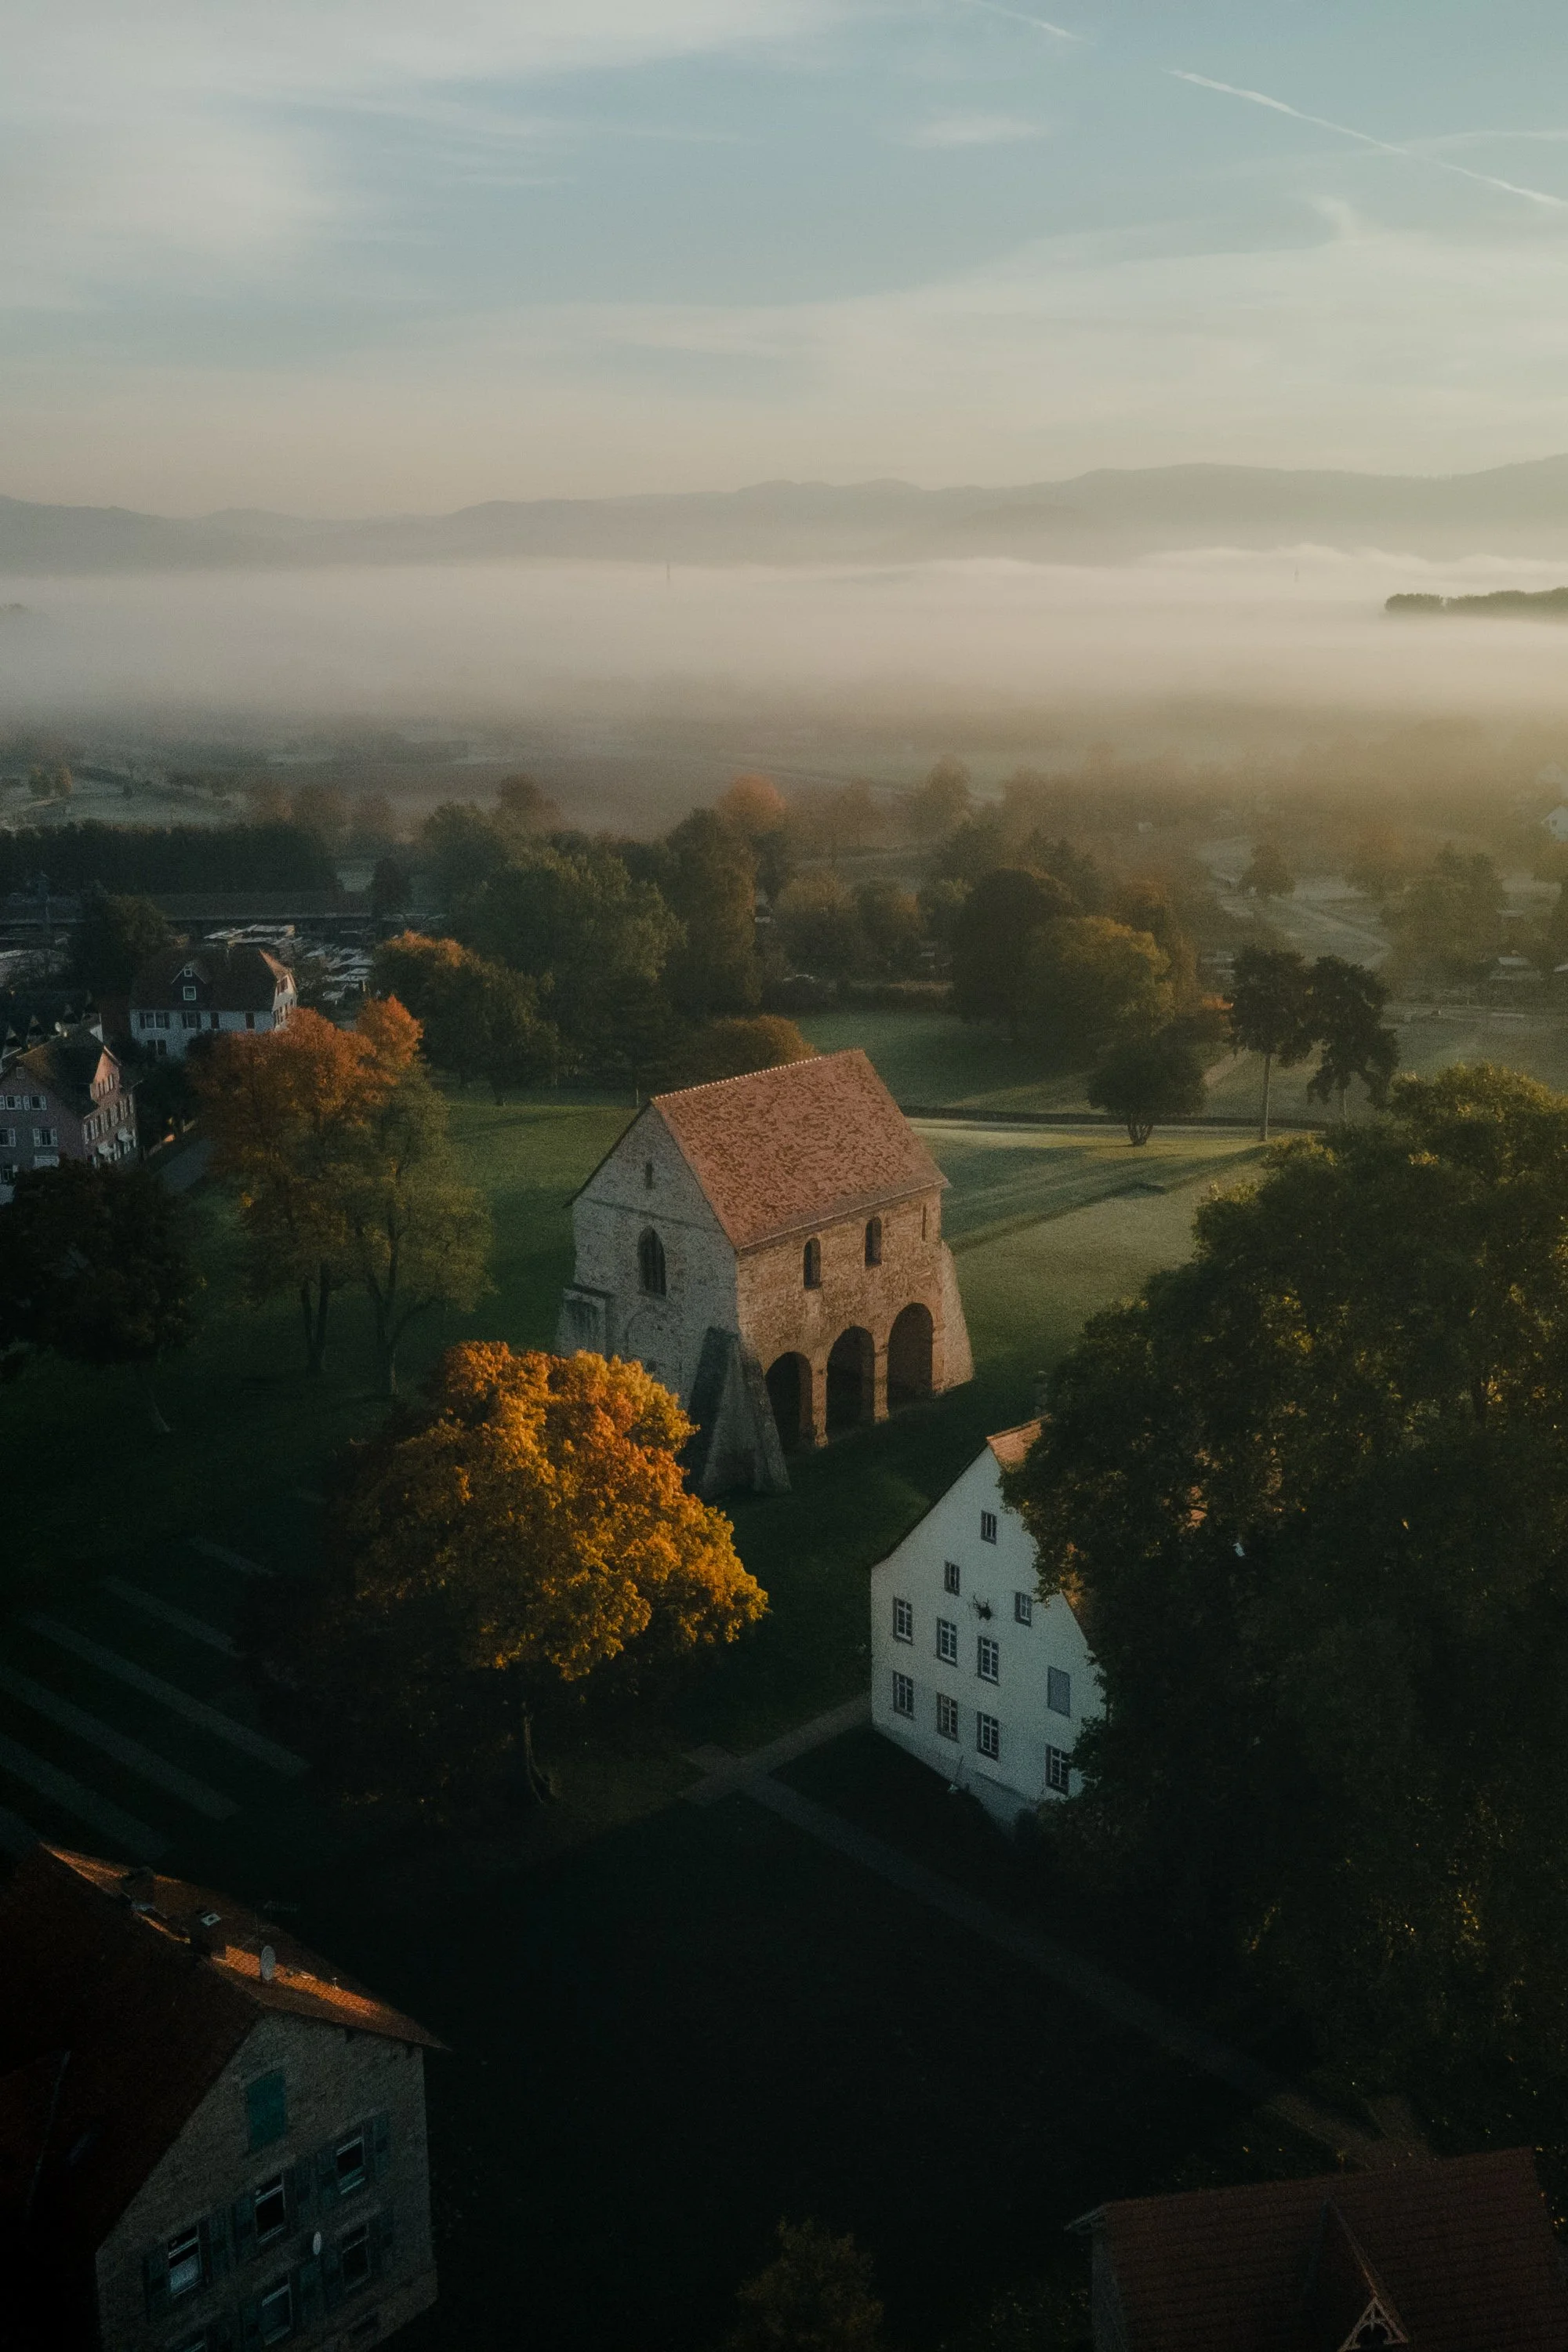
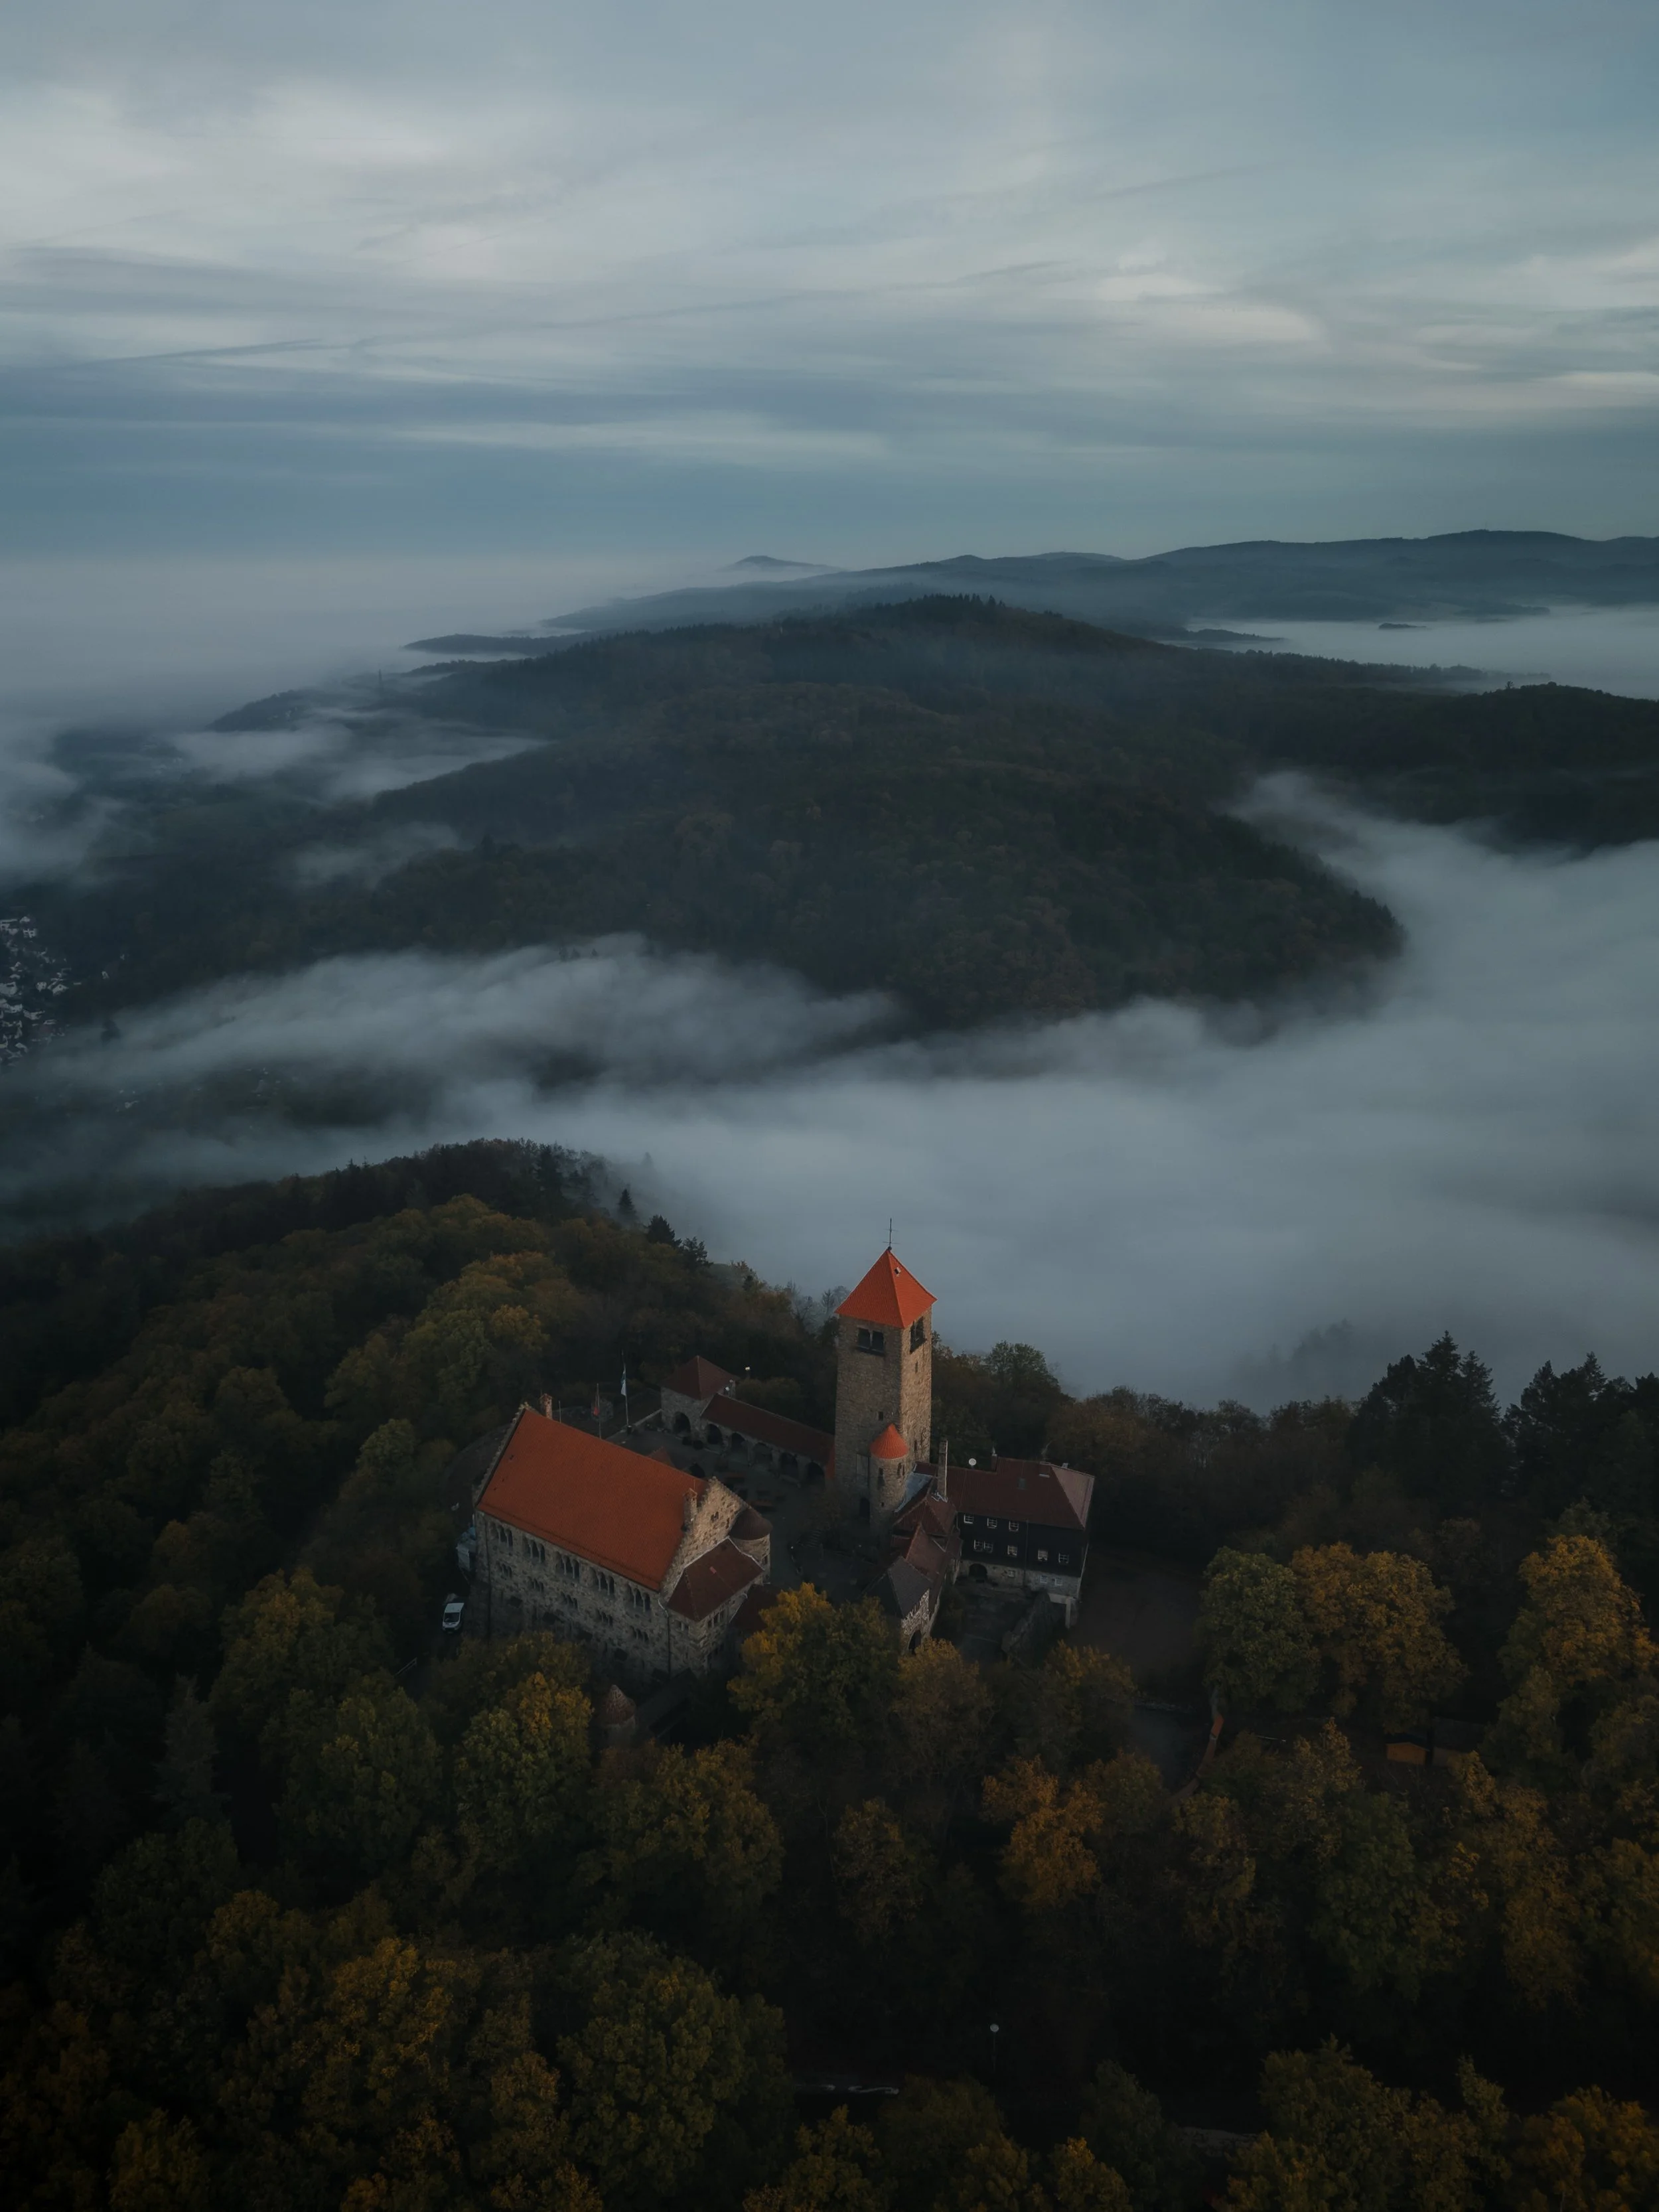
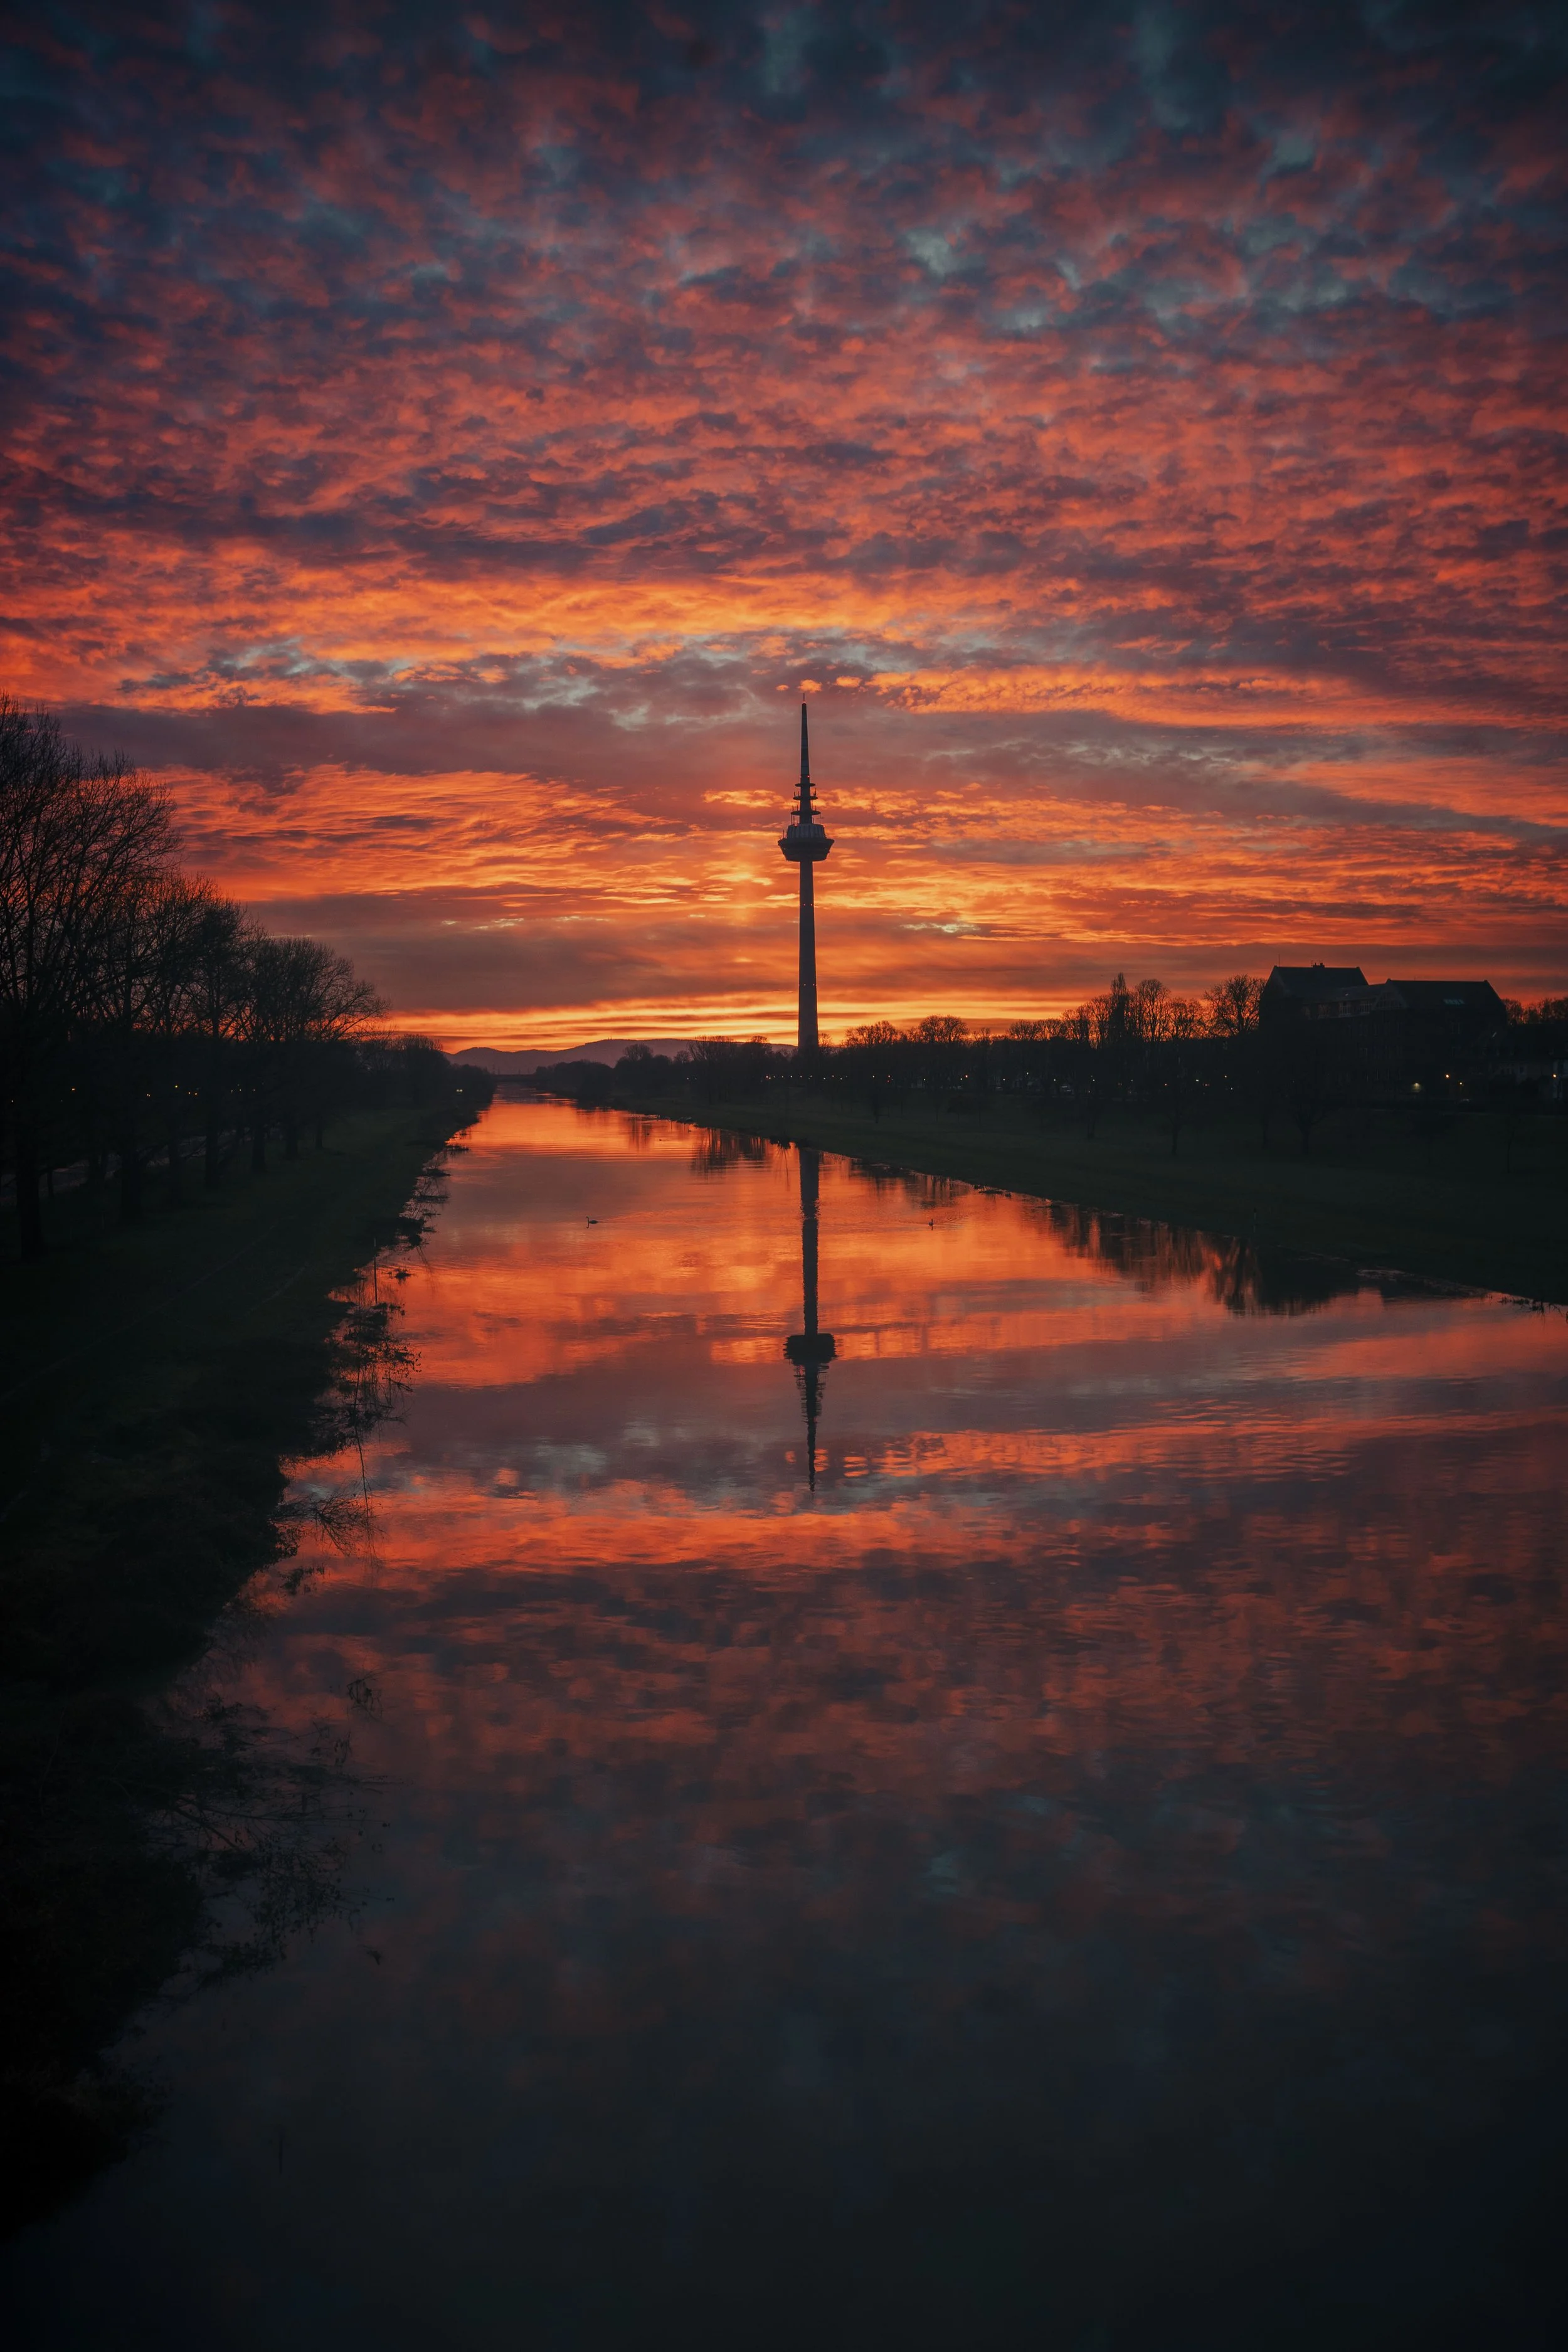
This image was captured just after sunrise at the UNESCO World Heritage site of Lorsch Abbey. The mist still hung over the fields, and the early sun had begun to illuminate the first autumn trees. The RAW photo, however, looked much darker than the scene felt in reality — underexposed and heavy, with most of the mood hidden in the shadows.
My goal was to bring back the clarity and warmth of that morning: the soft golden air, the calm contrast between architecture and nature, and the peaceful rhythm of the first light touching the old stones.
Basic adjustments - building the foundation
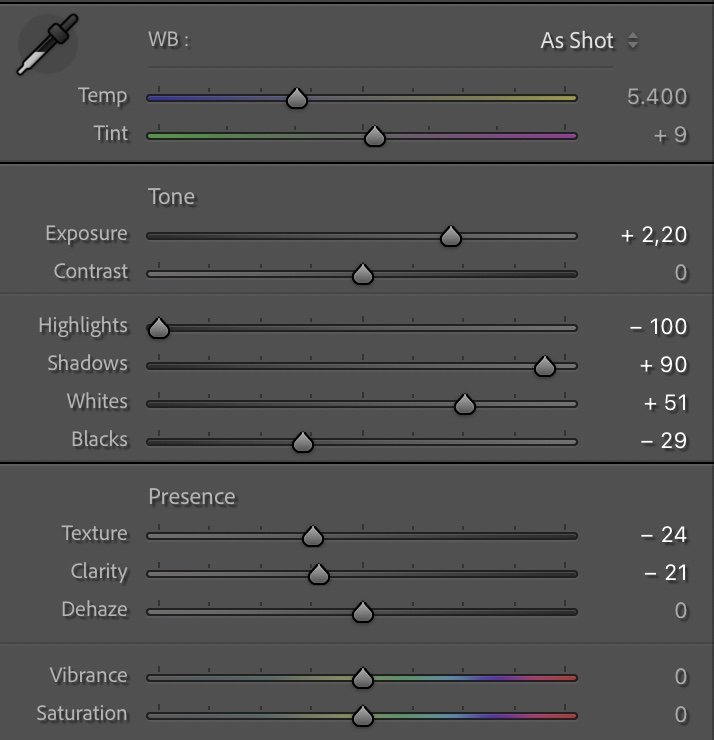
Basic Adjustments in Lightroom
I lifted the Exposure (+2.20) to restore the brightness of the sunrise and reveal the structure in the fog. The Highlights (–100) were reduced to preserve detail in the sky, while the Shadows (+90) and Whites (+51) opened up the darker areas around the abbey and nearby houses. The Blacks (–29) kept enough contrast to ground the image.
Reducing Texture (–24) and Clarity (–21) softened the buildings slightly, giving them a more organic look and allowing the atmosphere of the morning mist to come through. These adjustments bring back the feeling of standing there — fresh air, long shadows, and golden stillness.
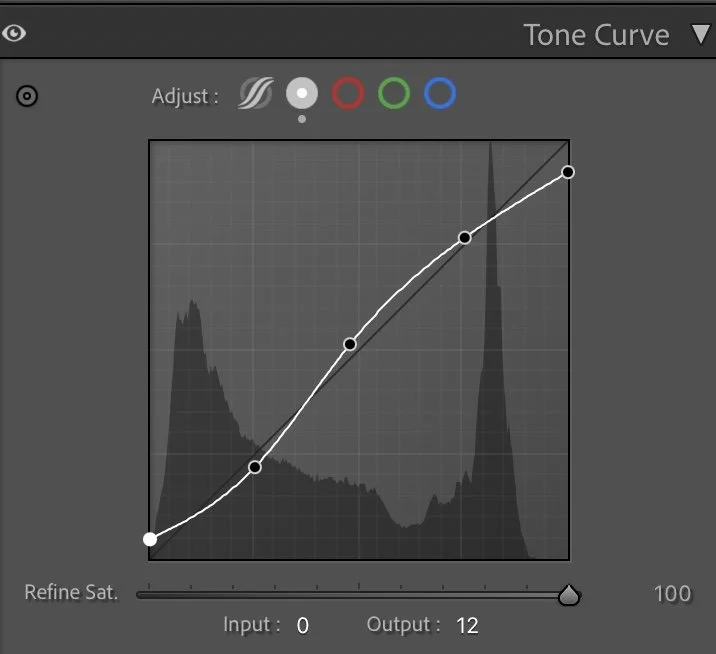
Tone curve in Lightroom
Tone curve — shaping natural depth
The tone curve adds gentle structure and depth with a smooth S-shape. Lifting the shadows slightly gave the fog a soft, glowing texture, while lowering the upper midtones maintained the golden balance of the light.
This step makes the transition between fog, light, and architecture seamless. The abbey doesn’t jump out too sharply — it blends into the morning atmosphere, creating a balanced, timeless mood.
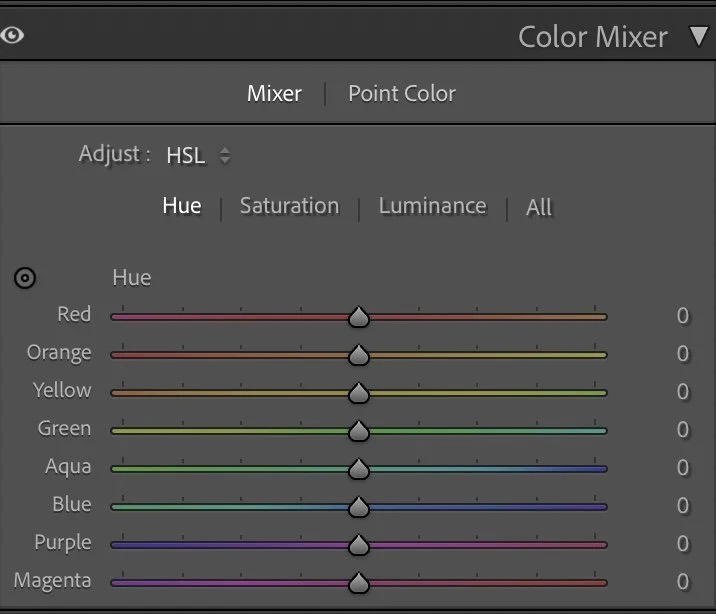
HSL Adjustments – efining tones and atmosphere
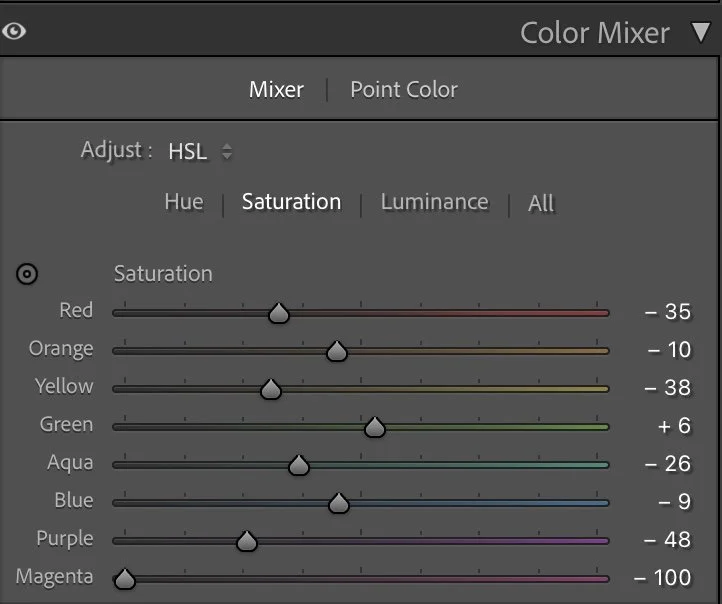
In the HSL panel, there were no hue shifts — the focus was entirely on saturation and luminance to control how each color interacts with light.
I reduced Red (–35) and Yellow (–38) to avoid over-saturation in the rooftops and sunlit trees, while slightly increasing Aqua (+26) to keep a hint of clarity in the distant fog.
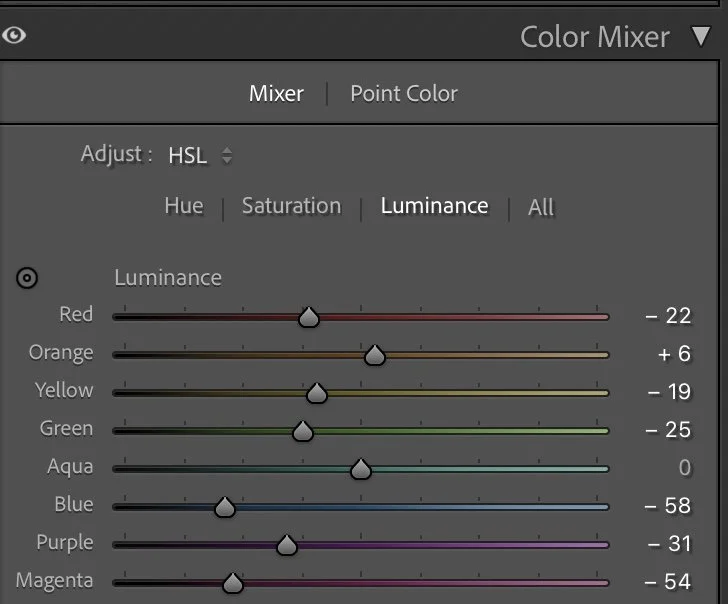
In the Luminance section, I darkened Reds (–22) and Blues (–58) to strengthen contrast in the buildings and sky, while slightly brightening Oranges (+6) to make the sunlit trees stand out naturally. These subtle refinements make the scene feel balanced — autumn warmth without overpowering glow.
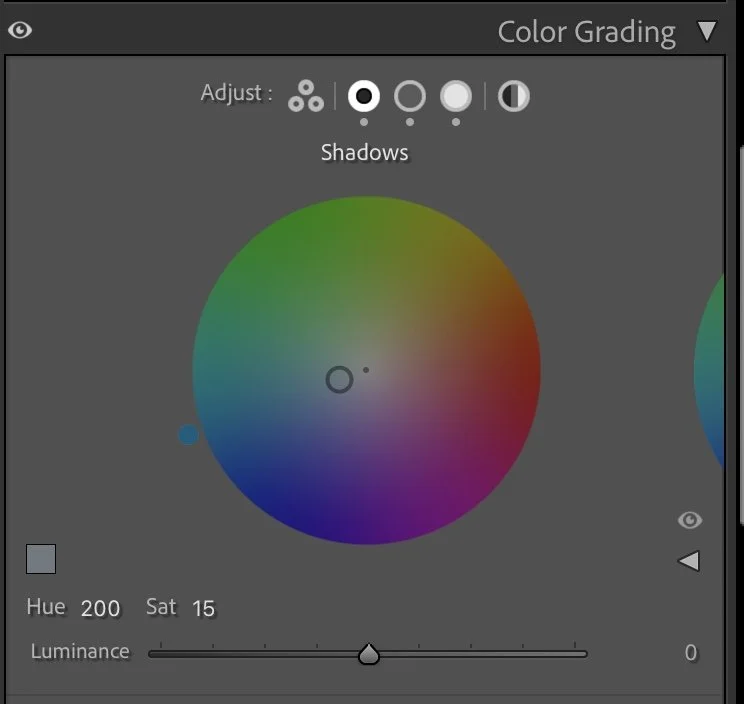
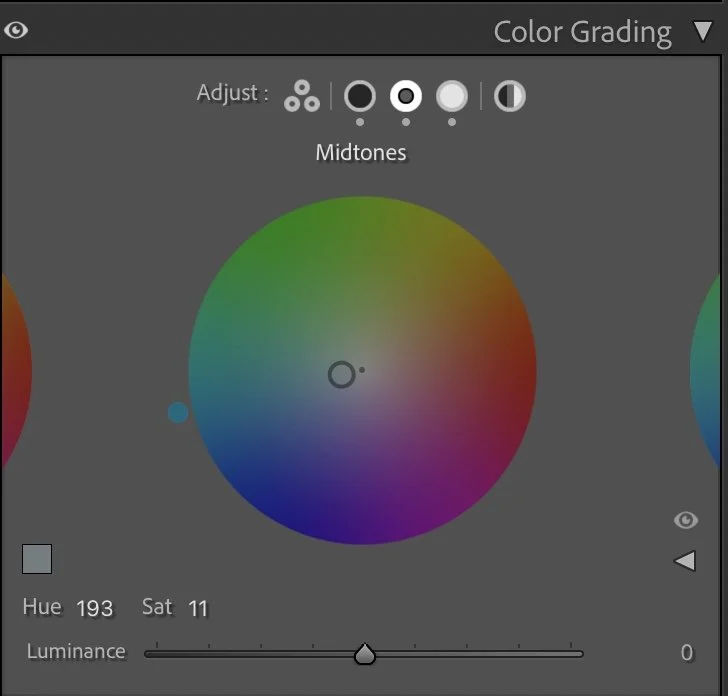
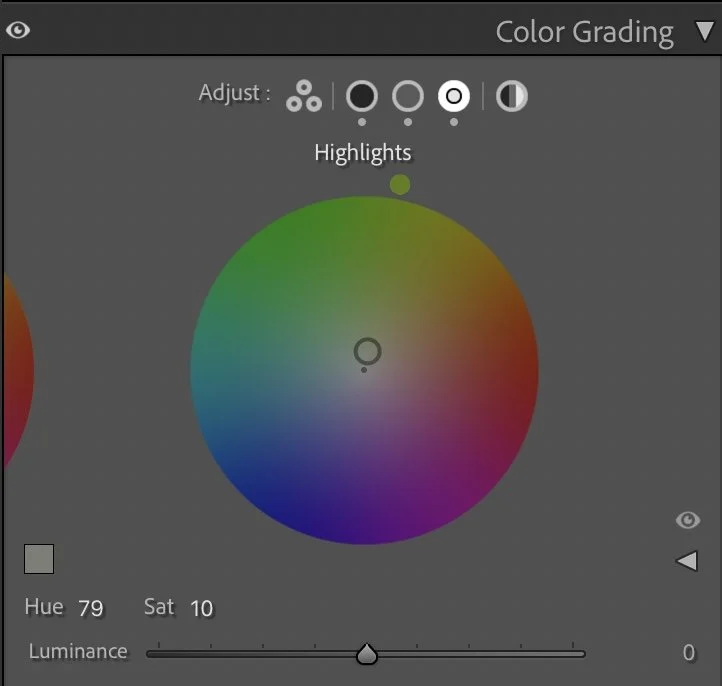
Color Grading – morning light and soft air
Color grading was key to defining the emotion of this edit. The Shadows (Hue 200 / Sat 15) bring in a cool blue tone, reinforcing the freshness of the early morning. The Midtones (Hue 193 / Sat 11) balance that coolness with a neutral, misty light, while the Highlights (Hue 79 / Sat 10) add a gentle yellow-green hue that evokes the rising sun cutting through the fog. The result is a delicate interplay of temperature — cool air meeting warm light — that gives the photo its sense of quiet awakening.
Final thoughts
This edit reminds me that even the most ordinary moments — a village morning, soft fog, old stone walls — can hold quiet strength when light is treated with care. The transformation isn’t about making the image bright; it’s about revealing what the eye already saw but the camera couldn’t capture.
By balancing exposure, texture, and tone, this image brings the world of Lorsch Abbey back to life — still, timeless, and full of gentle depth. Further Before and After Articles can be found here.

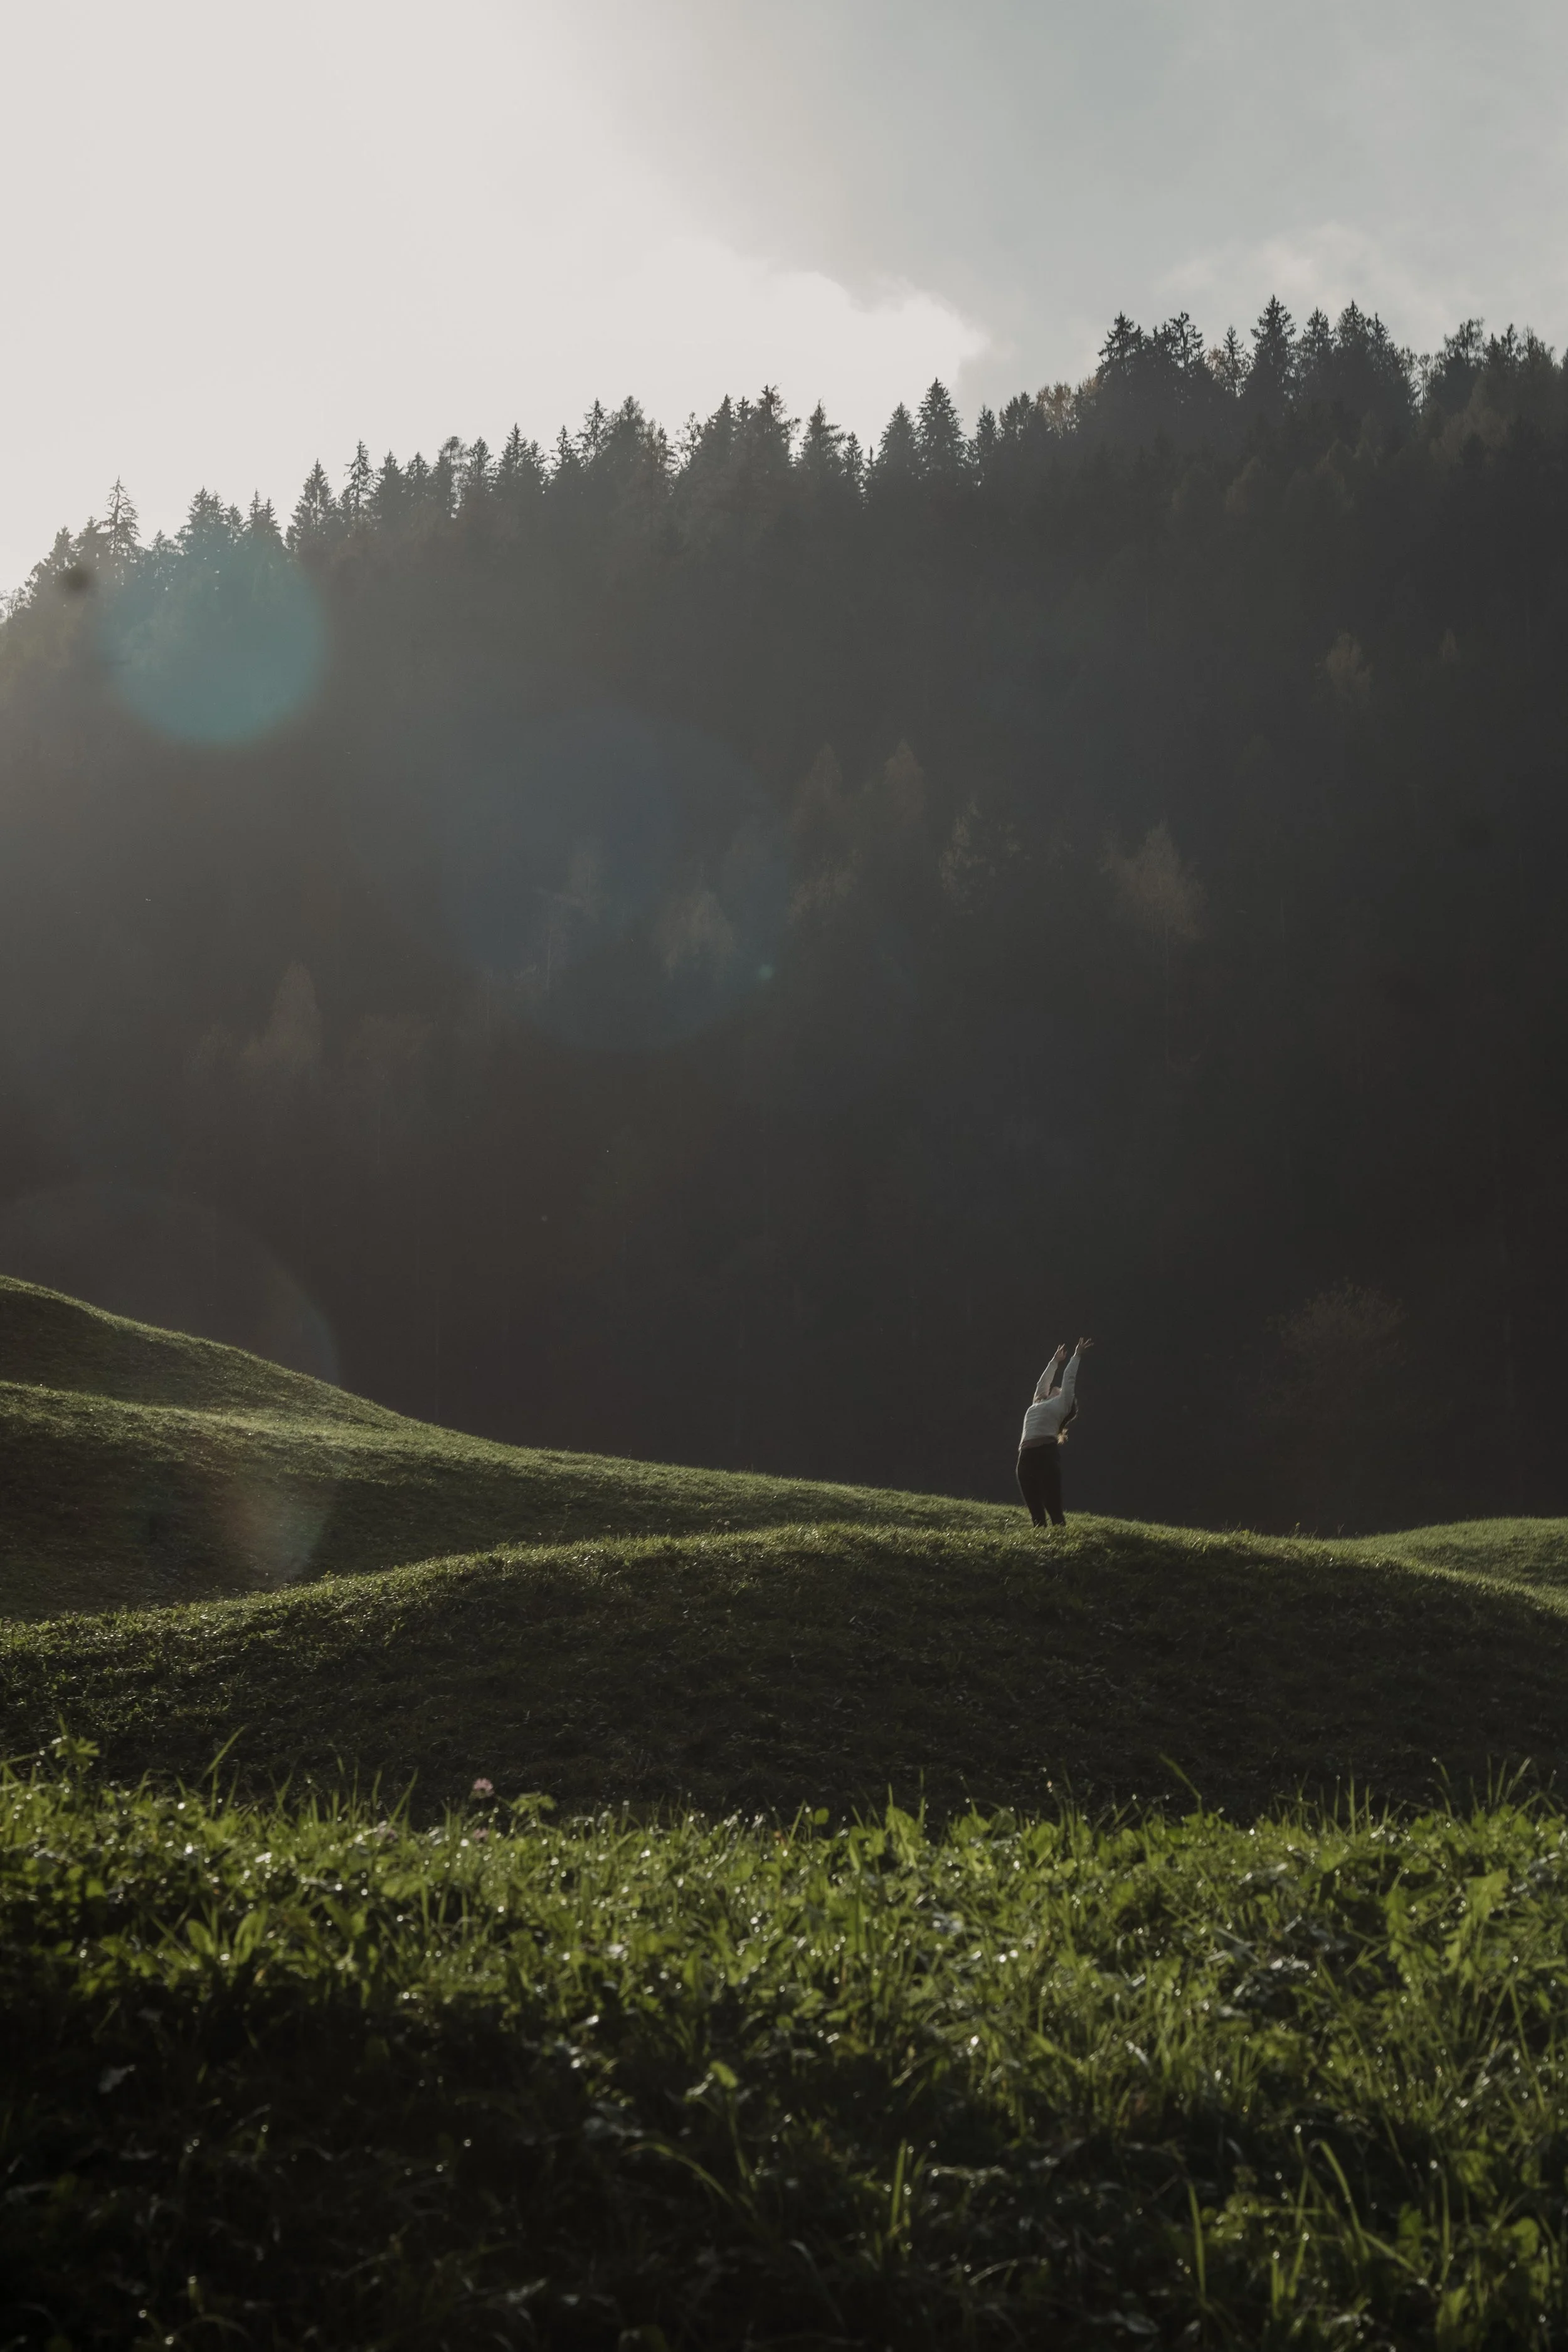
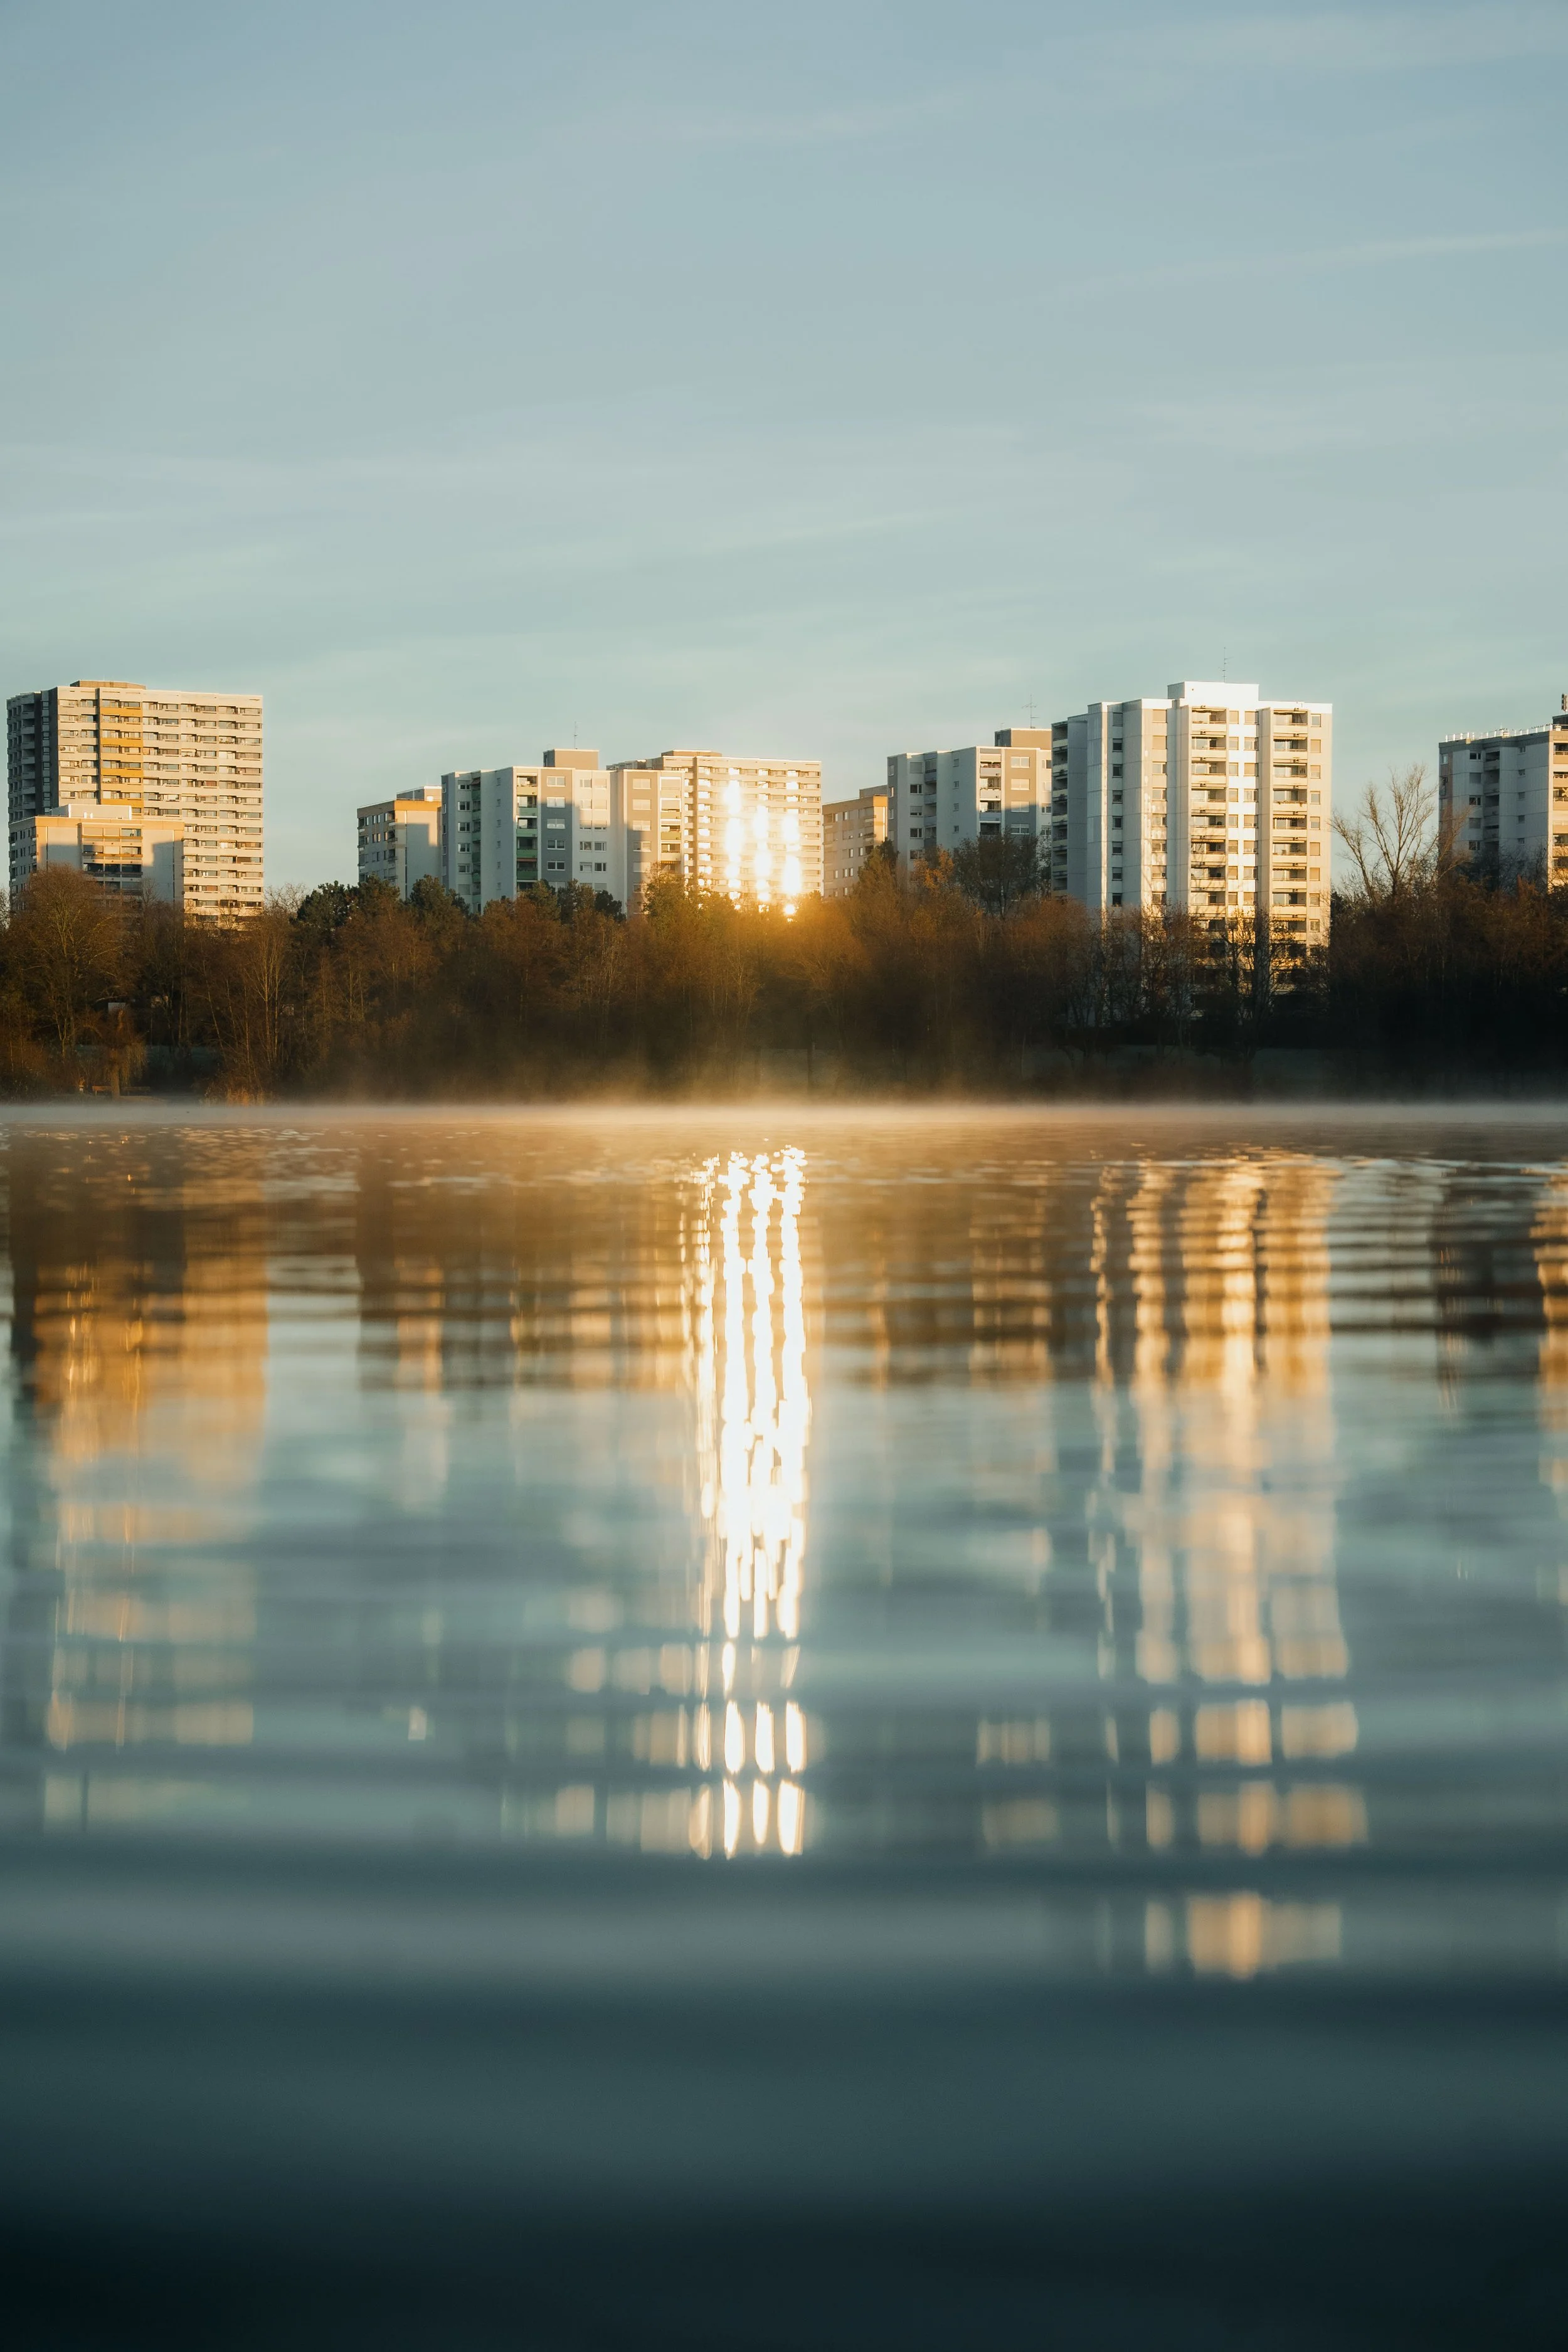
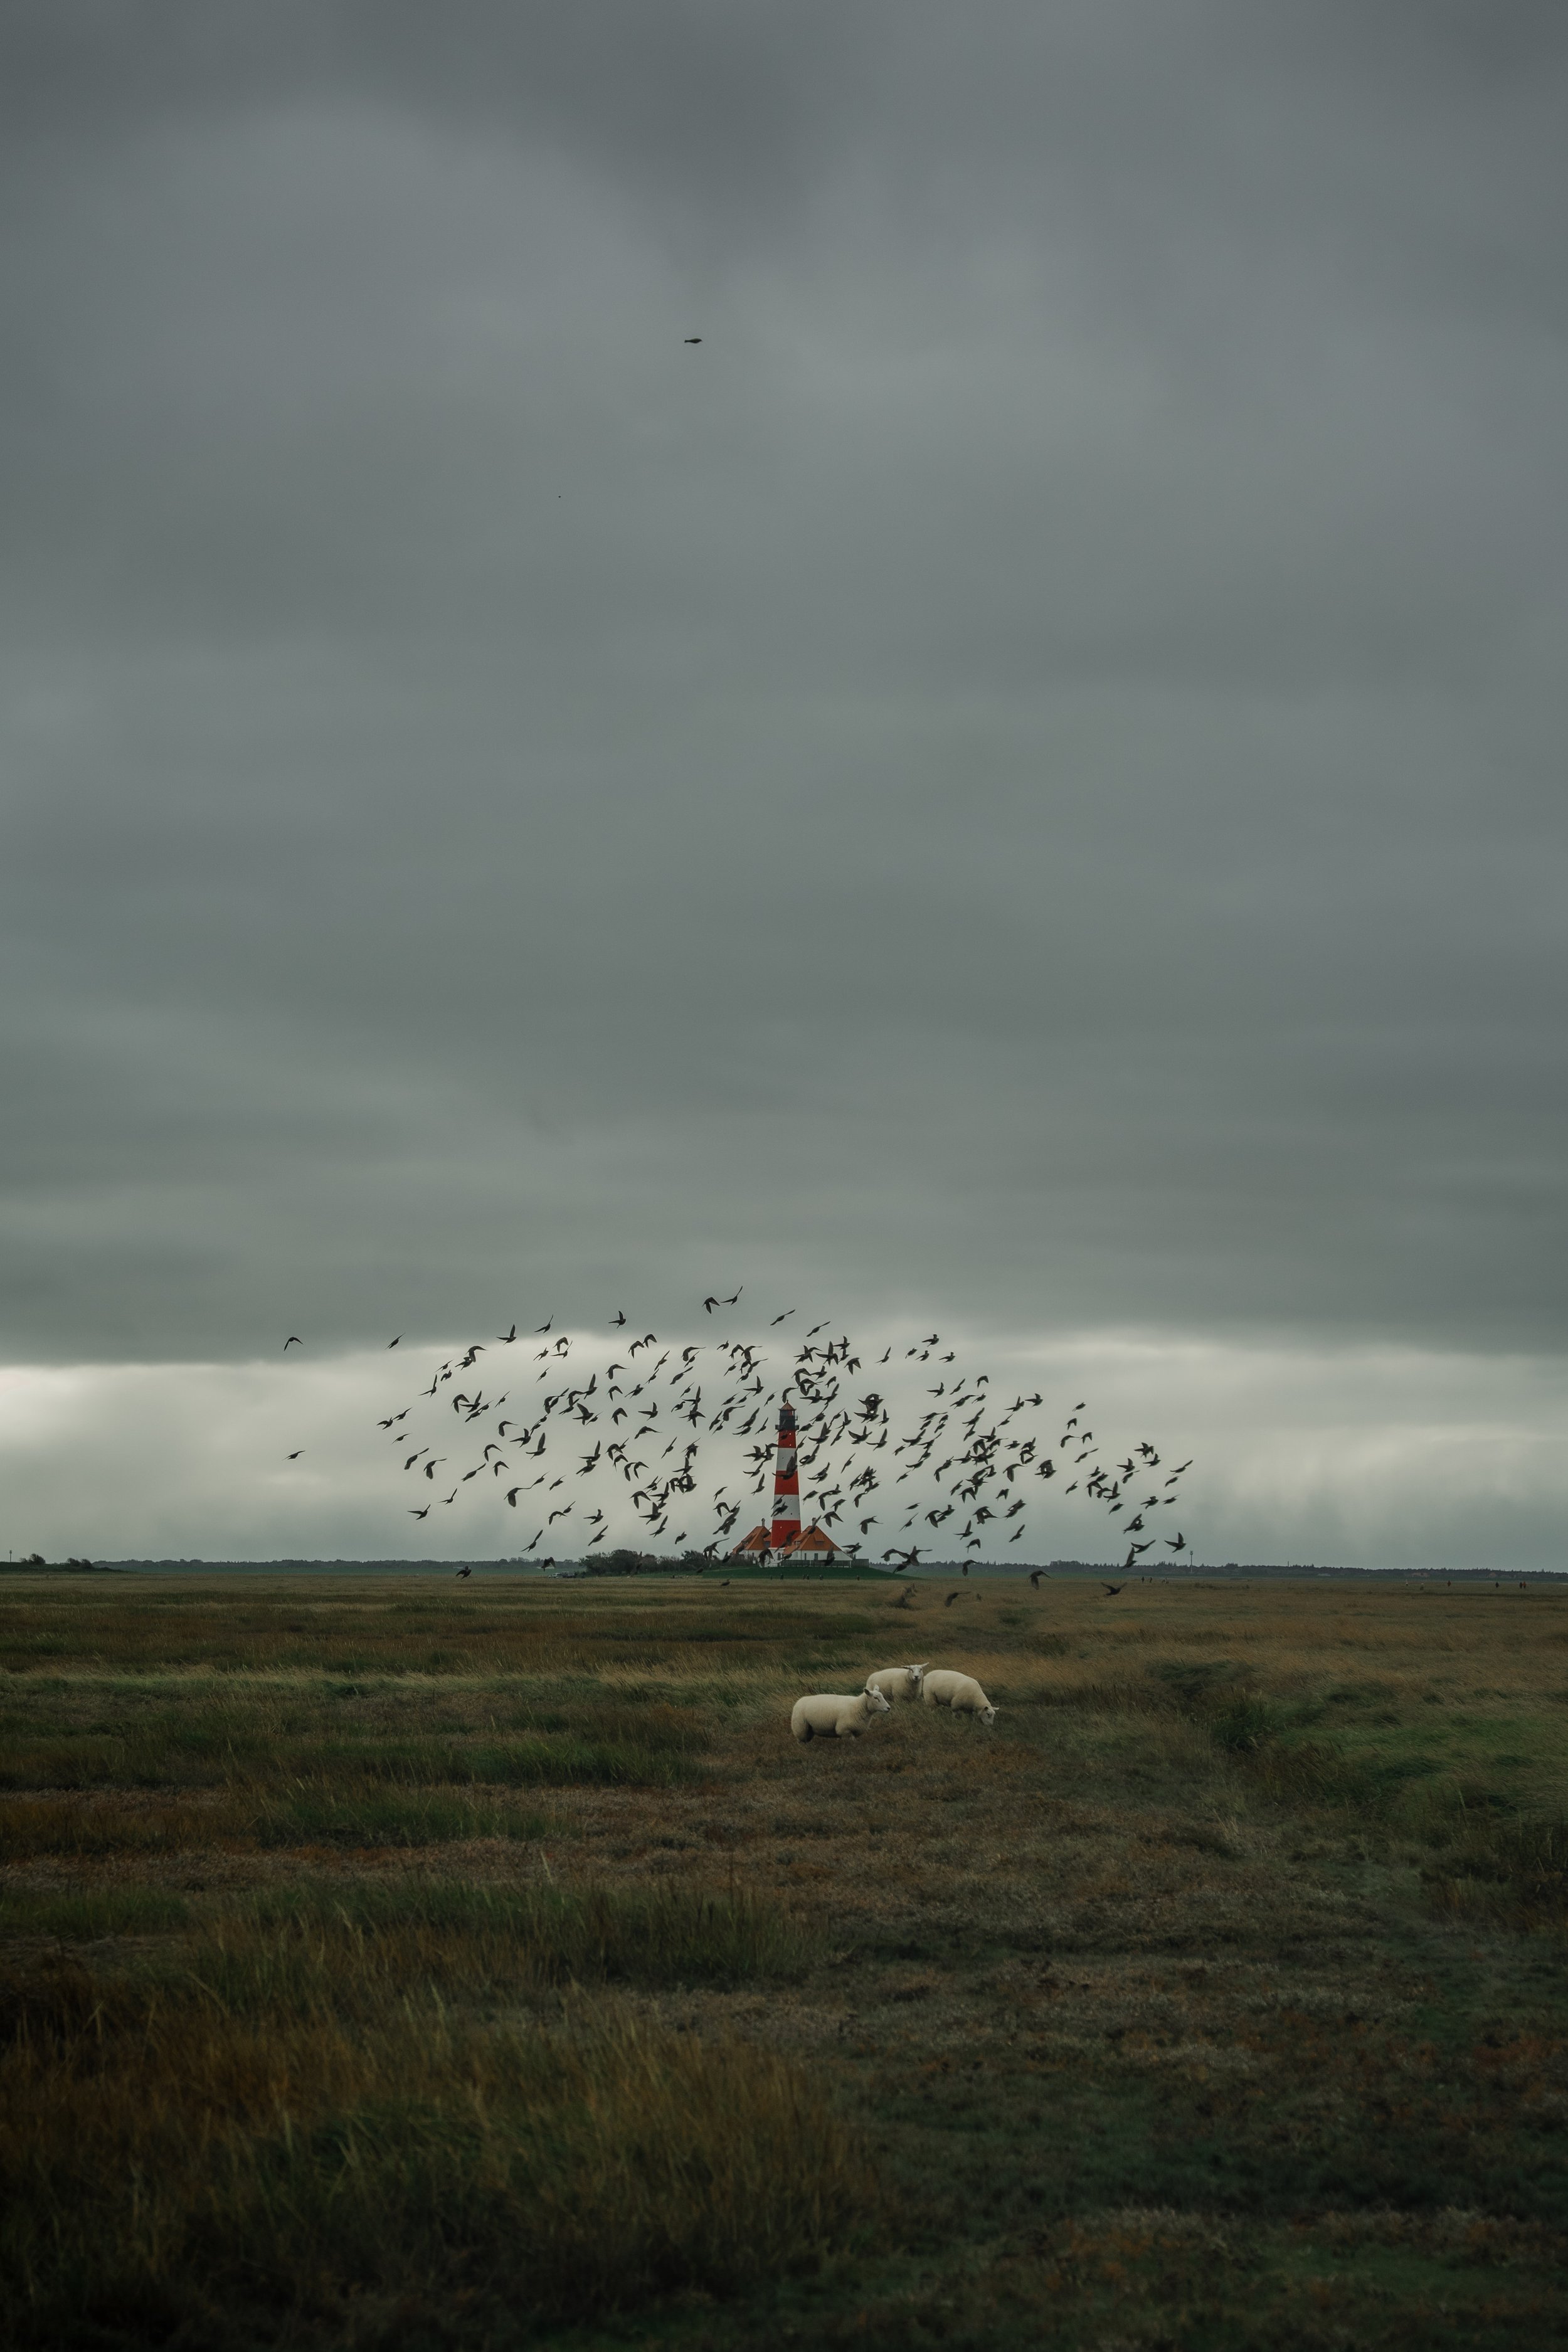
Creating more depth in the morning light
When I edited this image earlier, my intention was mainly to emphasize the warm morning light across the landscape. I slightly increased the brightness and allowed the sunlight to dominate the scene. The colors of the trees and the buildings became more vivid, which created a bright and inviting atmosphere.
Looking at the photograph again today, I approach the image a little differently.
In the current version, I allowed the shadows in the foreground to remain deeper while keeping the warm light in the distance softer and more natural. This creates a stronger sense of depth between the darker foreground, the illuminated buildings and the misty landscape in the background.
The fog and the distant hills now feel calmer and less processed. Instead of making the entire image brighter, the light becomes more directional and balanced across the scene.
For me, this version reflects how my editing style has evolved. Rather than emphasizing brightness and color, I now focus more on preserving the natural atmosphere and the quiet mood of the early morning.
Develop your own style
If you want to build your own Lightroom workflow step by step — not based on presets, but on a conscious and individual editing approach — take a look at my course.
In the course, I explain how photographers can develop their own editing style and gradually build a consistent visual look.
At first, starting a Lightroom edit in black and white may seem counterintuitive. After all, most of us care deeply about color. Yet removing color for a moment can reveal something more important: the light, balance and structure that hold an image together. In this article, I explain why I still begin many edits in black and white and how this simple approach changed both my editing workflow and the way I photograph.