Lightroom Editing: Before and After: Ericeira Coast

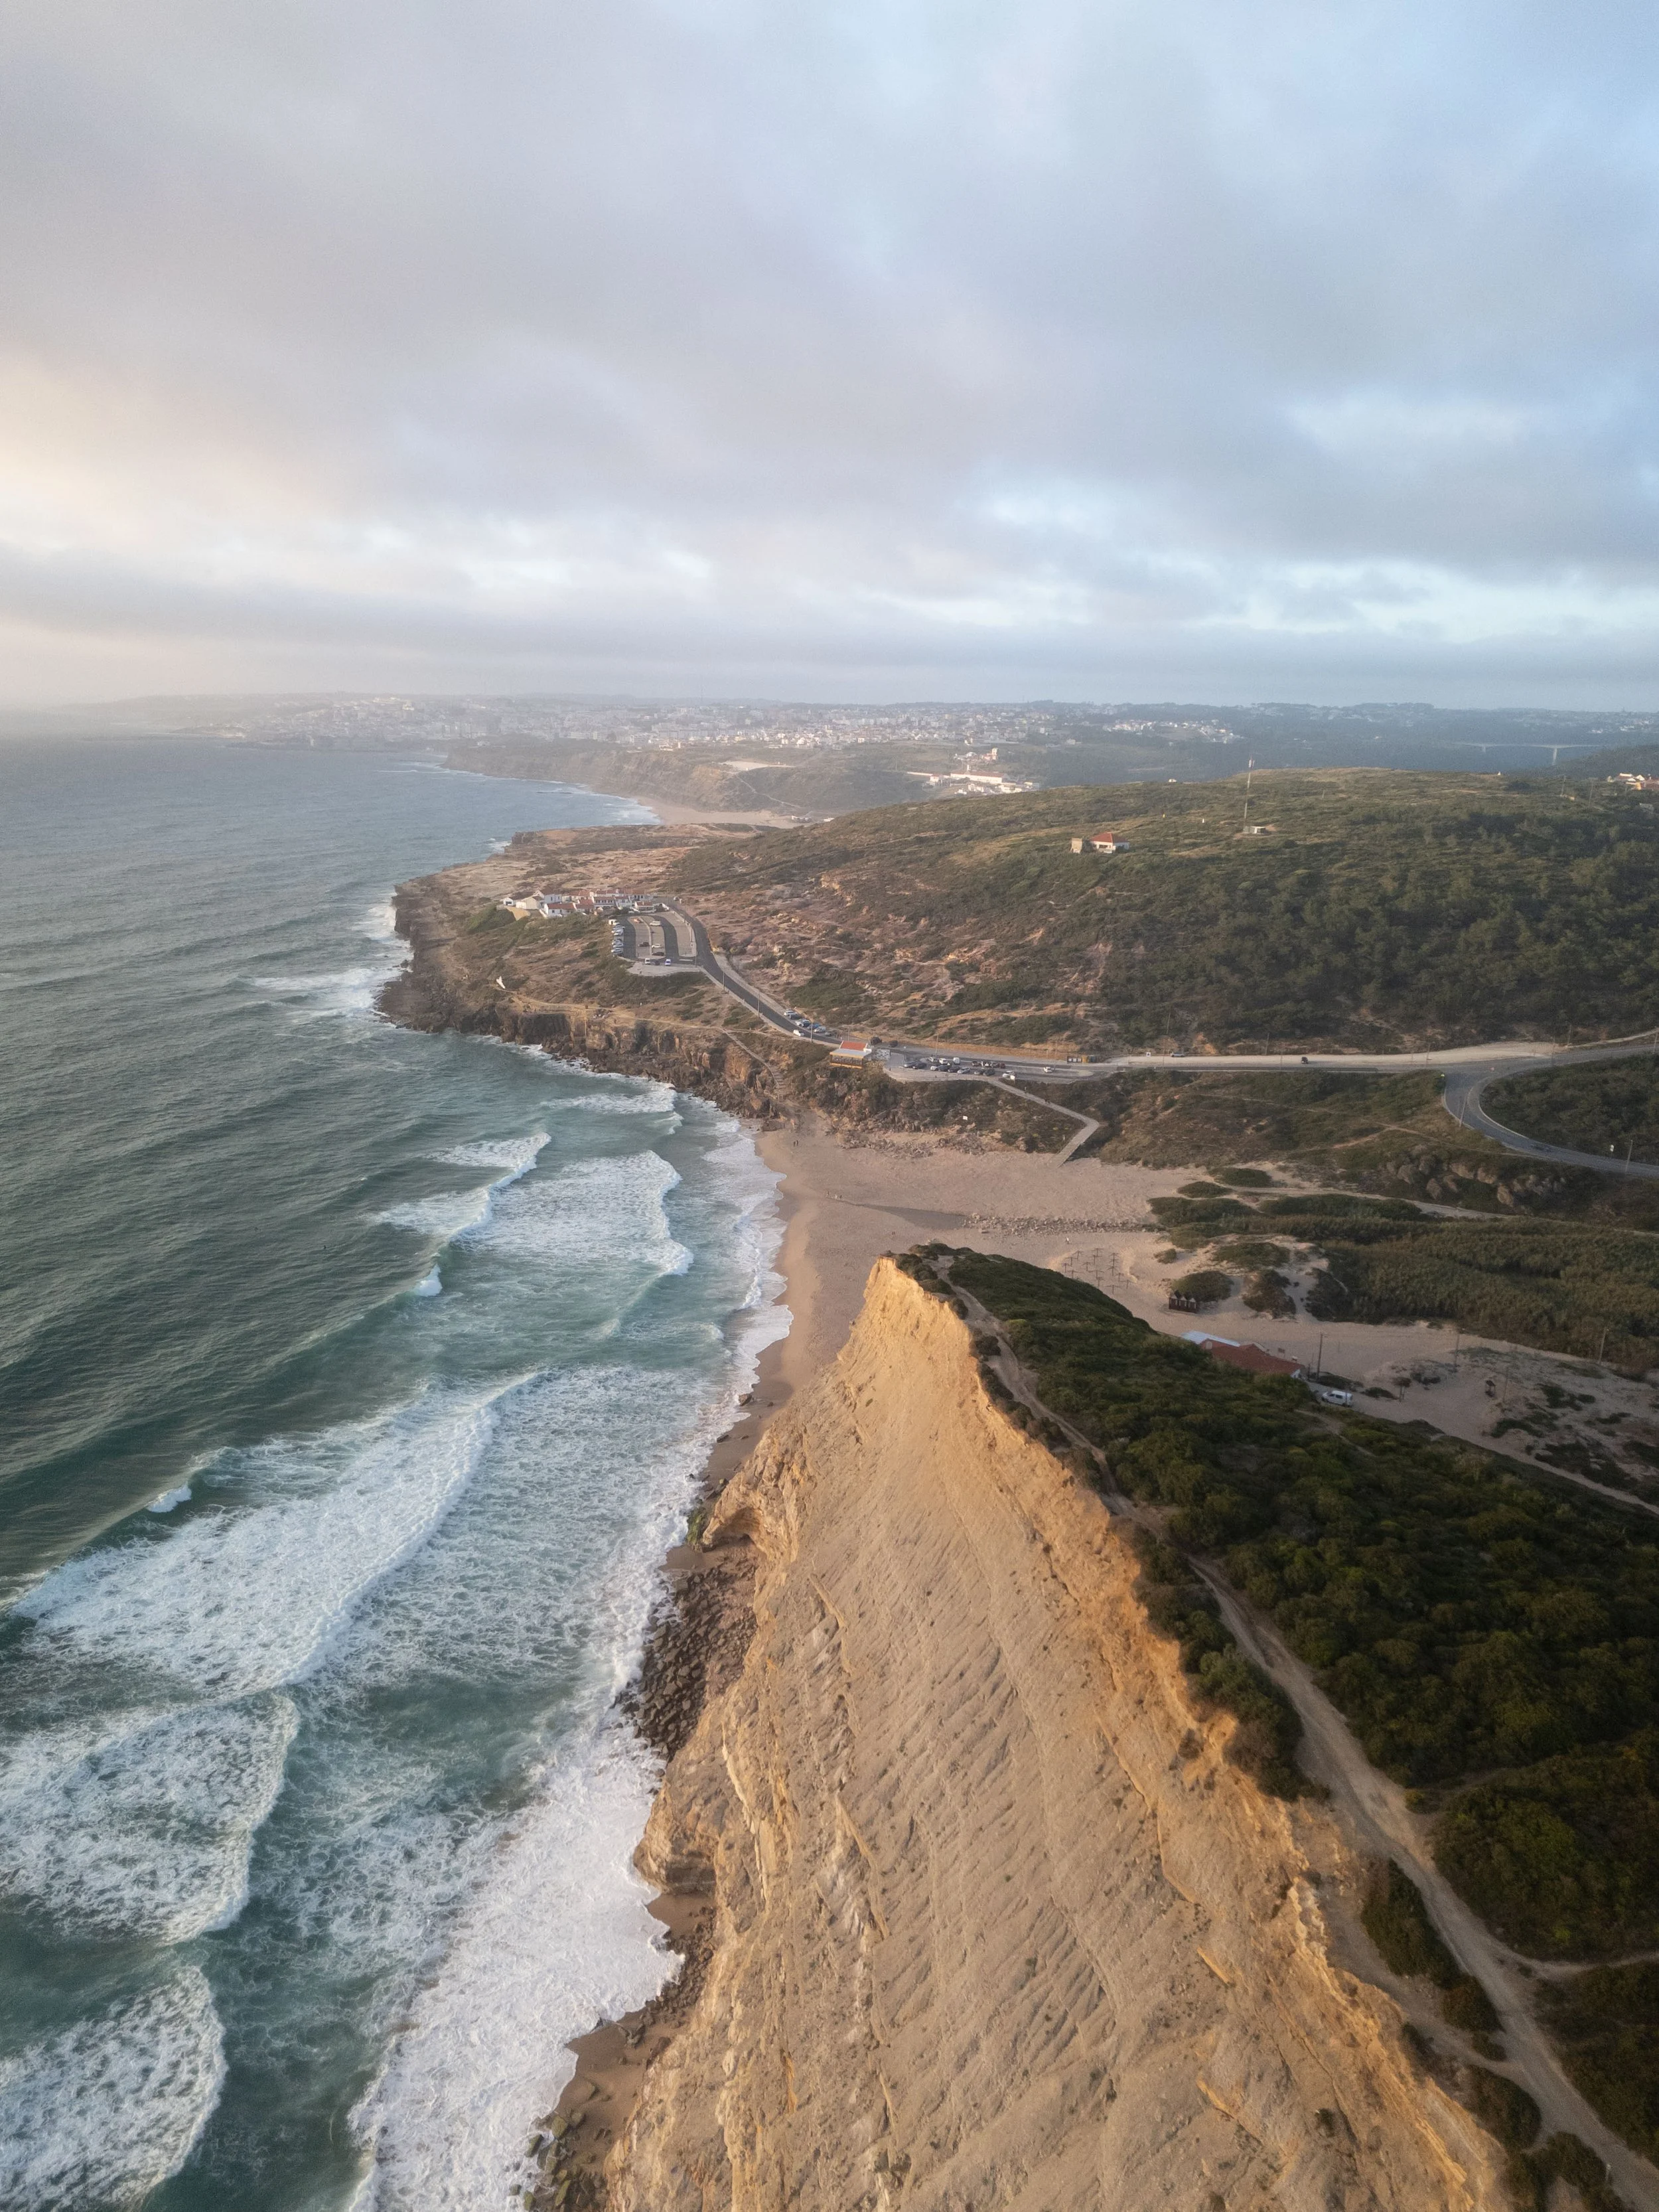
RAW Photo. Lightroom Edit is shown below at the end of the article.
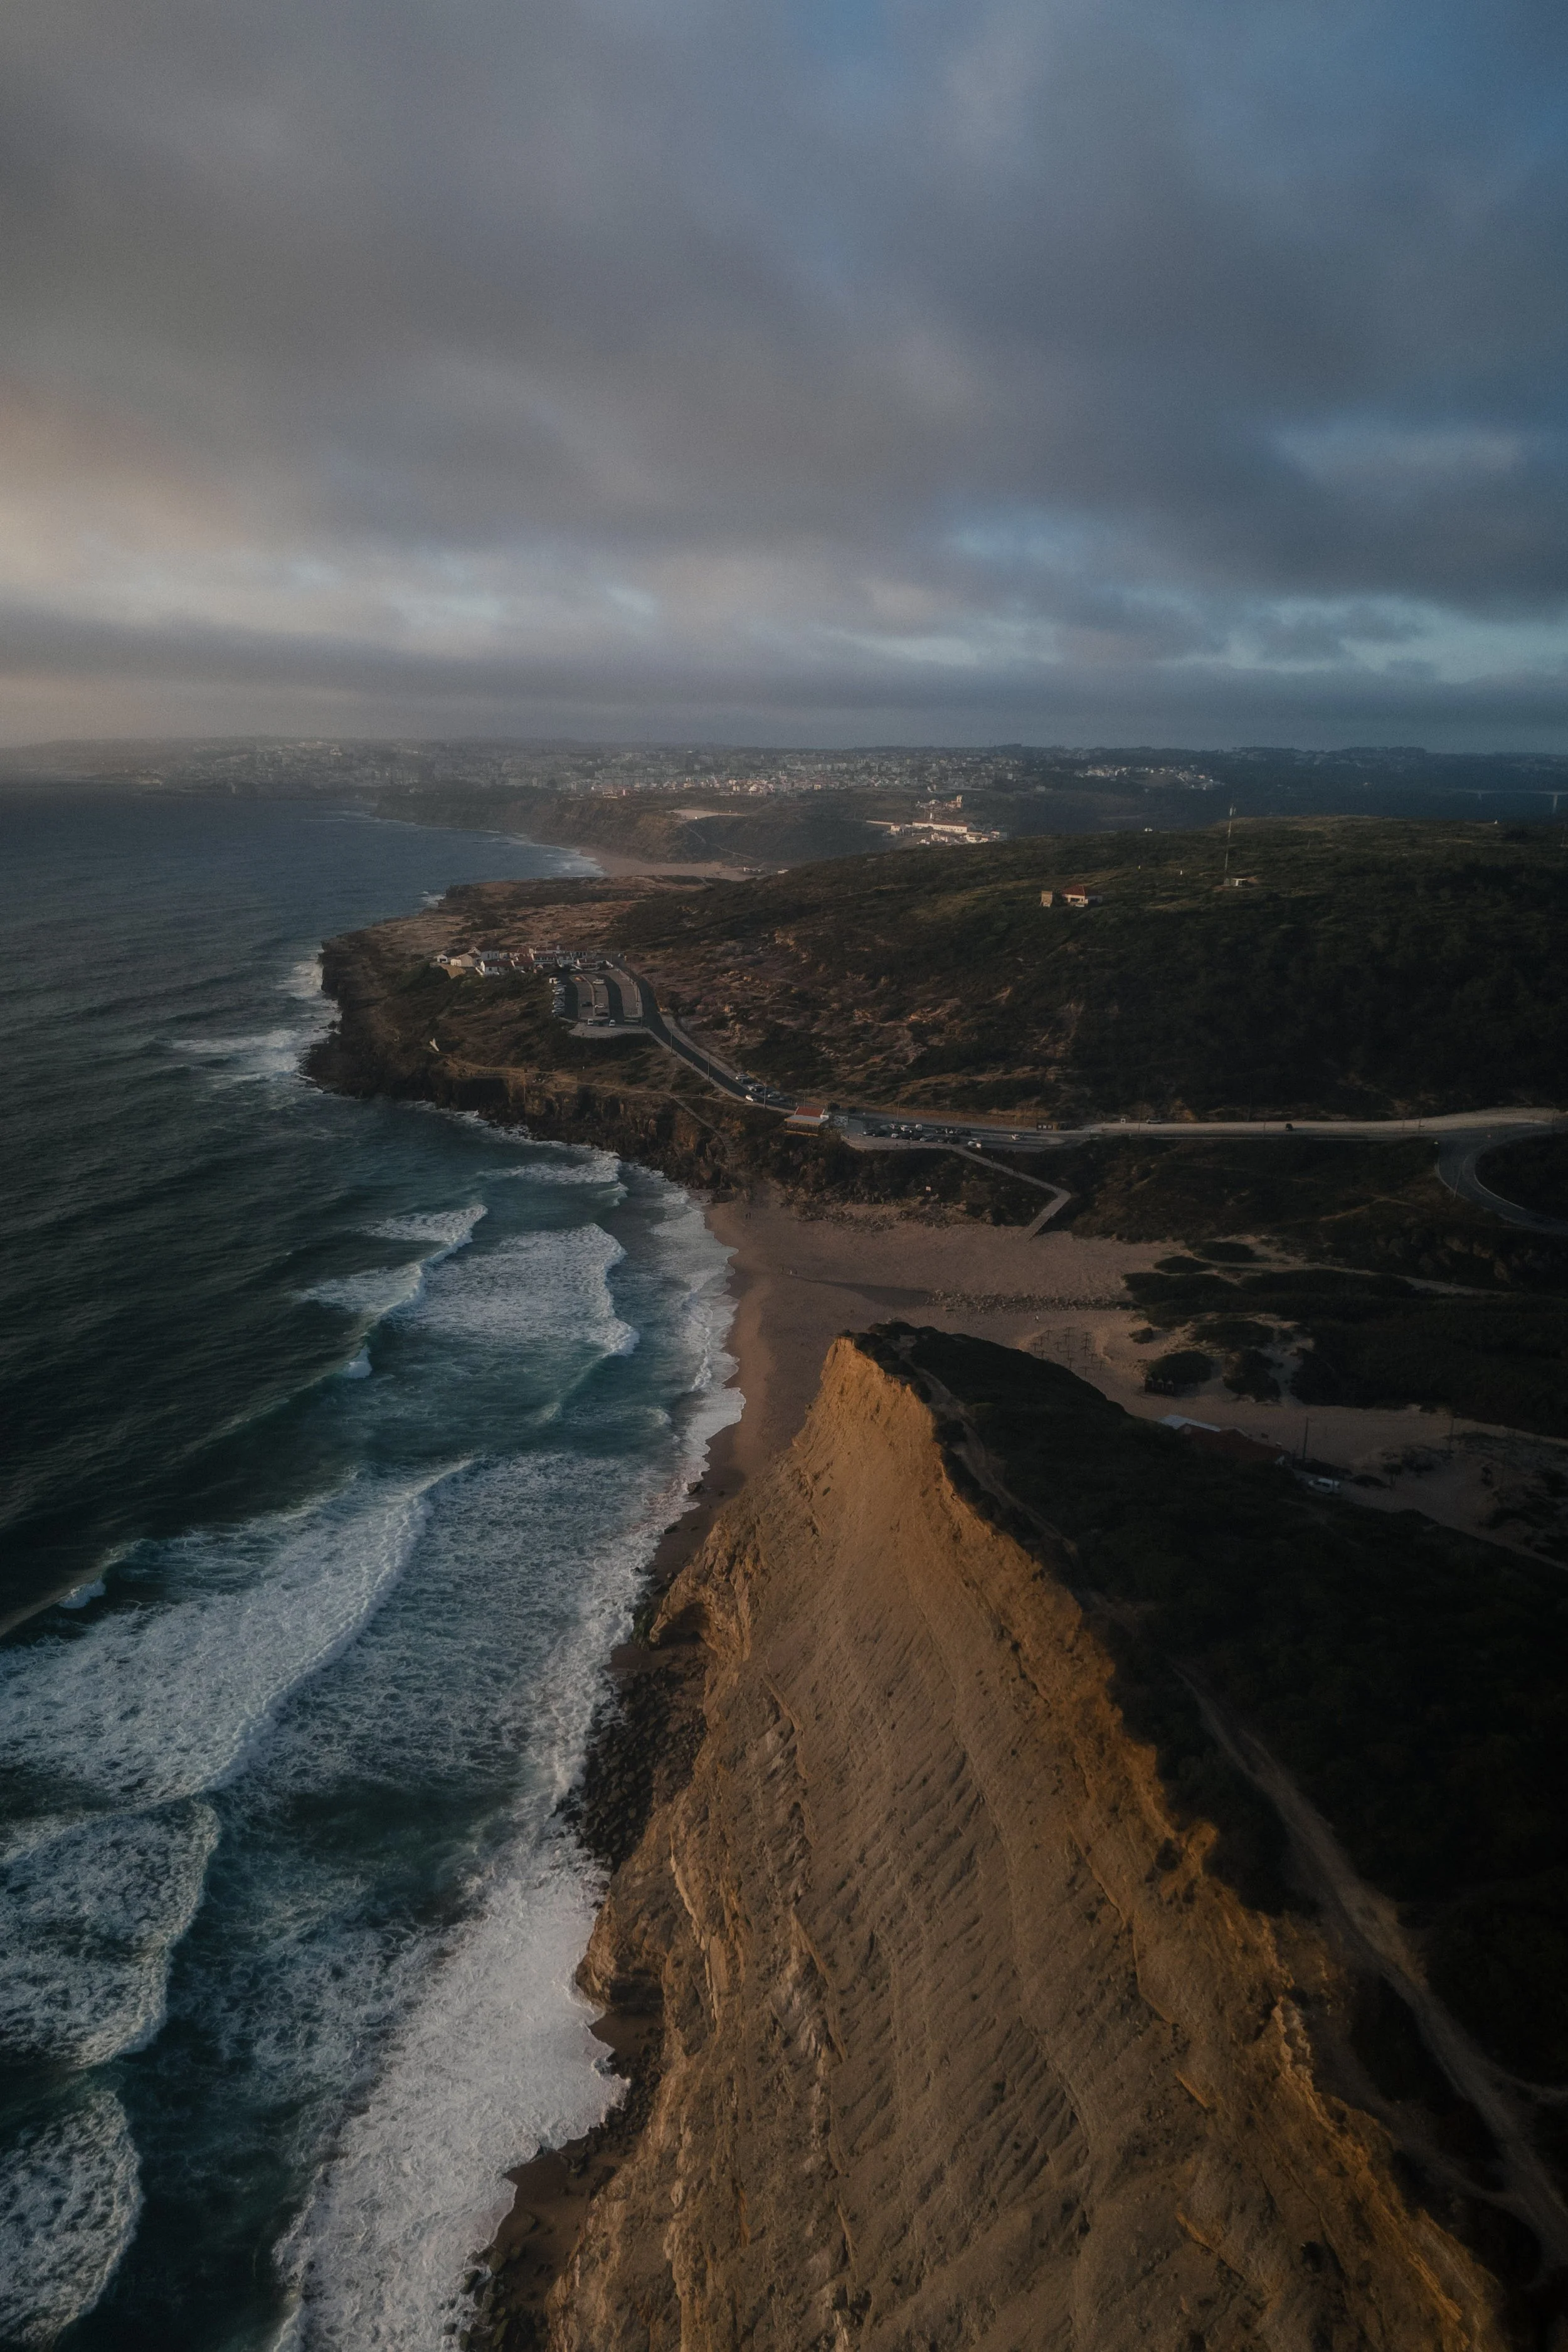
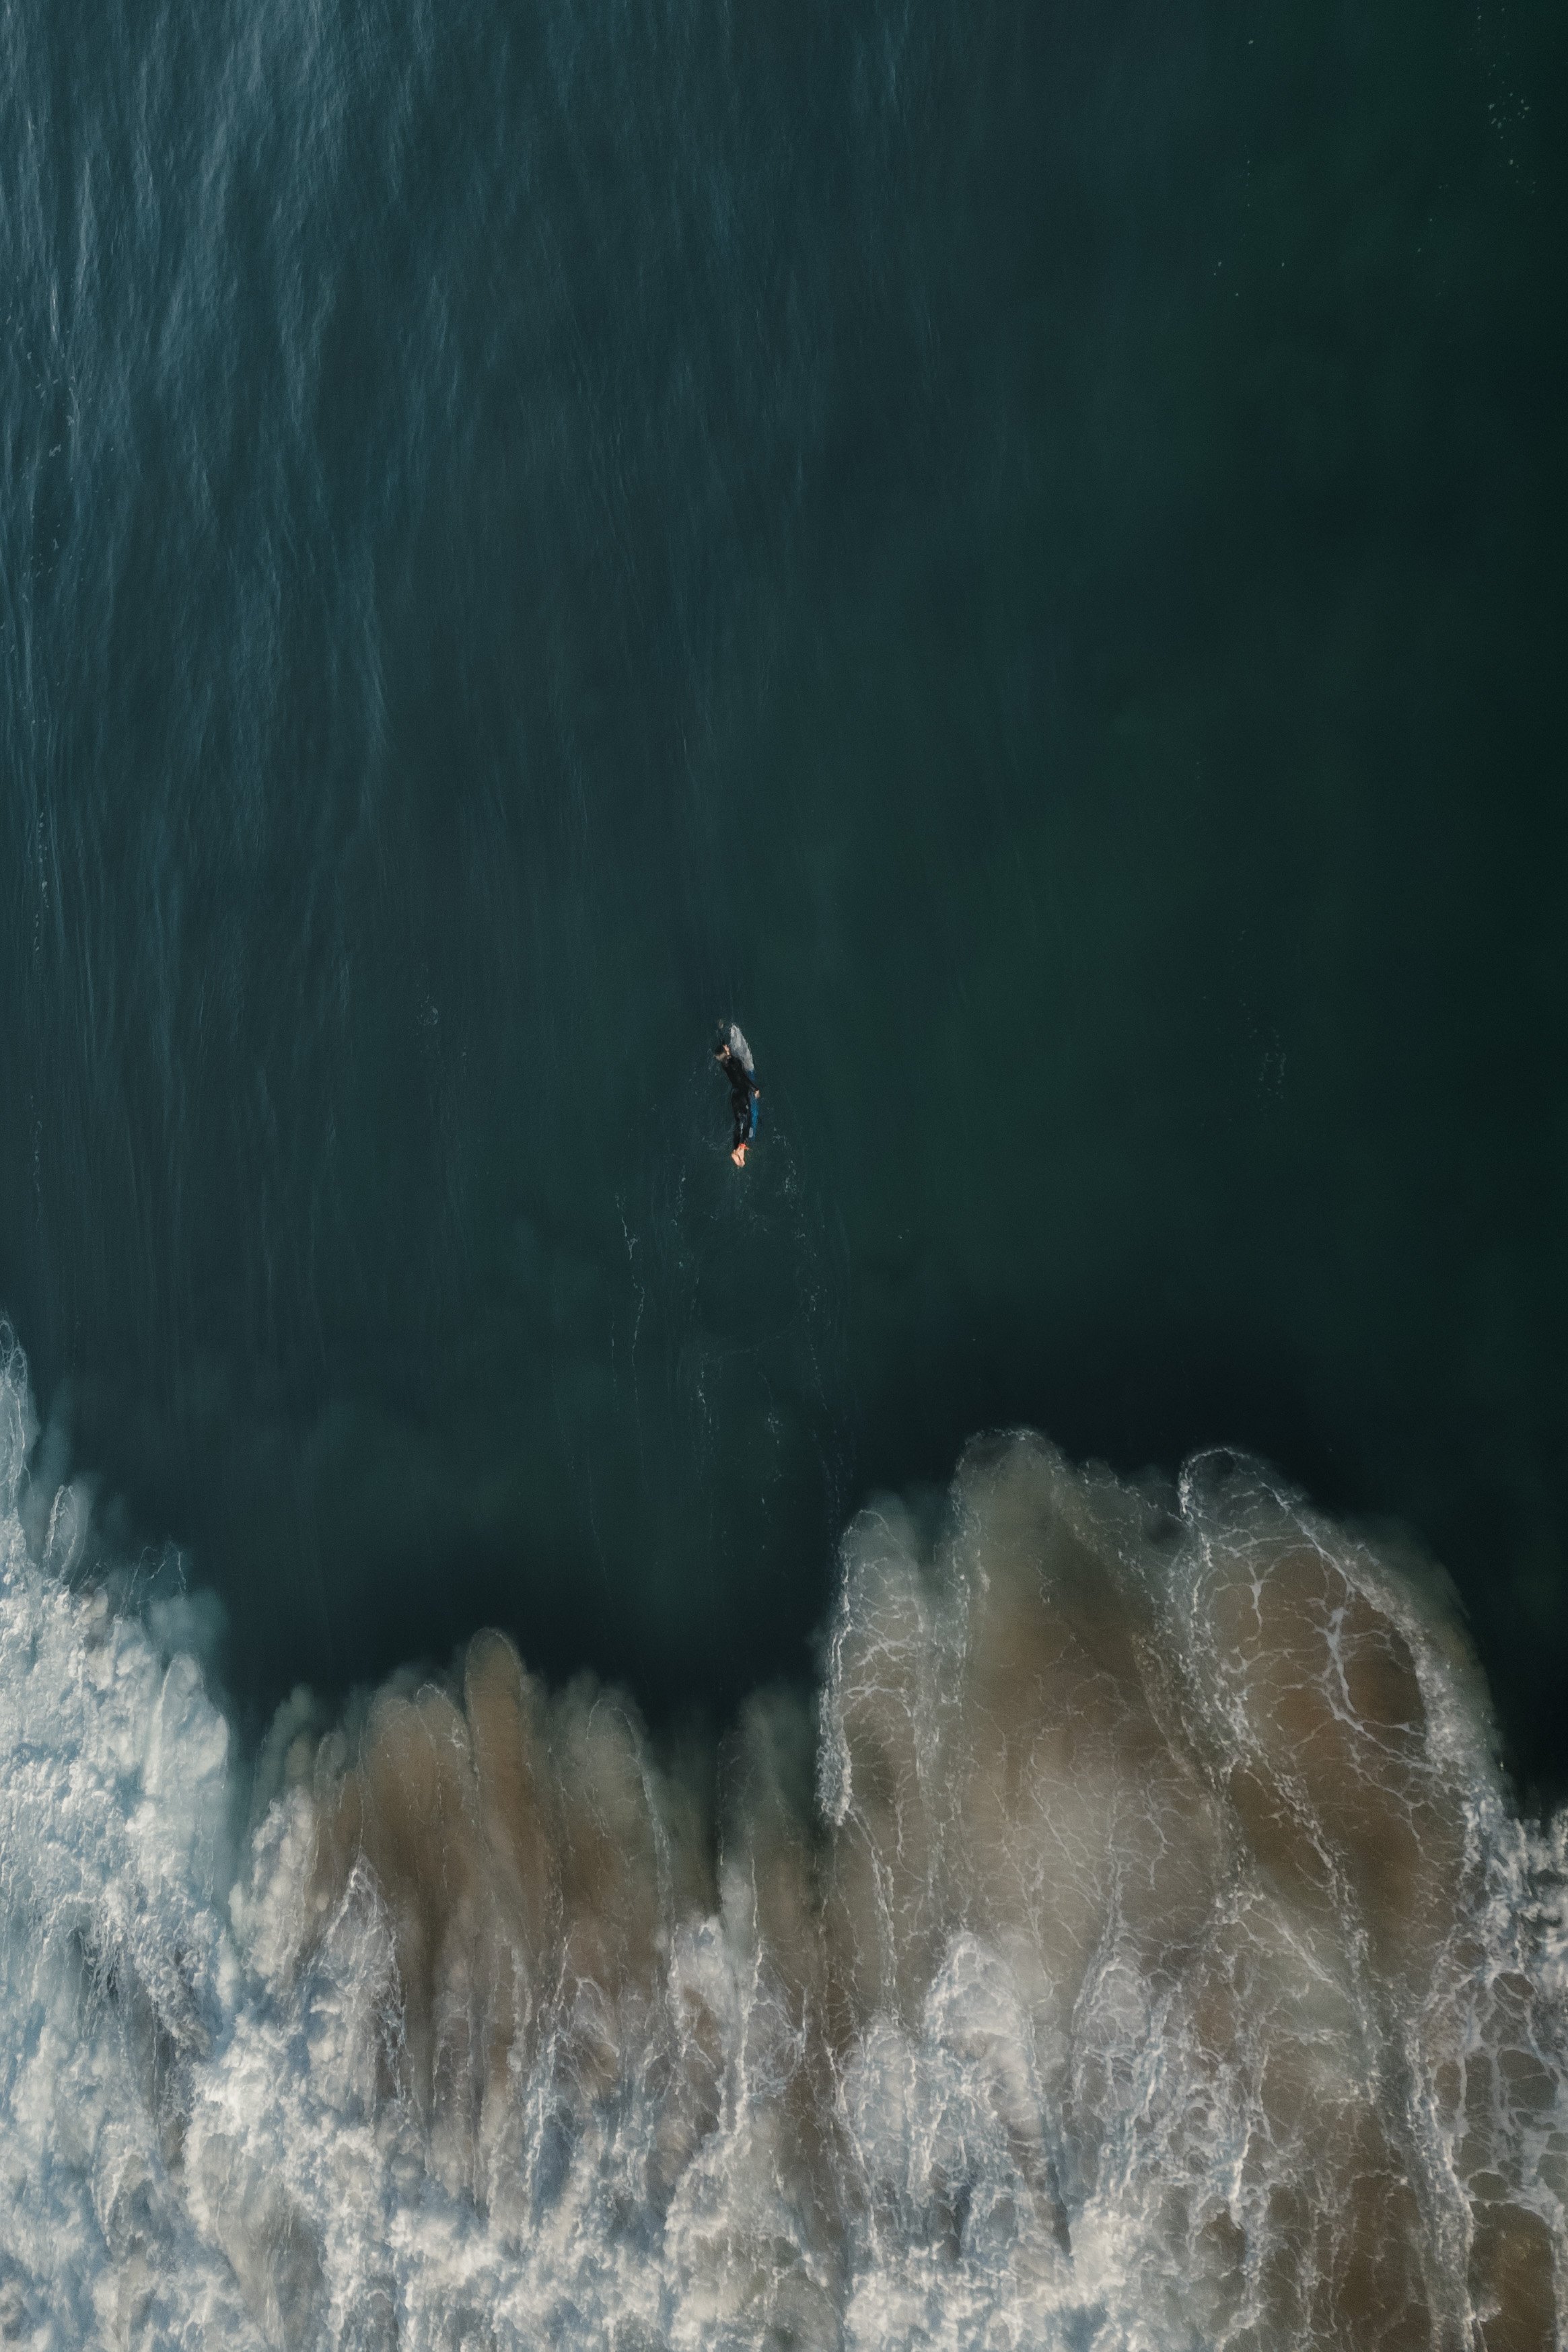
This aerial photo of the cliffs near Ericeira was taken after sunrise — a moment when the coastline feels calm, but the light is still harsh. The RAW image looked flat and slightly cold: the cliffs appeared pale, the water was bright and lacked texture, and the overall scene felt more like midday than golden hour.
What I wanted to capture was the atmosphere that defines Portugal’s Atlantic coast — the contrast between the warm cliffs and the cool, moving water. The goal was to create a cinematic balance between warmth and distance: sunlight that feels tangible, but not overexposed.
Basic adjustments - building the foundation

Basic Adjustments in Lightroom
To rebuild that depth, I slightly darkened the overall exposure (–0.60) and reduced the Highlights (–99) to recover the soft gradient in the sky. The Shadows (+40) and Whites (+45) opened the structure in the cliffs and waves, while Blacks (–41) anchored the contrast and made the edges of the coastline stronger.
The Texture (–24) and Clarity (–21) sliders helped reduce digital sharpness, especially in the foam of the waves. This makes the image feel smoother and less clinical — closer to how the moment actually felt when standing above the water.
Tone curve in Lightroom
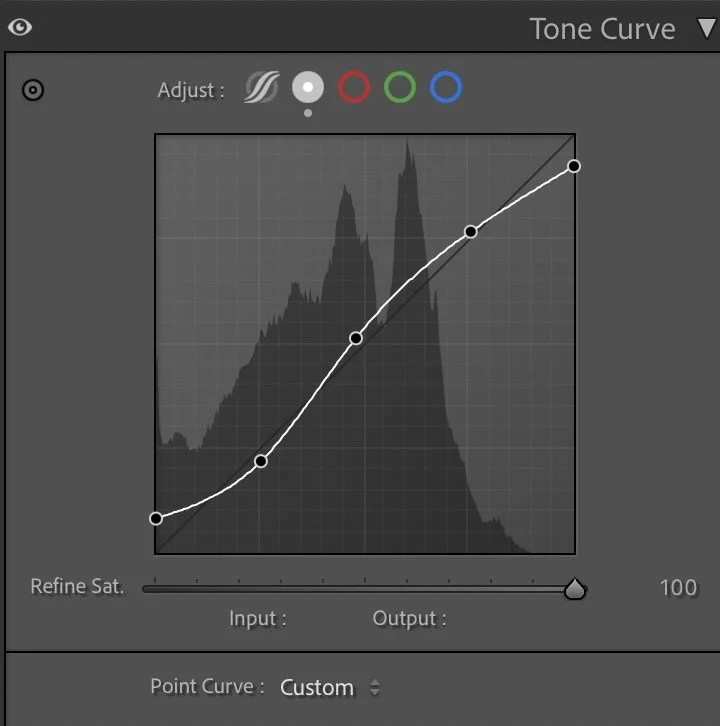
Tone curve — adding depth and contrast
The tone curve follows a soft S-shape, focusing on a natural roll-off in both highlights and shadows. By lifting the lower midtones slightly, the light feels less direct — as if filtered through a thin coastal haze.
This curve is key to the cinematic depth of the image. It preserves shadow detail in the cliffs and lets the sky stay luminous without washing out the ocean. The result is a clean, atmospheric contrast that doesn’t rely on heavy blacks or artificial punch.
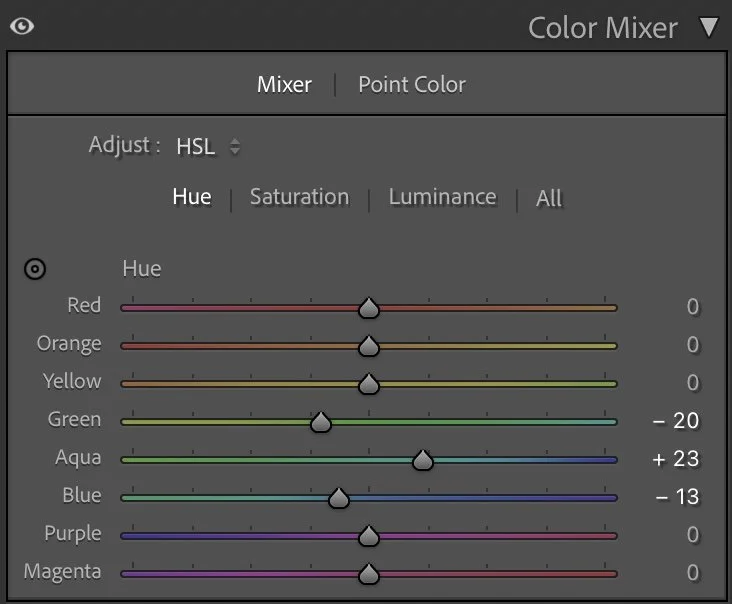
HSL Adjustments – refining the colors
The HSL adjustments shape the image’s character. I pushed the Green hue (–20) to remove the oversaturated vegetation tone, while Aqua (+23) and Blue (–13) were fine-tuned to balance the ocean color. Together, these shifts move the water slightly toward teal — less cyan, more Atlantic depth.
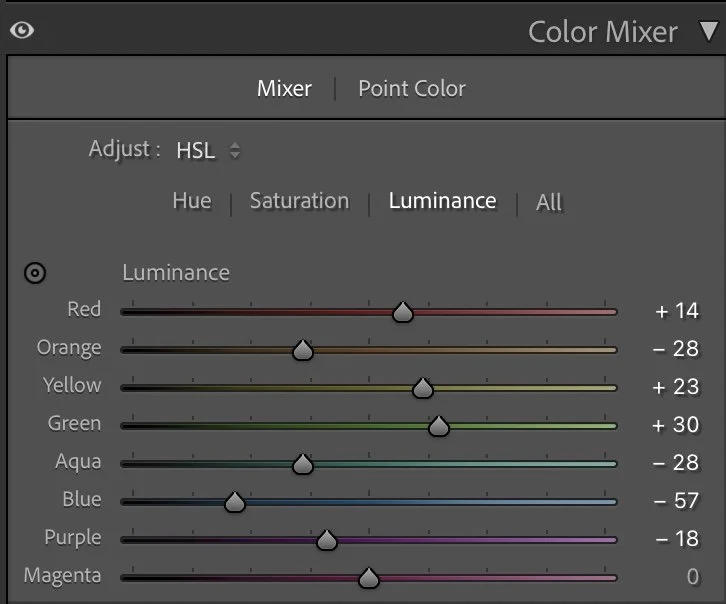
Saturation changes were subtle but intentional: Reds (–37) and Greens (–20) were reduced to keep the cliffs and plants from looking too vivid, while Aqua (+18) gives the sea just enough presence. In the Luminance panel, the Blues (–57) were darkened to emphasize the wave structure, and Yellows (+23) brought gentle light back to the cliffs.
Instead of amplifying color, these adjustments remove distraction — creating harmony between the sea, land, and light.

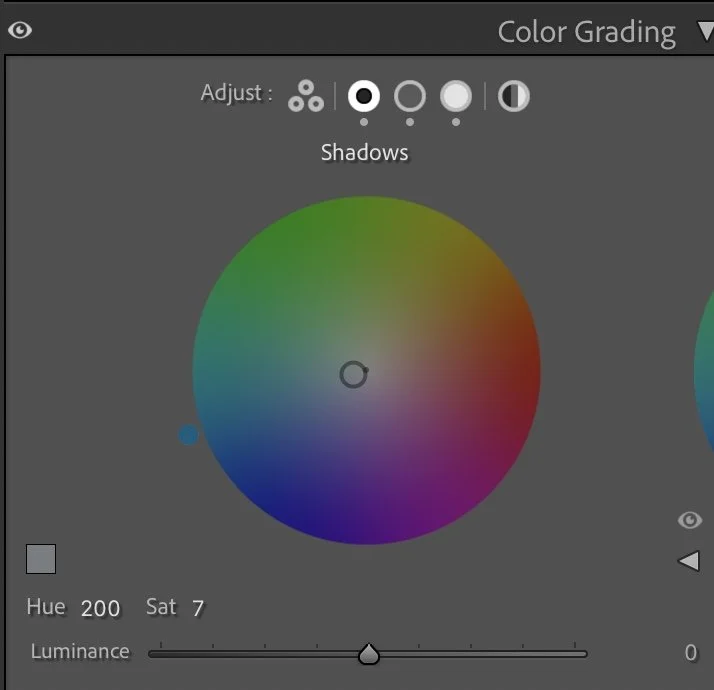
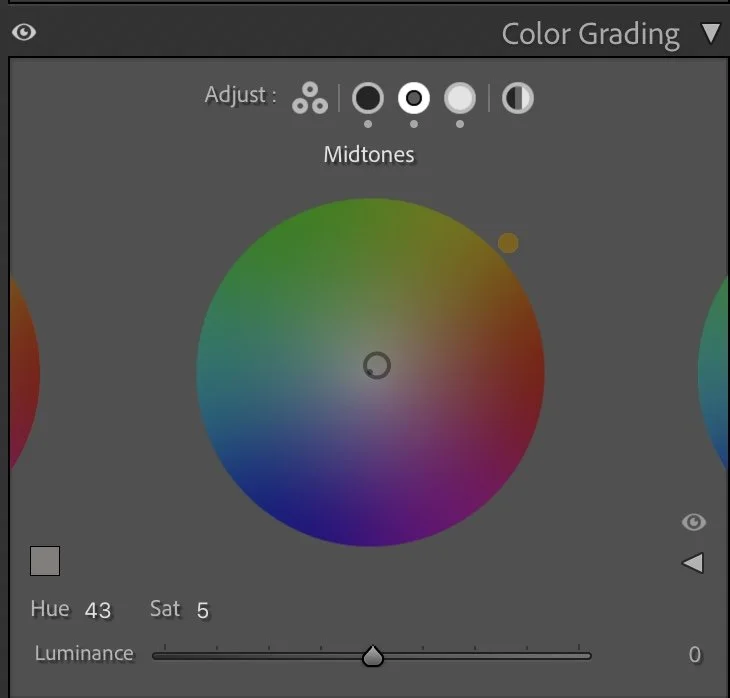
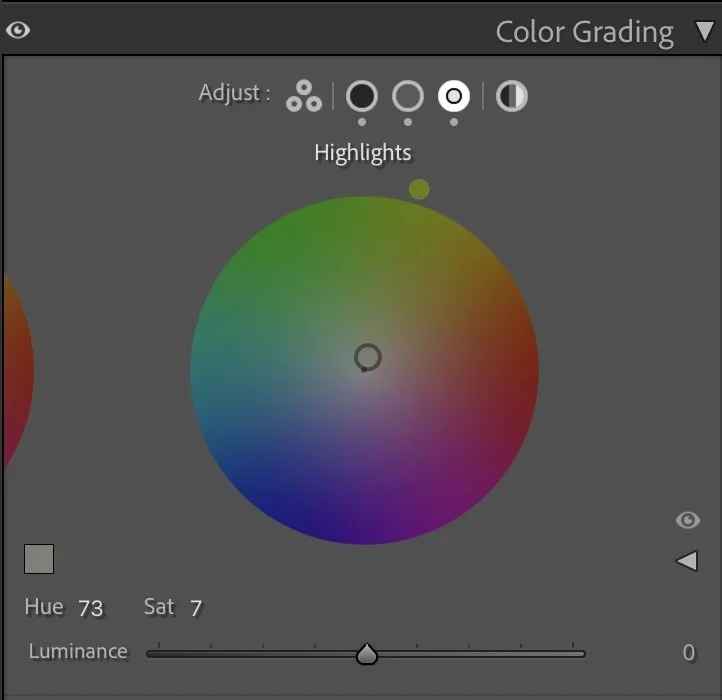
Color Grading – the finishing touch
Color grading completed the mood by building a dialogue between cool shadows and warm light.
The Shadows (Hue 200 / Sat 7) introduced a subtle blue tone to the darker areas, reflecting the Atlantic’s crisp air. The Midtones (Hue 43 / Sat 5) shifted toward a muted golden warmth, giving the cliffs a soft glow. Finally, the Highlights (Hue 73 / Sat 7) added a whisper of yellow-green light — not to warm the image, but to suggest the transition between sun and sea spray.
Together, these tones express exactly what I wanted: a sense of calm movement, where air, water, and light meet quietly.
Conclusion
This edit captures the essence of Ericeira’s cliffs — the mix of strength and serenity that defines Portugal’s coast. It’s not about intensity, but rhythm: how light falls, how shadows breathe, how color quietly leads the eye.
By darkening exposure, softening detail, and balancing warm and cool tones, the image moves from digital clarity to emotional clarity — the kind that makes you feel the place more than you see it.
That’s what this process is always about: not changing reality, but revealing its stillness. Further Before and After Articles can be found here.

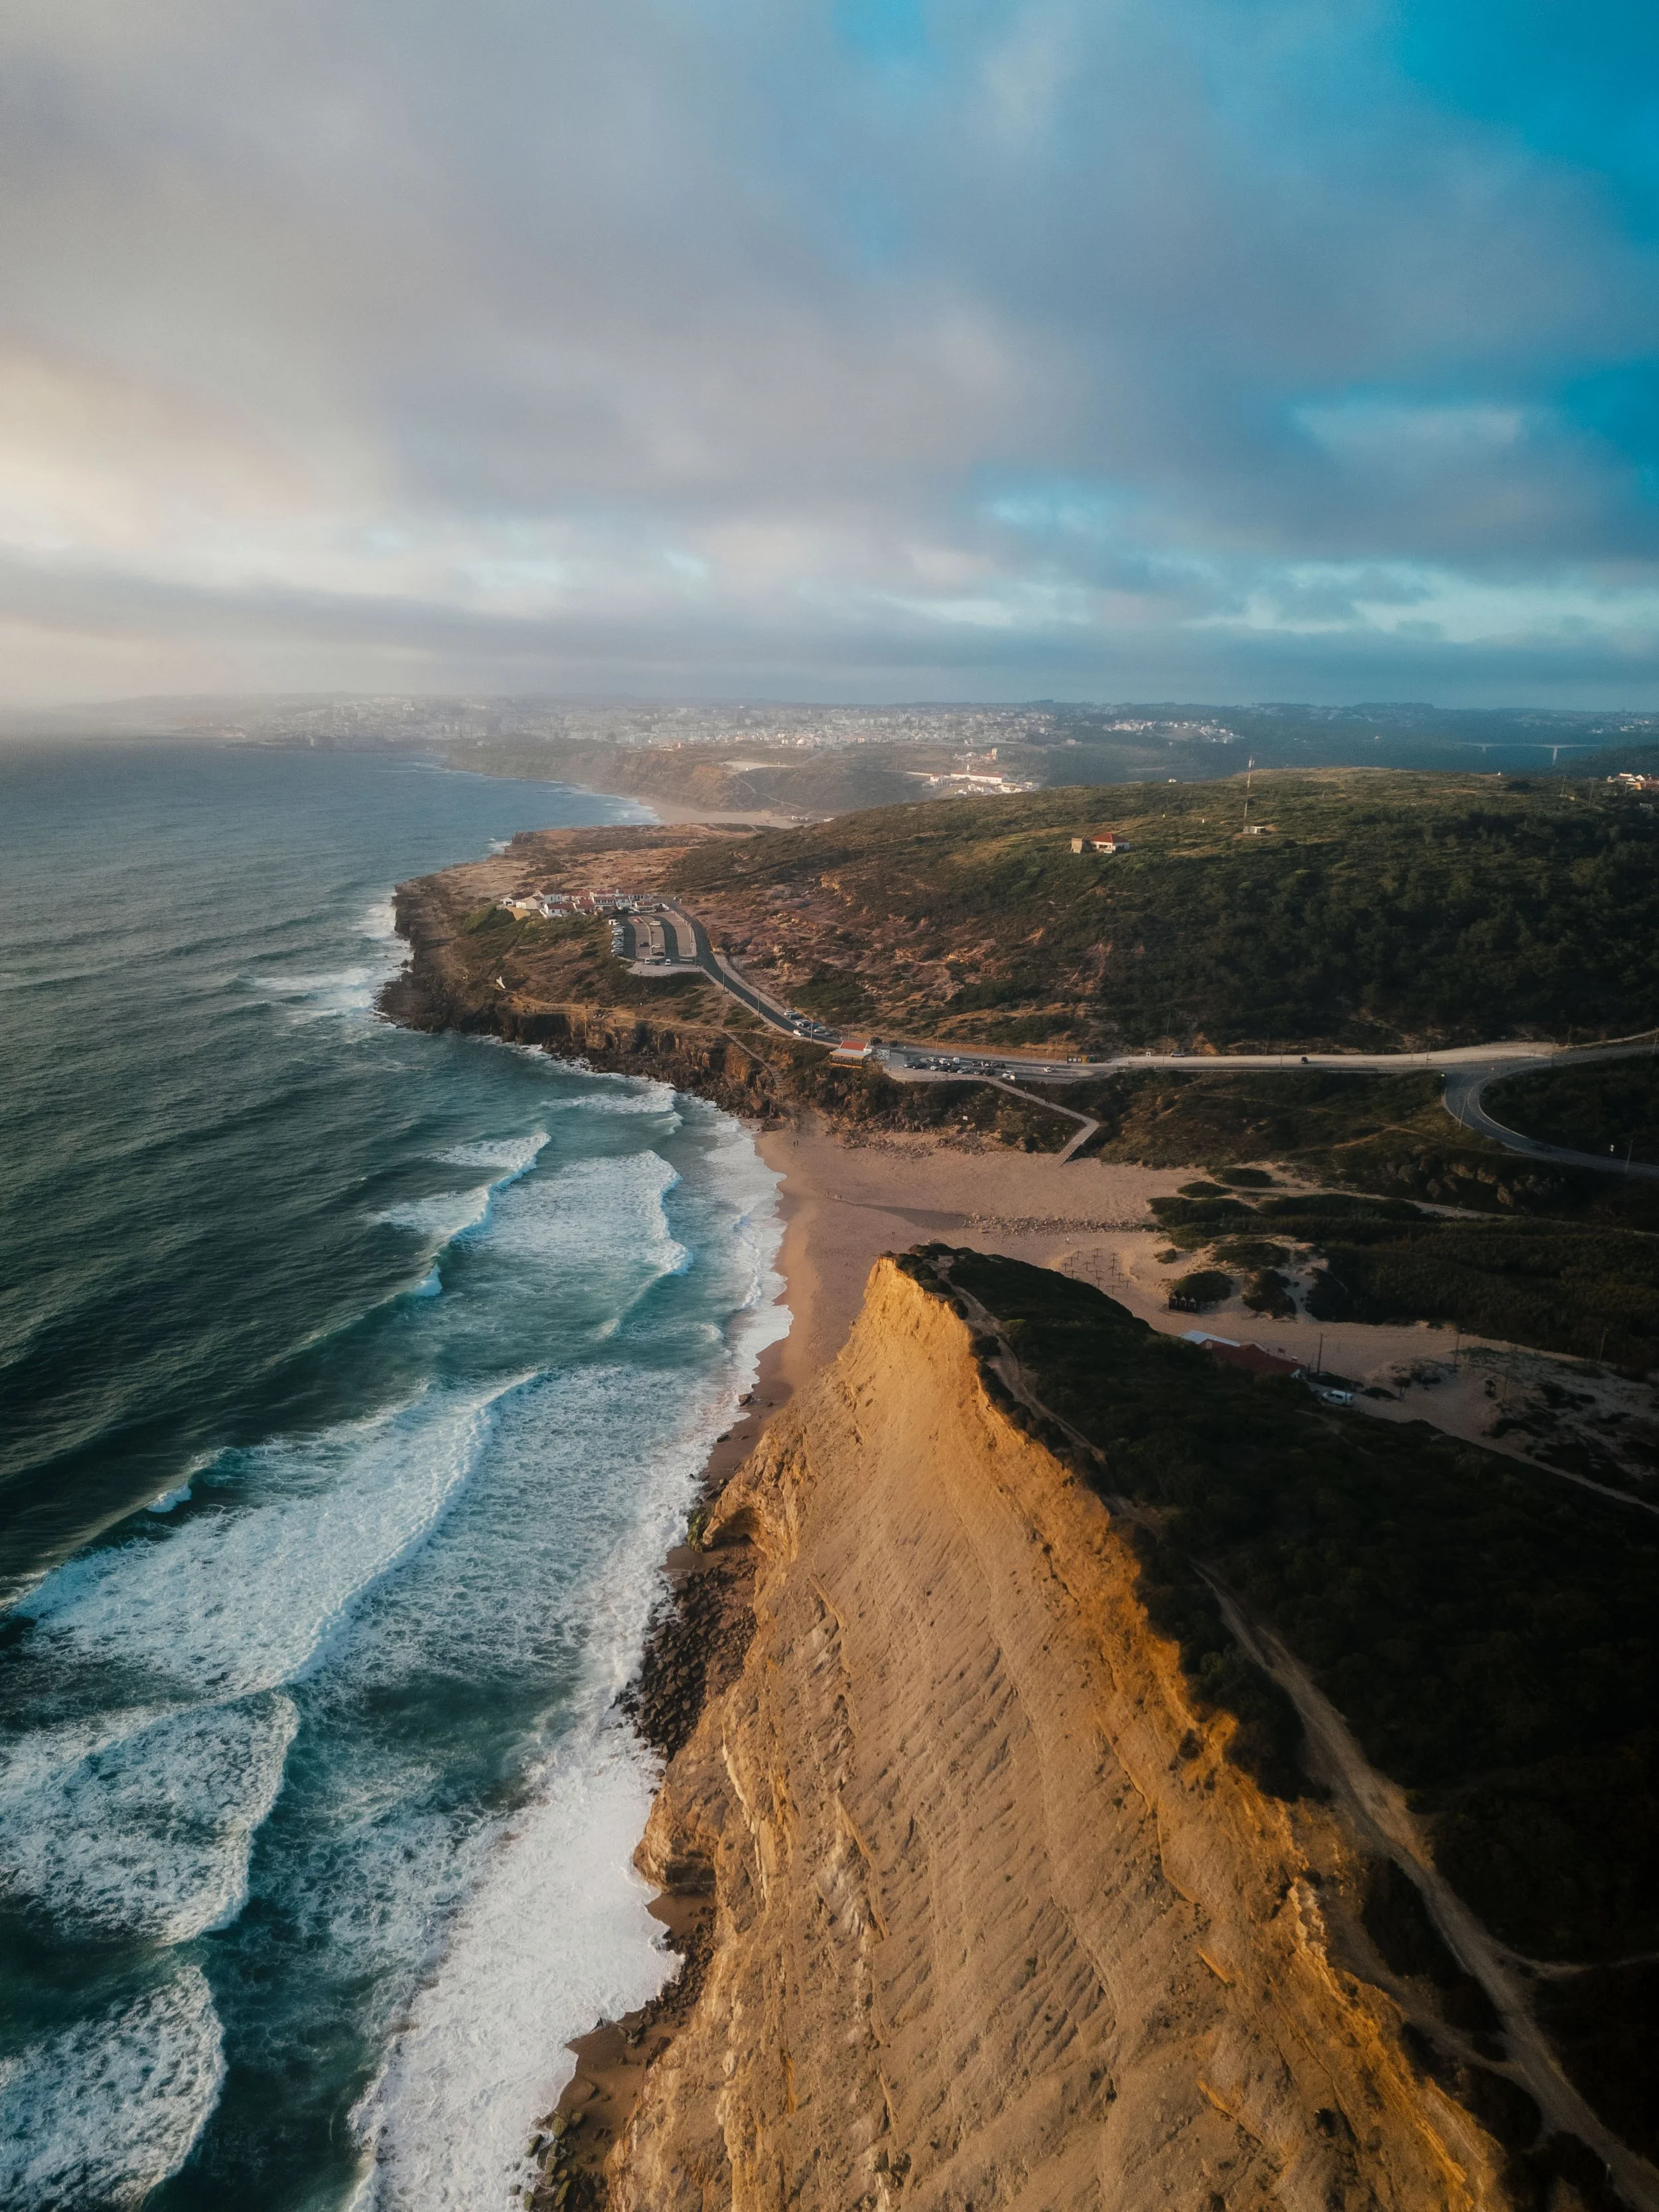
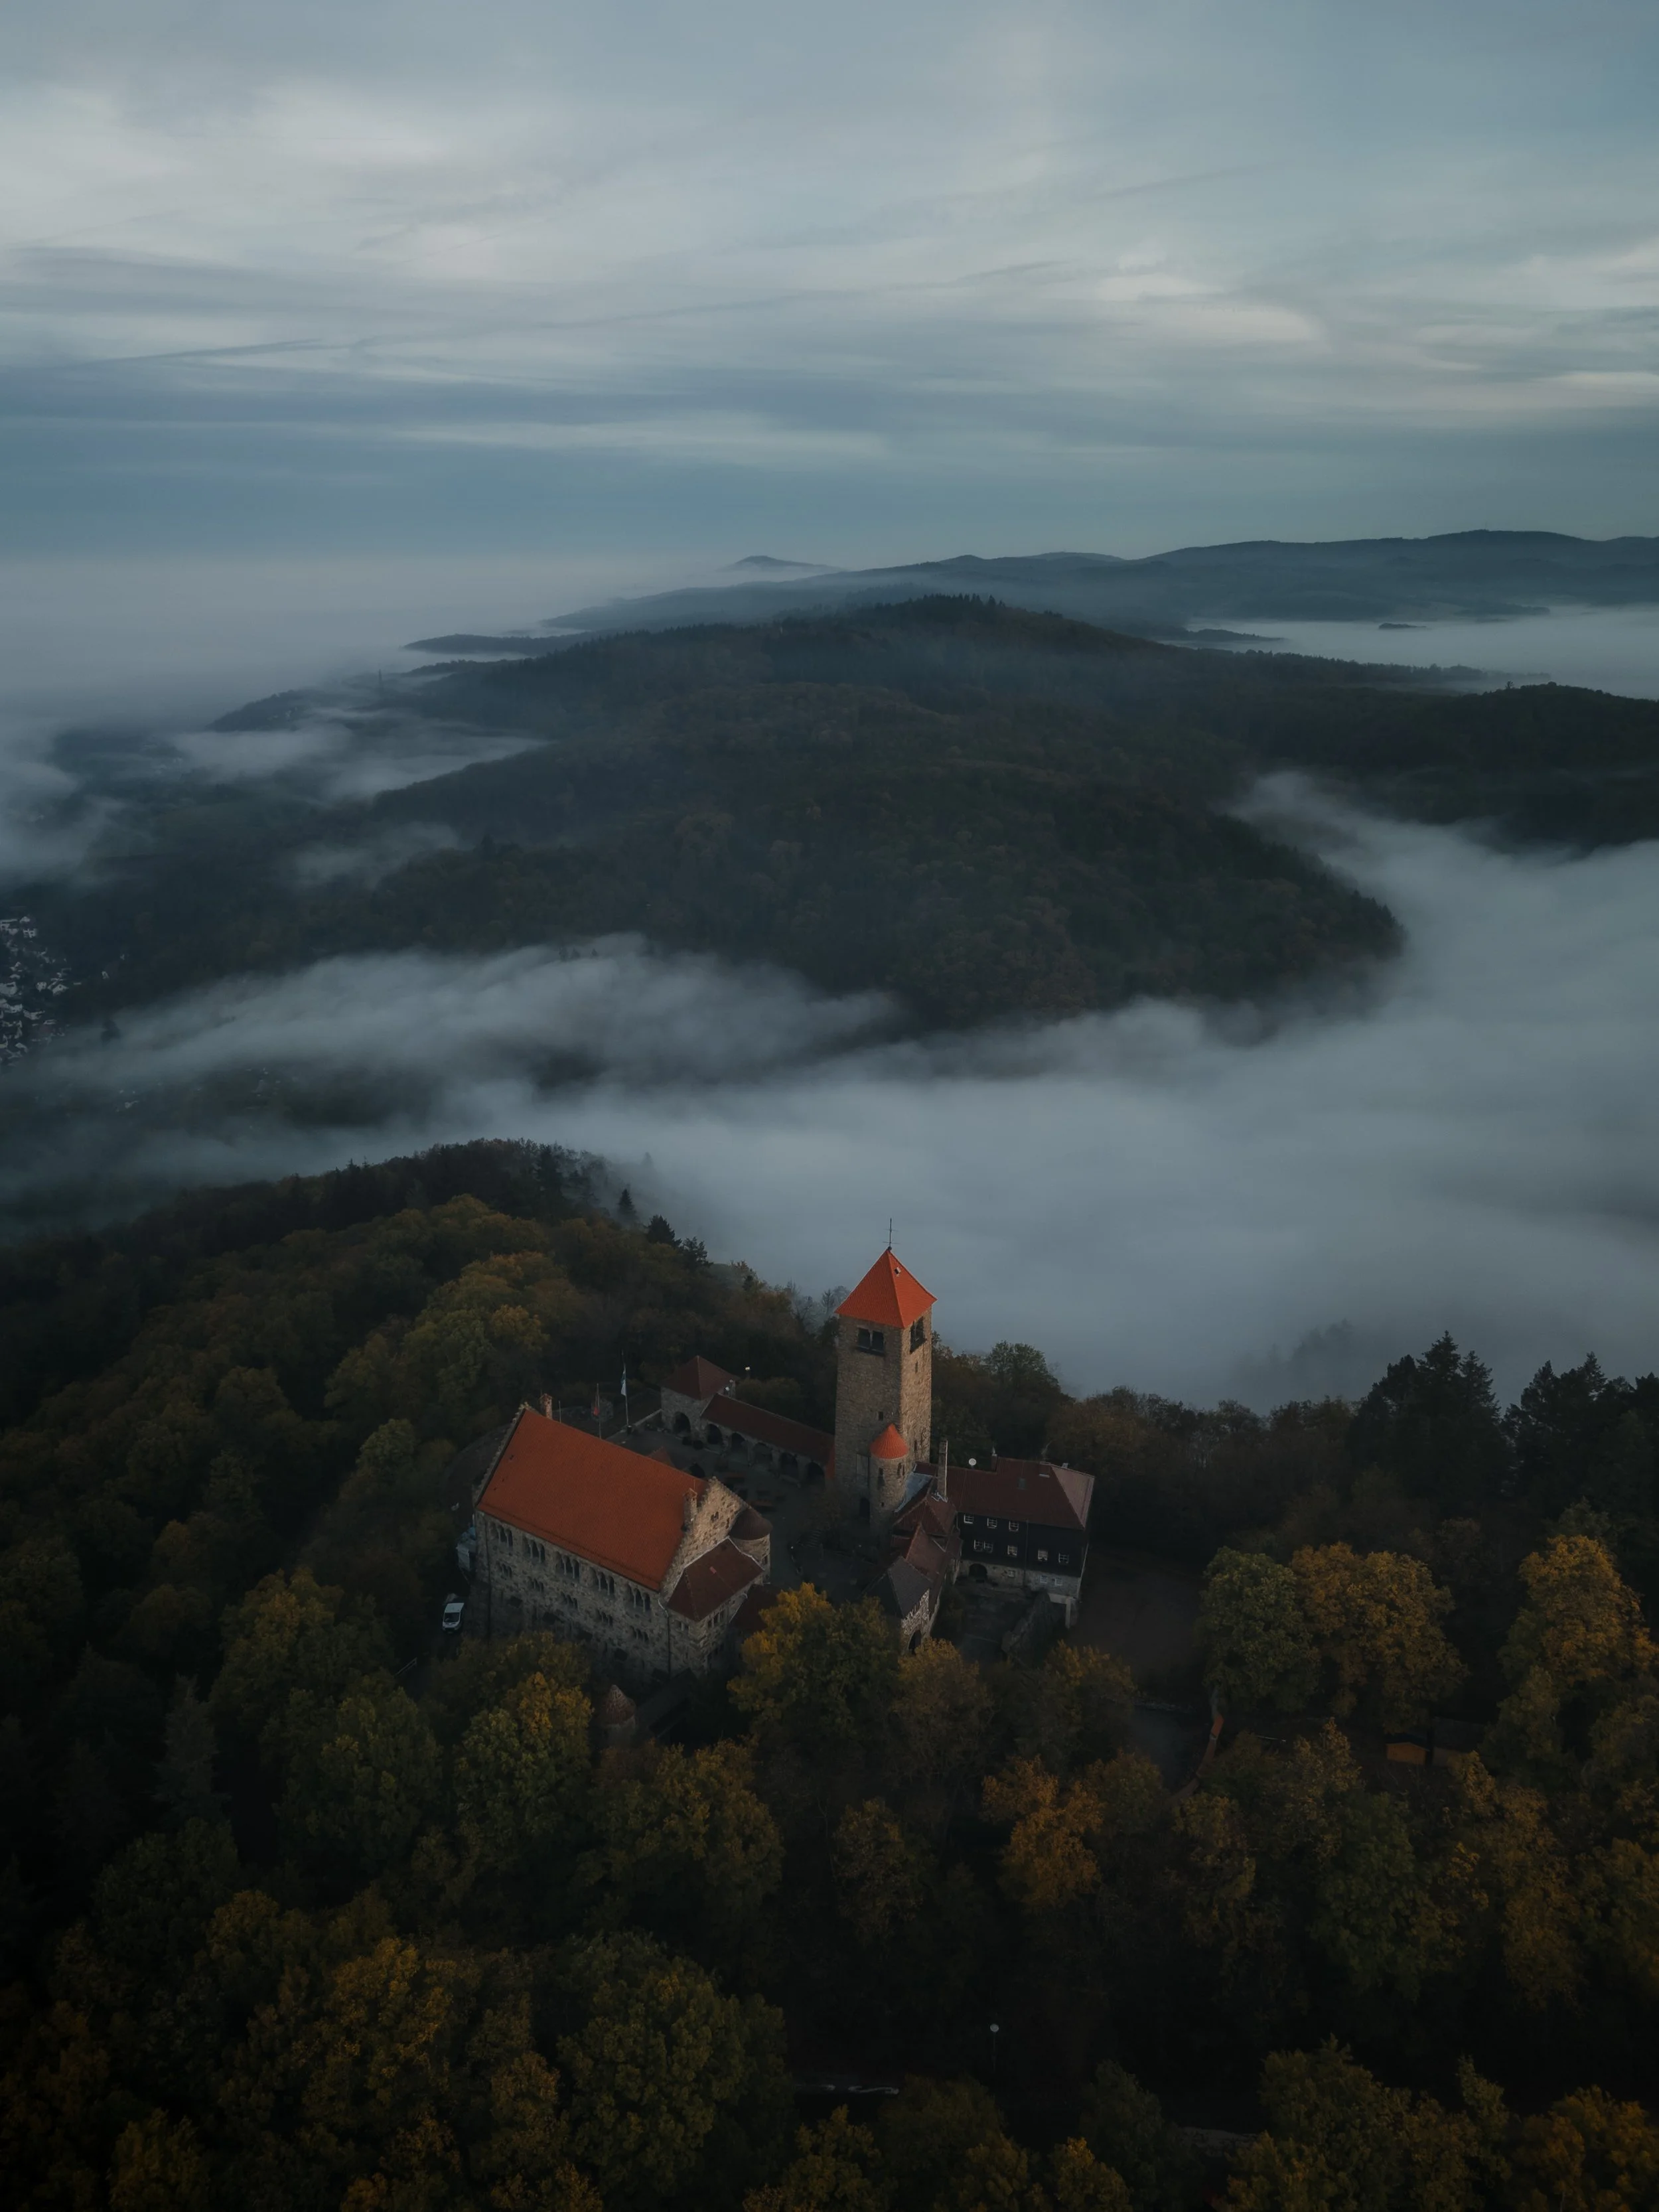
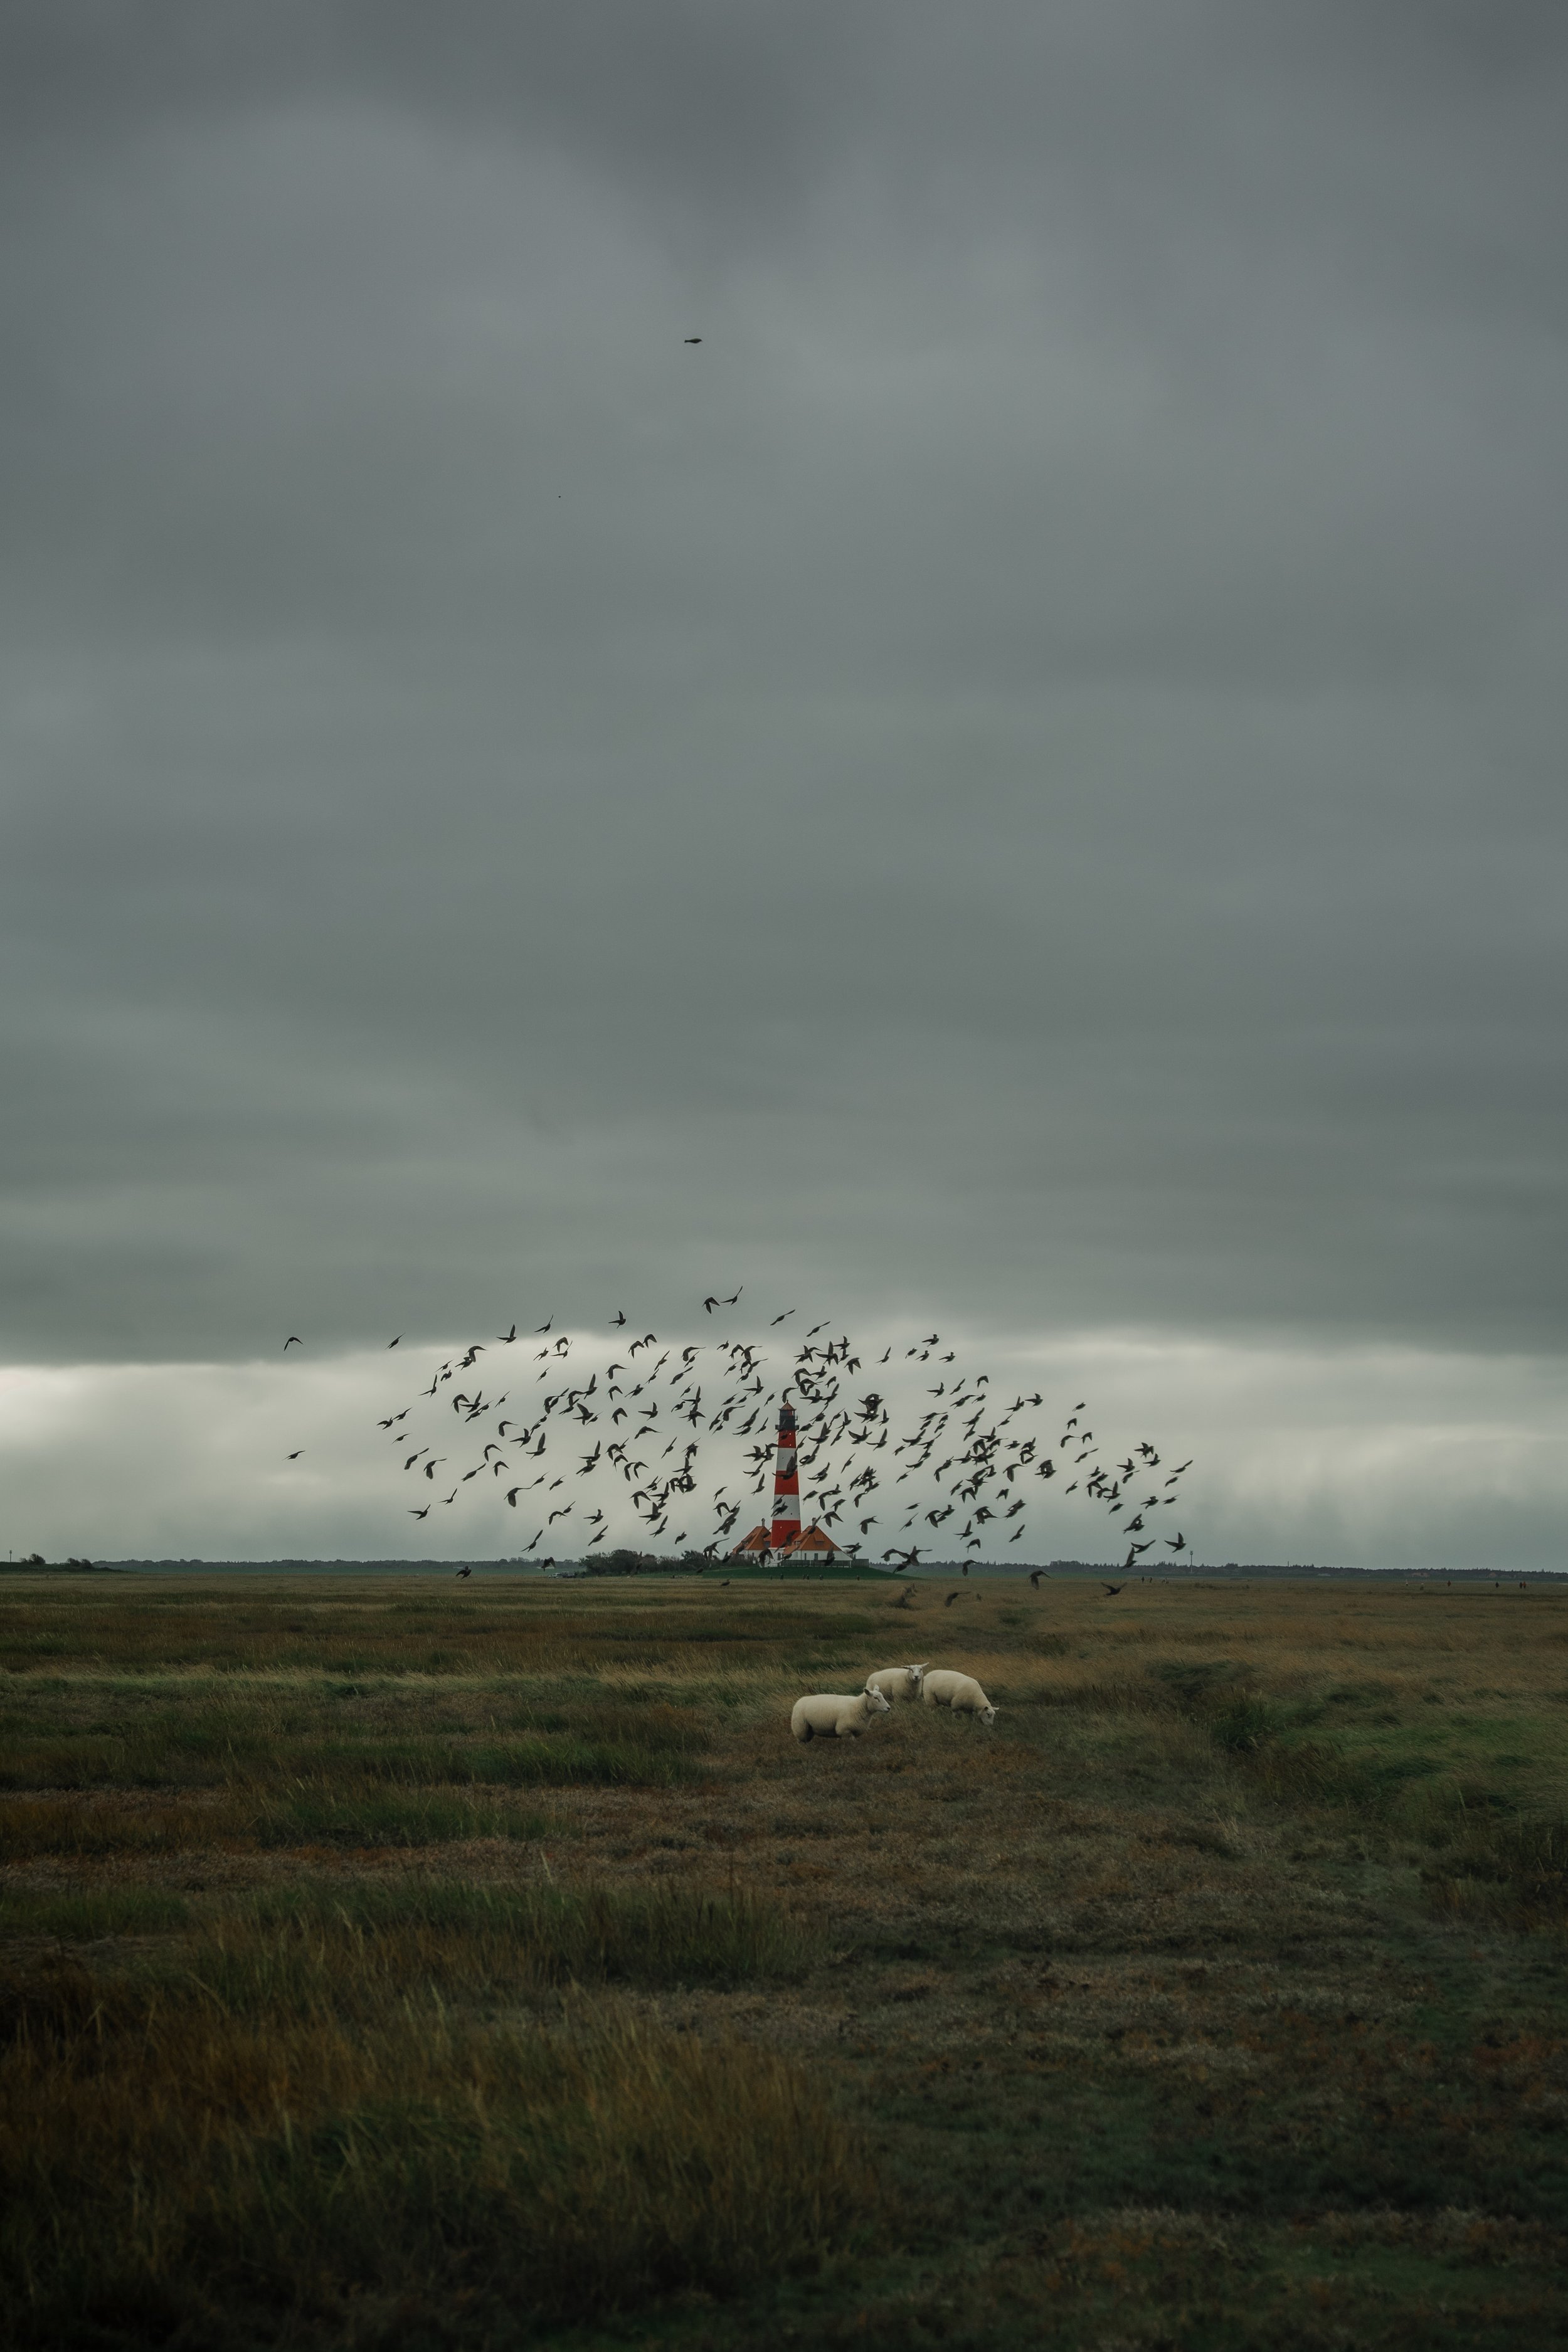
Letting the atmosphere stay dramatic
In the earlier version of this image, I focused on brightening the scene and bringing more clarity to the sky and the coastline. The ocean, the cliffs, and the distant landscape became more evenly visible.
While this made the image feel open and bright, it also softened some of the dramatic atmosphere created by the clouds and the changing light.
In the current version, I allowed the darker tones of the sky and the ocean to remain stronger. This gives the clouds more weight and makes the sunlight touching the cliffs stand out more clearly.
Instead of trying to balance every part of the scene, the edit now follows the natural mood of the moment — a slightly moody coastline with patches of warm light breaking through the clouds.
For me, this version feels closer to the real atmosphere of that evening.
Develop your own lightroom editing style
If you want to build your own Lightroom workflow step by step — not based on presets, but on a conscious understanding of light, color and atmosphere — you might enjoy my course.
In the course I explain how photographers can develop their own editing style and create a consistent visual look over time.
At first, starting a Lightroom edit in black and white may seem counterintuitive. After all, most of us care deeply about color. Yet removing color for a moment can reveal something more important: the light, balance and structure that hold an image together. In this article, I explain why I still begin many edits in black and white and how this simple approach changed both my editing workflow and the way I photograph.