Lightroom Editing: Before and After: Heidelberg, Germany
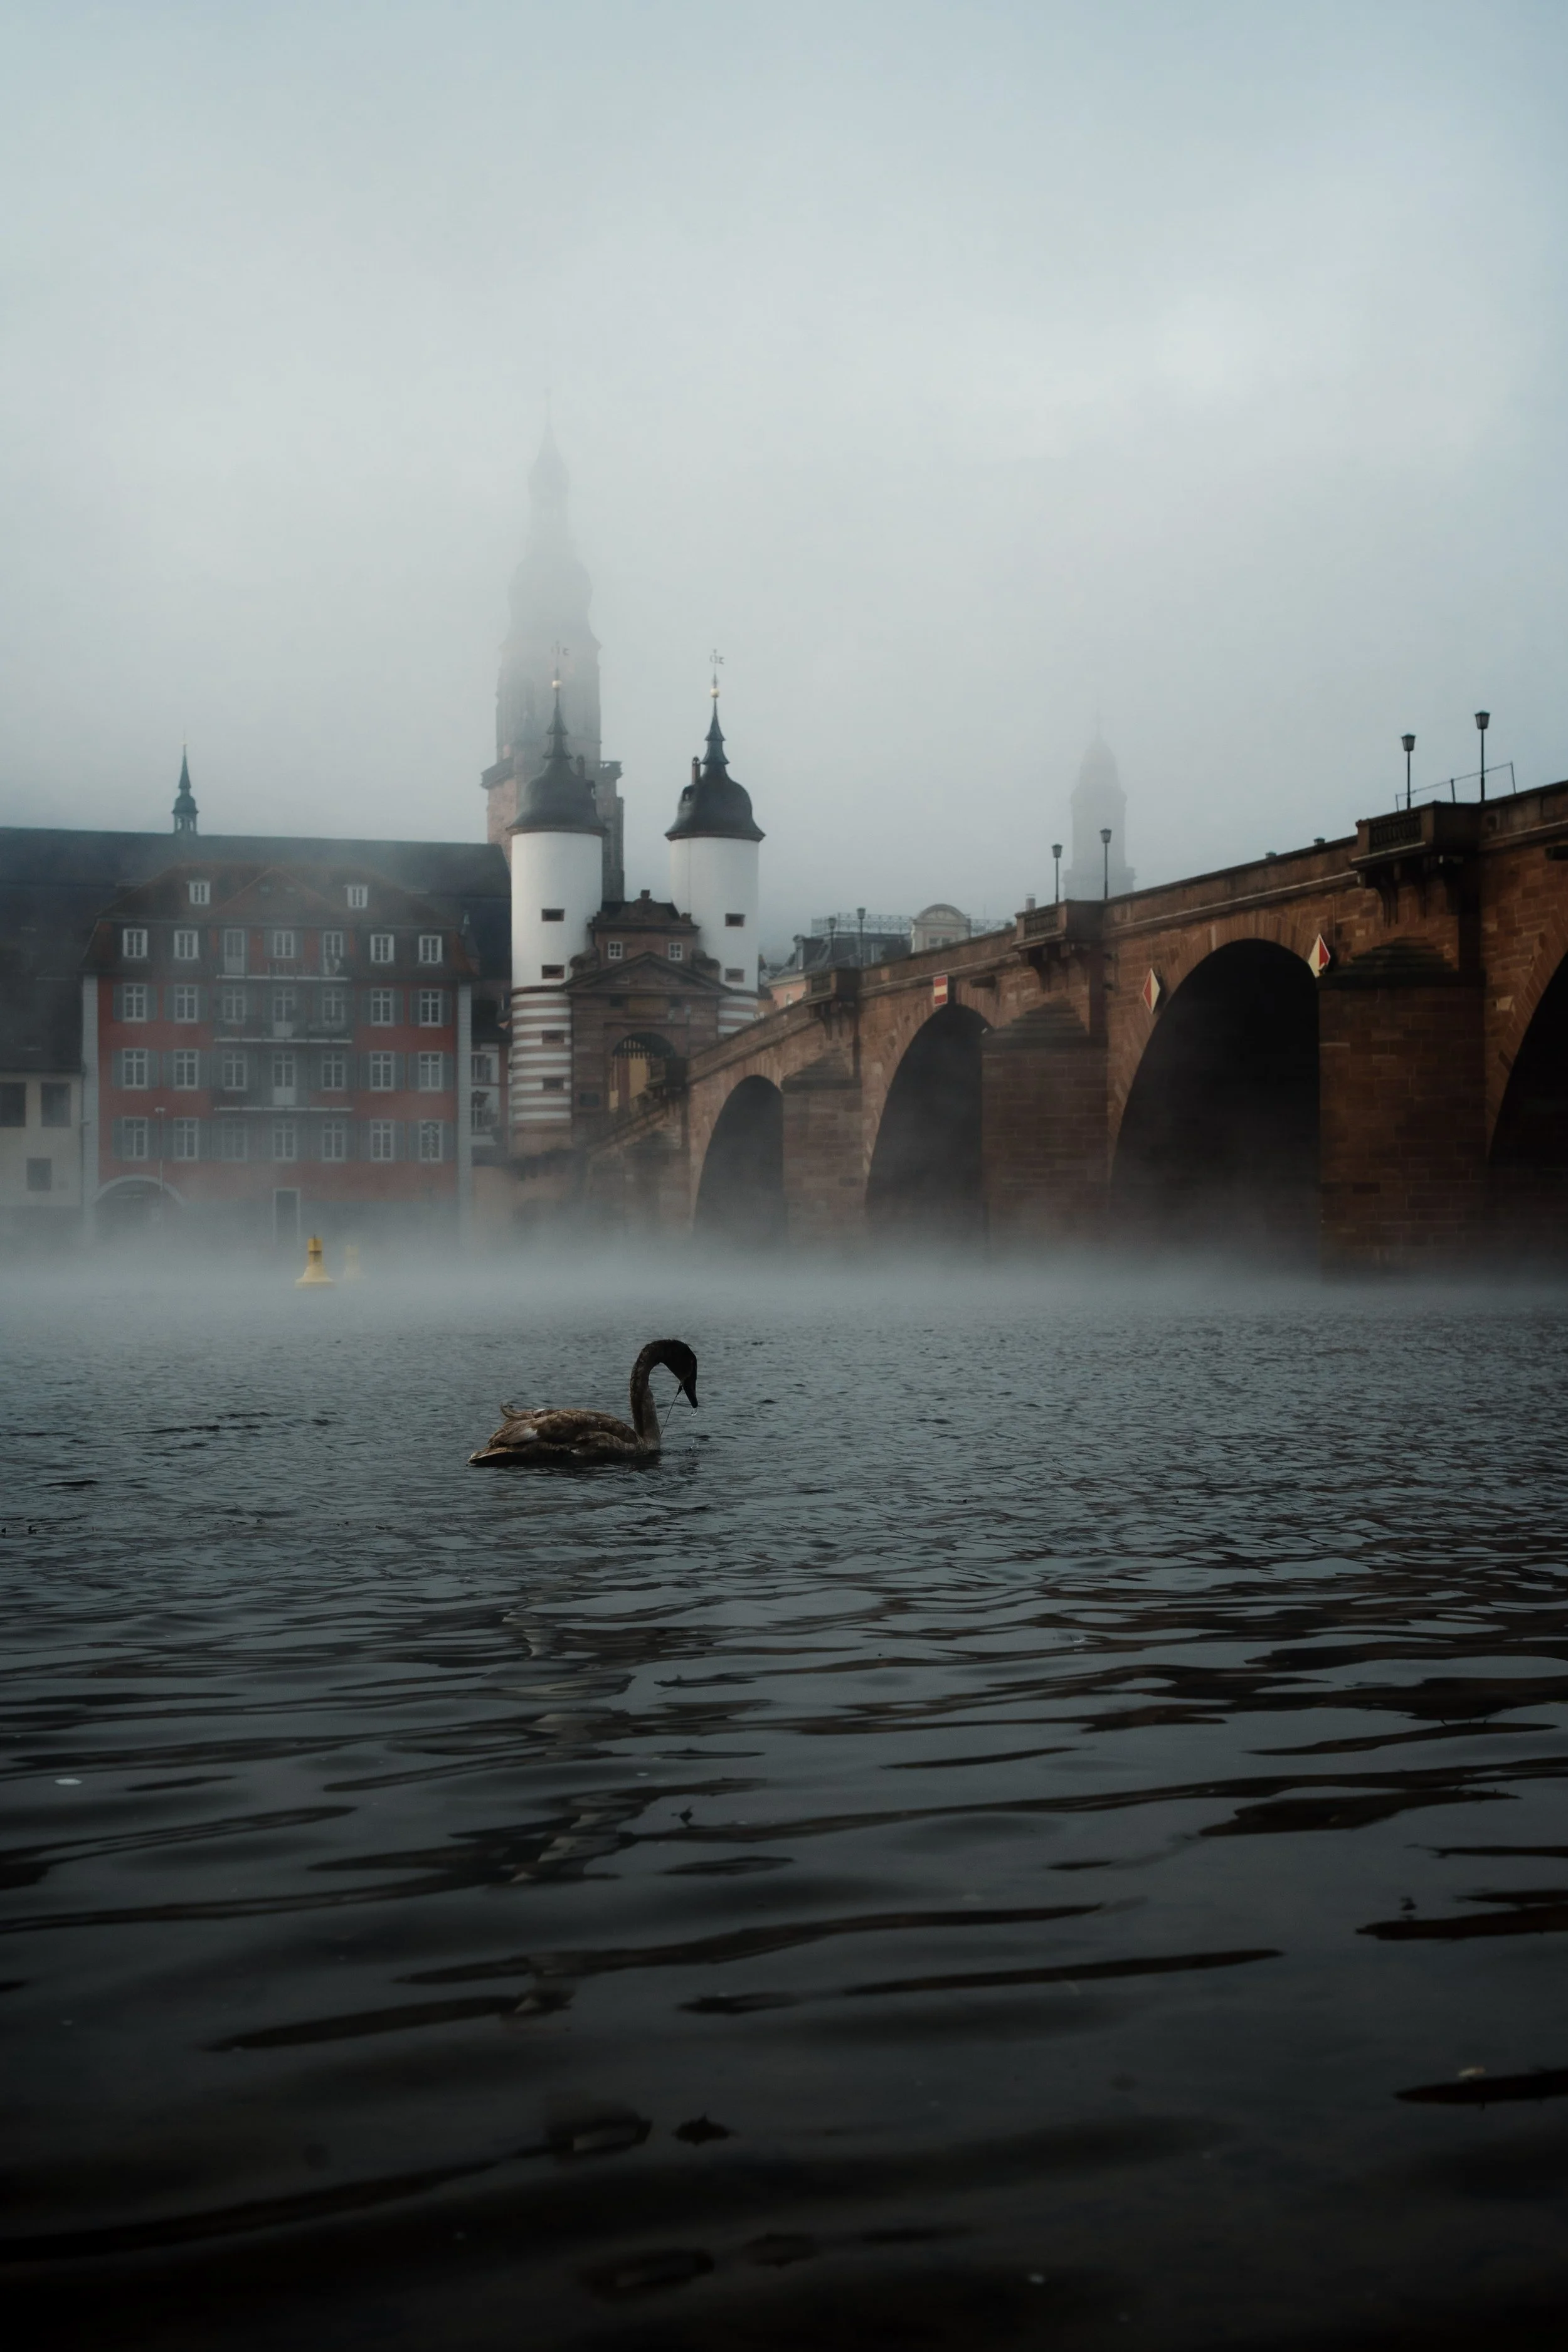
RAW Photo. Lightroom Edit is shown below at the end of the article.
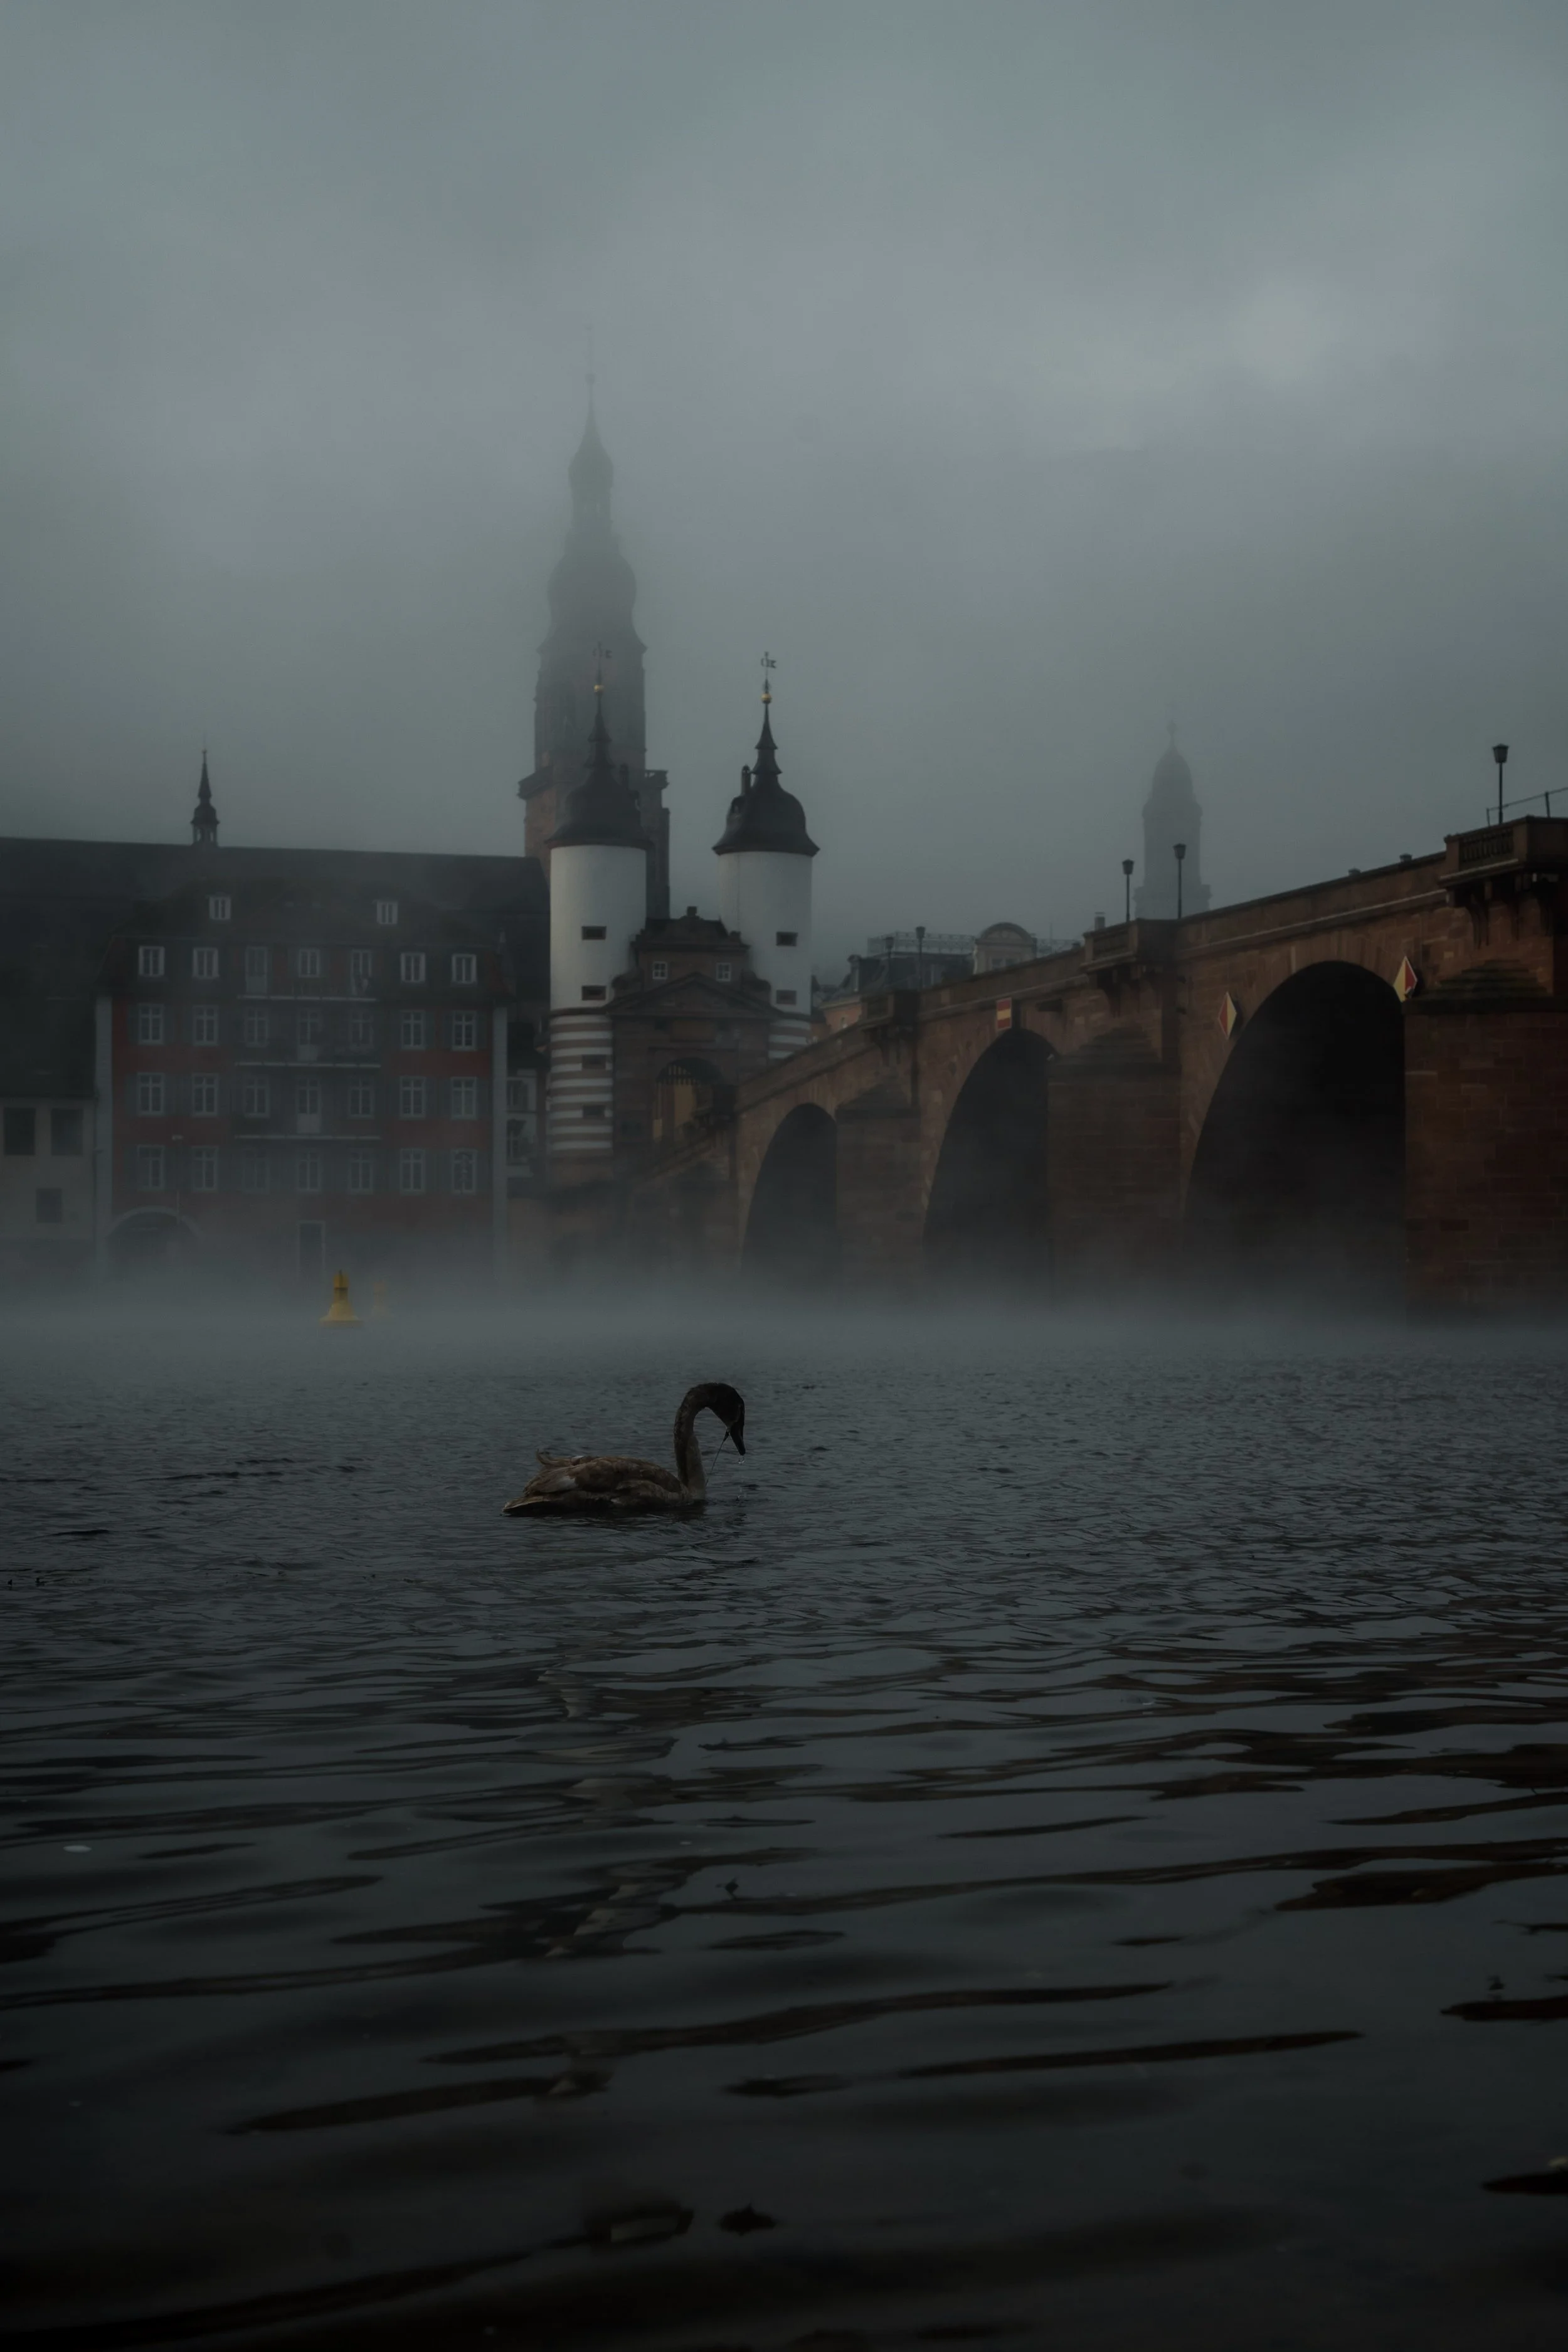
Starting point
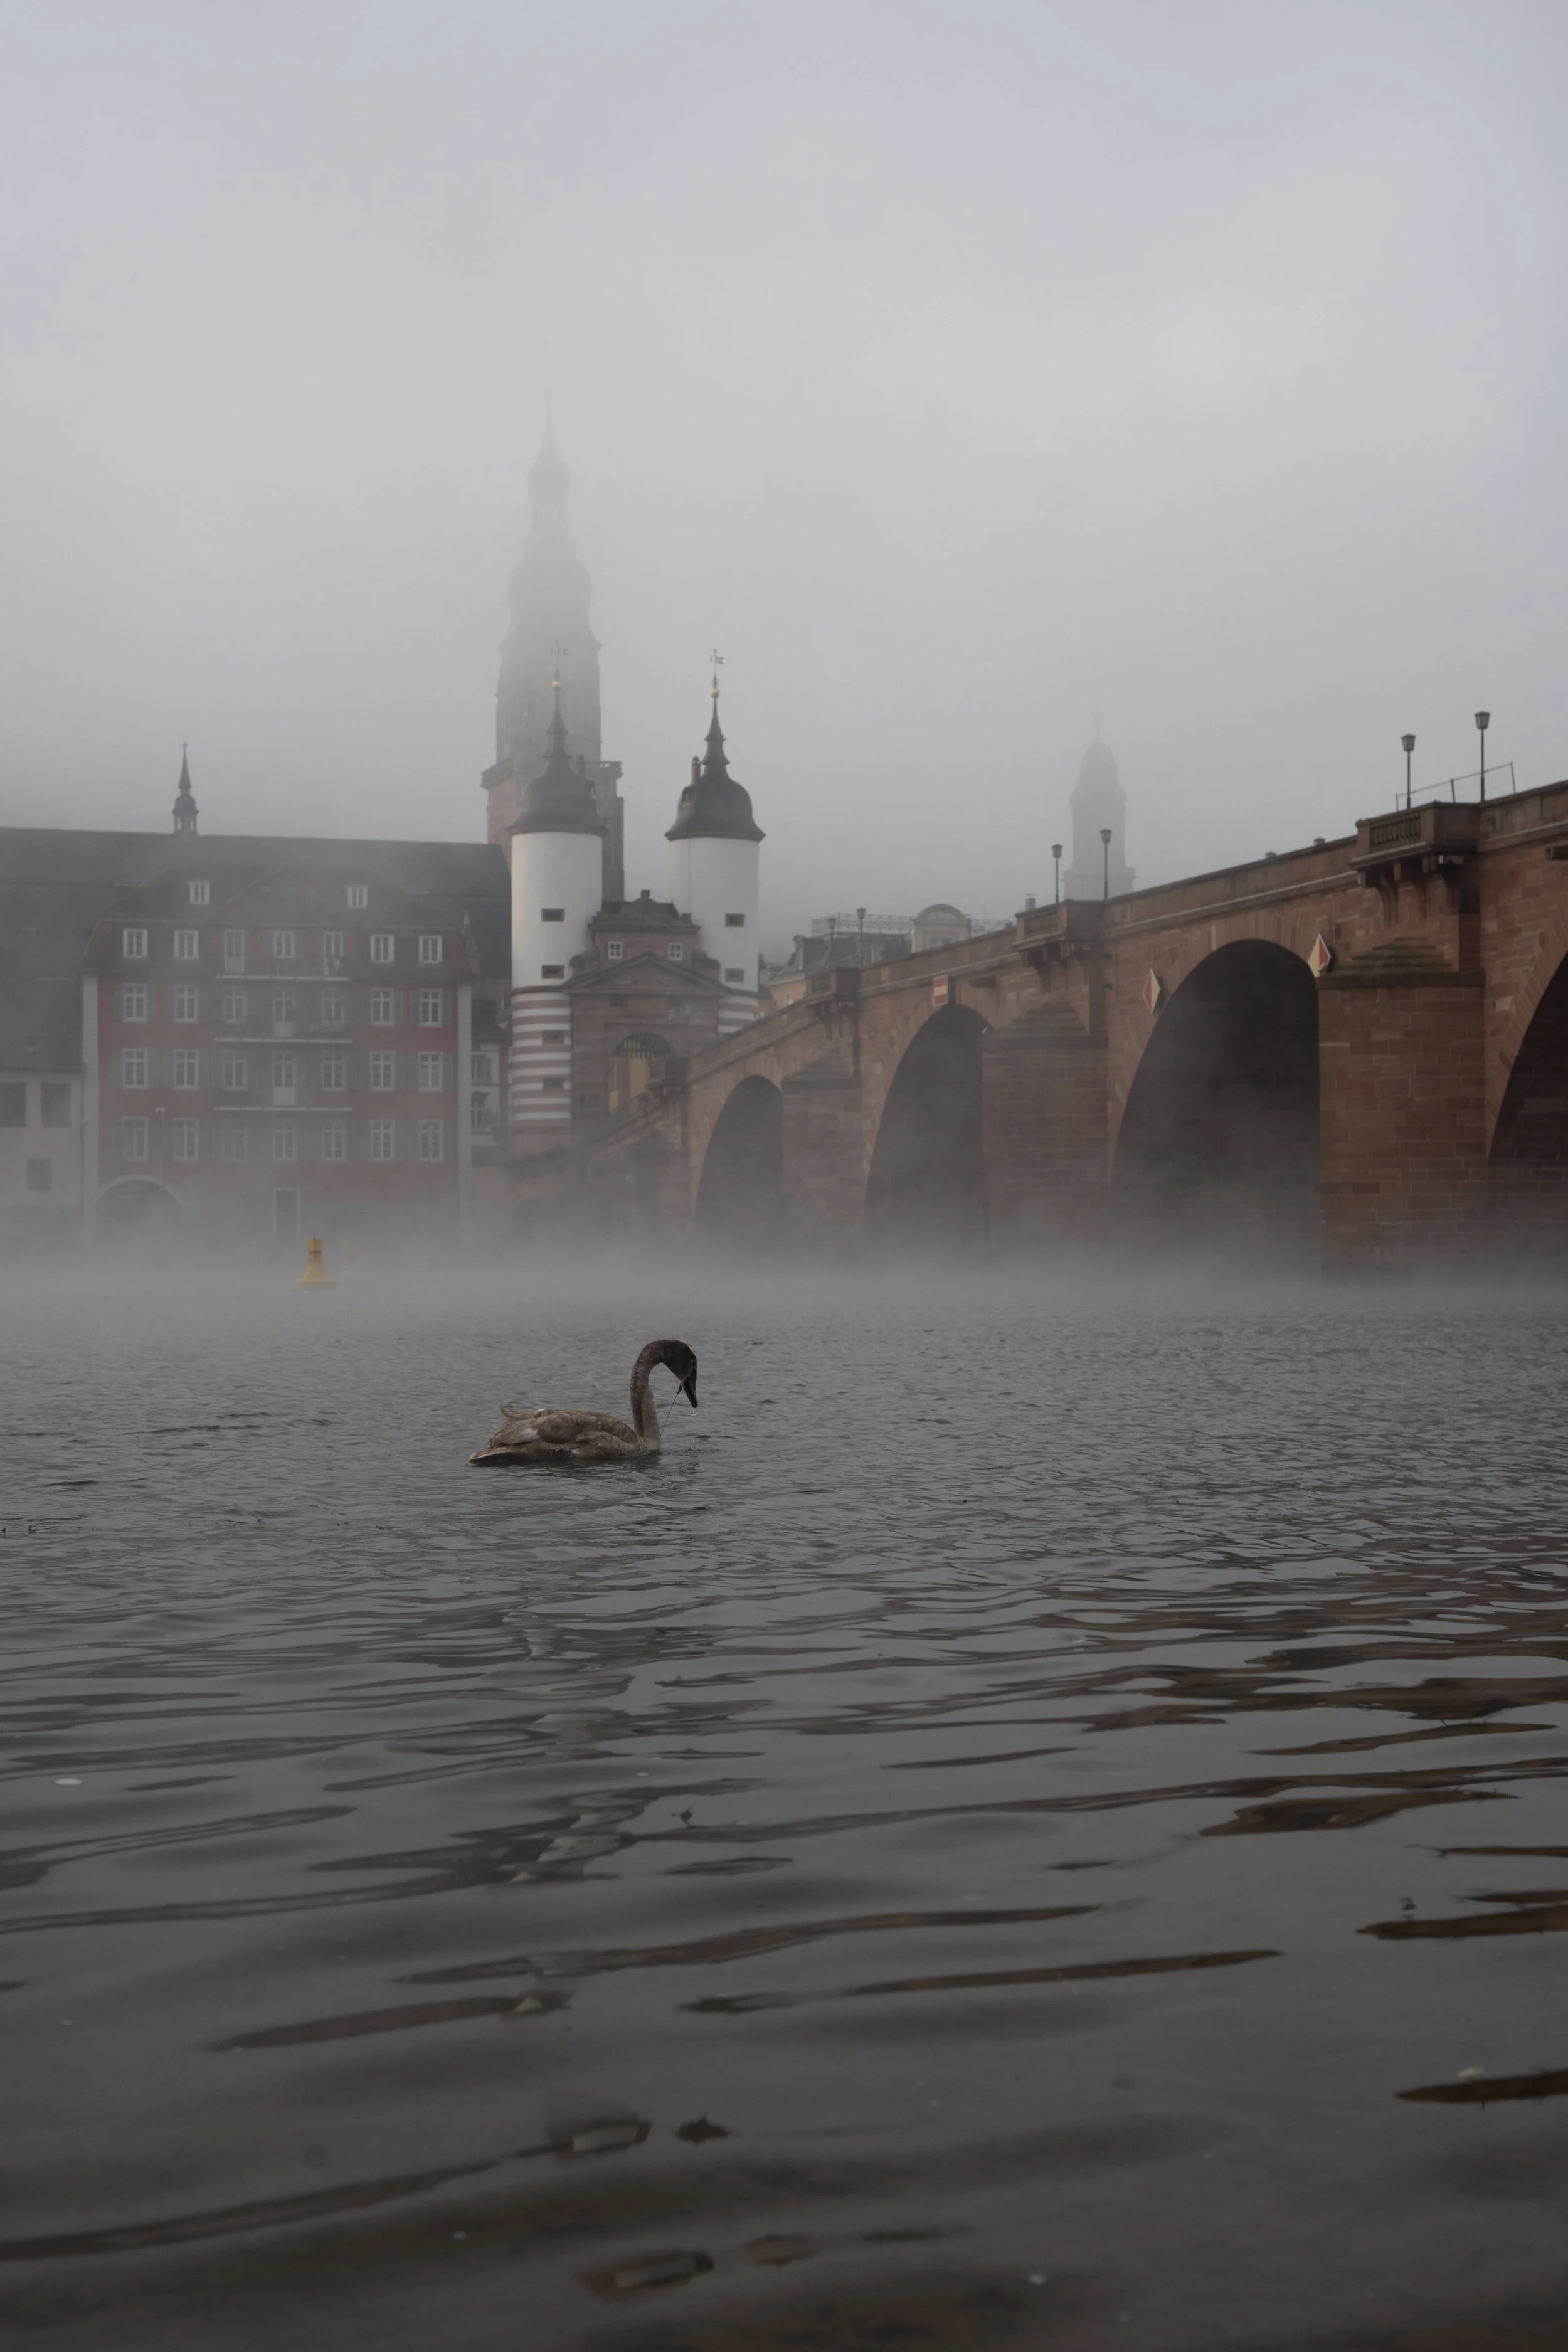
This photo was taken on a foggy morning at the Old Bridge in Heidelberg. When I arrived at the riverbank, the whole scene was wrapped in mist — the castle hidden, the bridge barely visible, and a lone swan drifting through the soft grey water.
The unedited image captured the atmosphere, but it lacked structure. The fog was so dense that the buildings in the background dissolved into a flat mass. The water had no depth, and the swan almost disappeared in the shadows. My goal was to keep the softness of the mist while giving the photo more clarity, separation, and emotional weight.
Exposure and basic adjustments
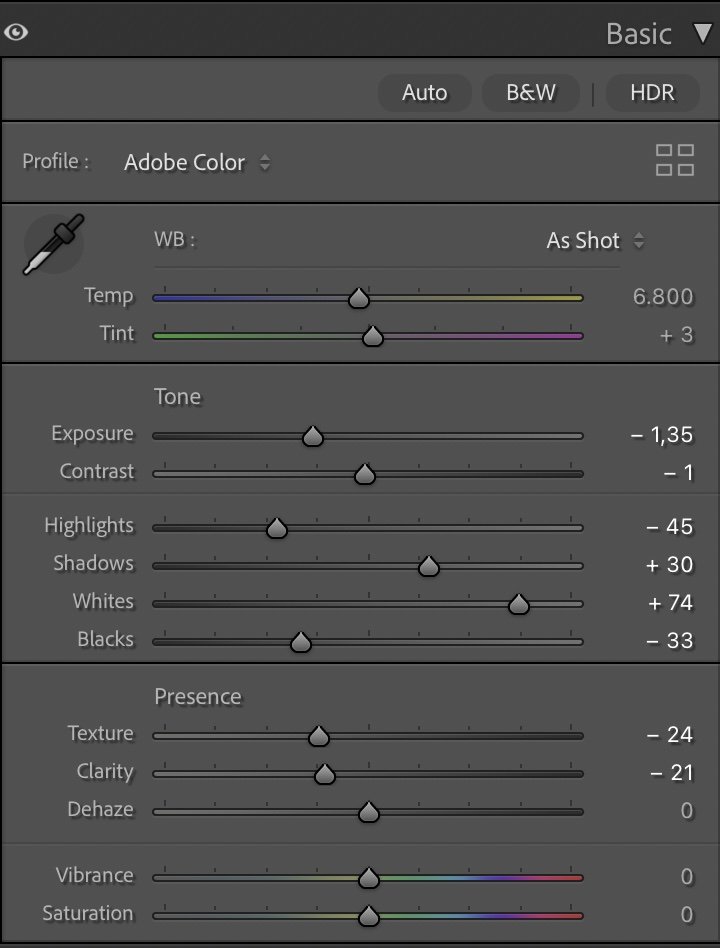
Basic Adjustments in Lightroom
The edit began with balancing the overall exposure. I slightly darkened the image (Exposure –1.35) to make the fog feel denser and more cinematic. Then I lowered the Highlights (–45) to keep the white areas of the mist under control while brightening the Shadows (+30) so that the swan and the darker water could emerge more clearly.
The Whites (+74) were lifted to bring some definition back to the fog, and the Blacks (–33) were deepened to give the river more contrast without losing its softness.
Texture (–24) and Clarity (–21) were reduced to maintain the natural smoothness of foggy conditions. Dehaze stayed at 0 to avoid destroying the atmosphere — this is one of those images where the mist is the story, not something to “fix.”
Tone curve in Lightroom
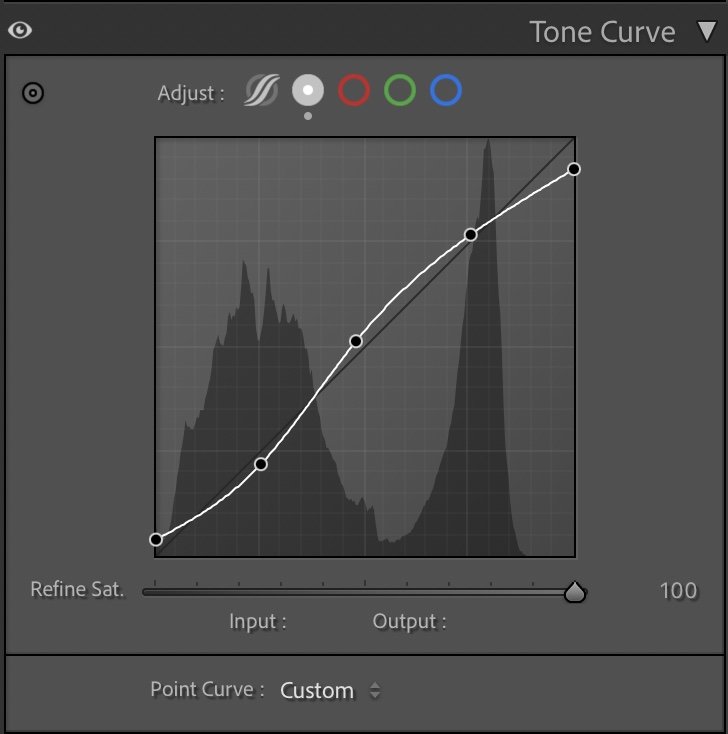
Tone curve — shaping the mood
The tone curve follows a subtle S-shape to define the depth of the photo without adding harsh contrast. The lifted midtones help the bridge and surrounding buildings emerge gently through the fog. The darker shadows give the river a deeper, smoother look, creating separation from the misty background. This small tonal shift makes the entire scene feel more intentional — as if the viewer’s eye moves naturally from the water to the bridge and then into the fog.
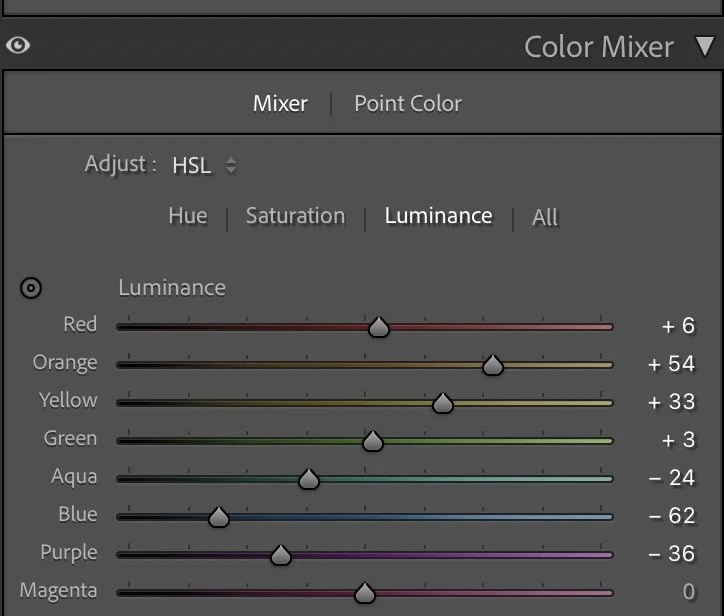
HSL Adjustments – refining colors through subtle control
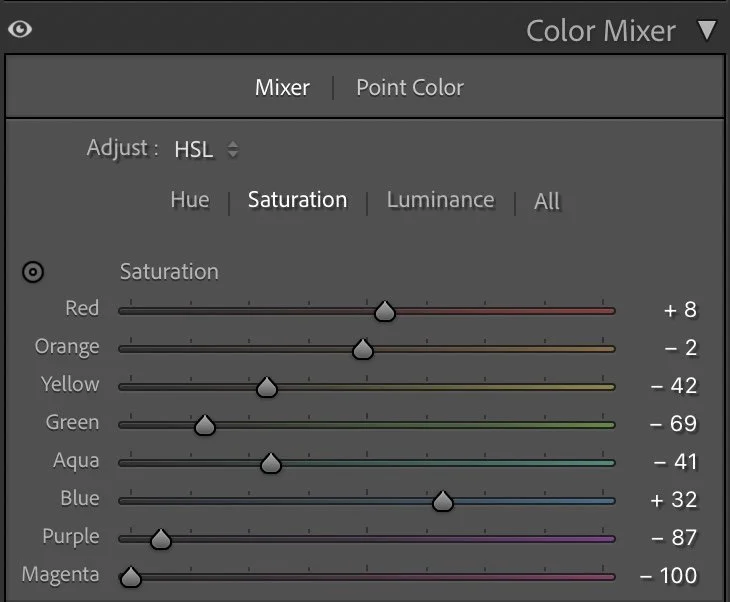
The HSL adjustments focus on fine-tuning the cool morning tones. In the Hue panel, only the Blue channel was shifted slightly (–19) to push the water toward a neutral blue-grey rather than a pure blue. Saturation was used to balance the color palette. Reds (+8) and Blues (+32) were gently increased for the architecture and water. Greens and Yellows were heavily reduced (–69 / –42) to avoid muddy tones in the trees and background. Magenta and Purple were pulled down significantly to keep the fog neutral and clean. For Luminance, the warm tones (Orange +54, Yellow +33) were lifted to give the buildings more visibility, while Blue (–62) and Purple (–36) were darkened so that the river feels deeper and more atmospheric.

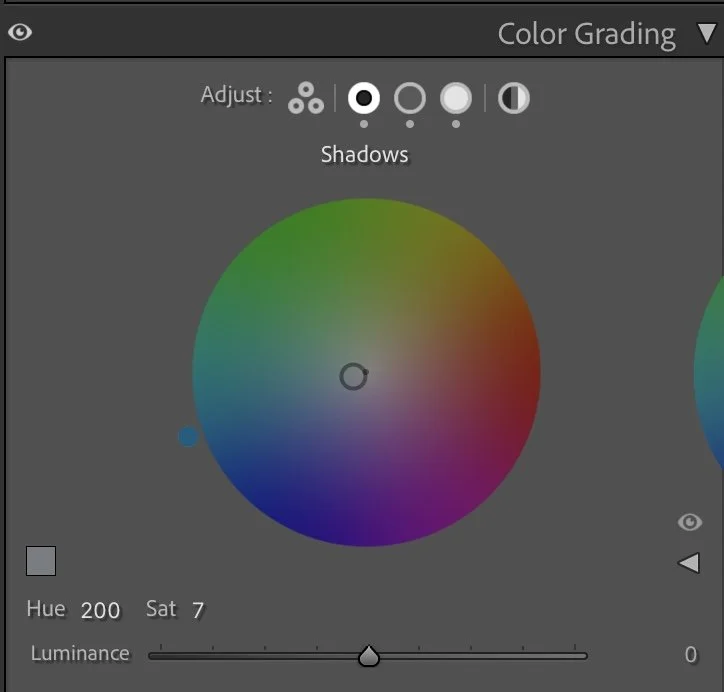
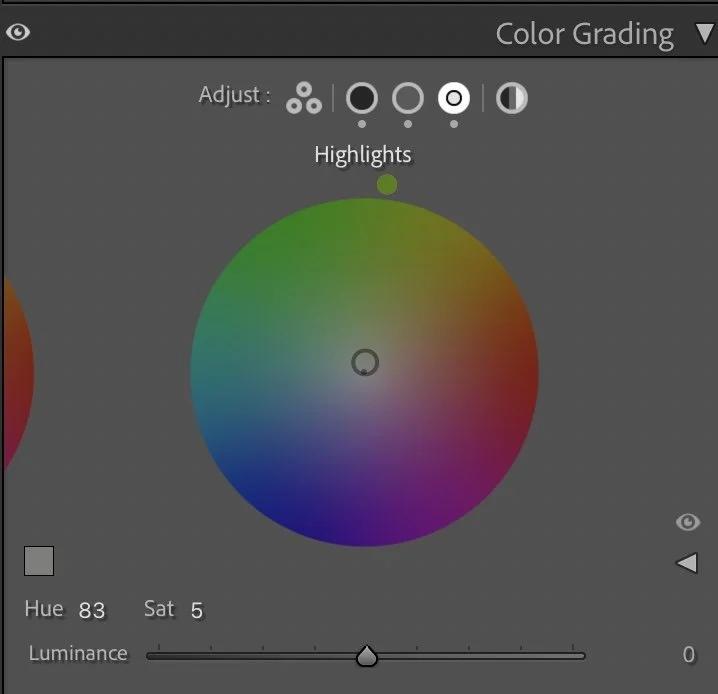
Color Grading – balancing cold and warm light
Color grading gives the final emotional character to the image.
The Shadows (Hue 200 / Sat 7) were given a cool blue tone to reinforce the cold morning feeling on the water. The Midtones (Hue 196 / Sat 9) carry a similar hue, creating a consistent cool atmosphere across the river and the lower half of the scene. The Highlights (Hue 83 / Sat 5), however, received a soft warm tint. This adds a gentle contrast to the mist and suggests the first hint of sunlight behind the clouds. This combination creates a balanced, cinematic mood: cool water, warm fog, and a calm transition between the two.

Final thoughts
This edit shows how fog doesn’t need to be corrected — it needs to be shaped. By lifting certain luminance values and adding subtle color grading, the image keeps its quiet atmosphere while gaining depth and structure. The swan becomes a focal point, the bridge stands out more clearly, and the fog feels less like a blanket and more like a story.
It’s a reminder that editing foggy scenes is not about clarity, but about emotion. The softness is the strength — and the edit simply helps reveal it. Further Before and After Articles can be found here.

Emphasizing the atmosphere of the scene
When I first edited this image, my main intention was to reveal more details in the scene. I slightly lifted the darker areas and tried to make the architecture and the mist more visible. The result worked well technically, but the image felt a little brighter and less mysterious than the moment actually felt.
Looking at the photograph today, my approach is different.
In the current version I allowed the darker tones of the water and the fog to remain deeper. This creates more contrast between the swan in the foreground and the misty background with the bridge and the church towers. The darker tones also help to emphasize the calm and quiet atmosphere of the early morning.
Instead of pushing brightness and clarity, the focus is now more on preserving the natural mood of the scene. The fog feels denser, the water darker and the architecture slightly more distant.
For me, this version reflects how my editing style has changed over time. Rather than making every detail visible, I try to keep the atmosphere that made the moment special in the first place.
Develop your own style
If you want to build your personal Lightroom workflow step by step — not based on presets, but on a conscious and individual editing approach — take a look at my course.
In the course, I explain how photographers can develop their own editing style and gradually build a consistent visual look.
At first, starting a Lightroom edit in black and white may seem counterintuitive. After all, most of us care deeply about color. Yet removing color for a moment can reveal something more important: the light, balance and structure that hold an image together. In this article, I explain why I still begin many edits in black and white and how this simple approach changed both my editing workflow and the way I photograph.